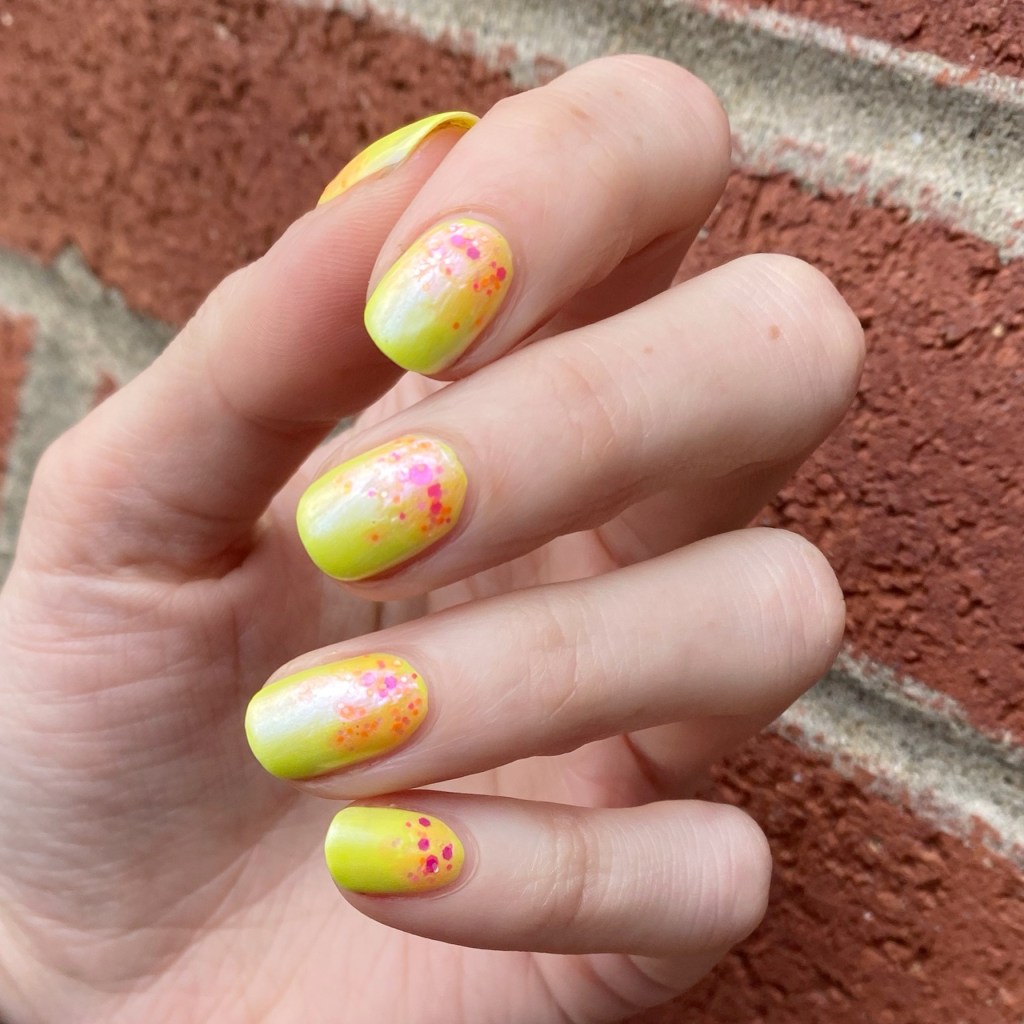
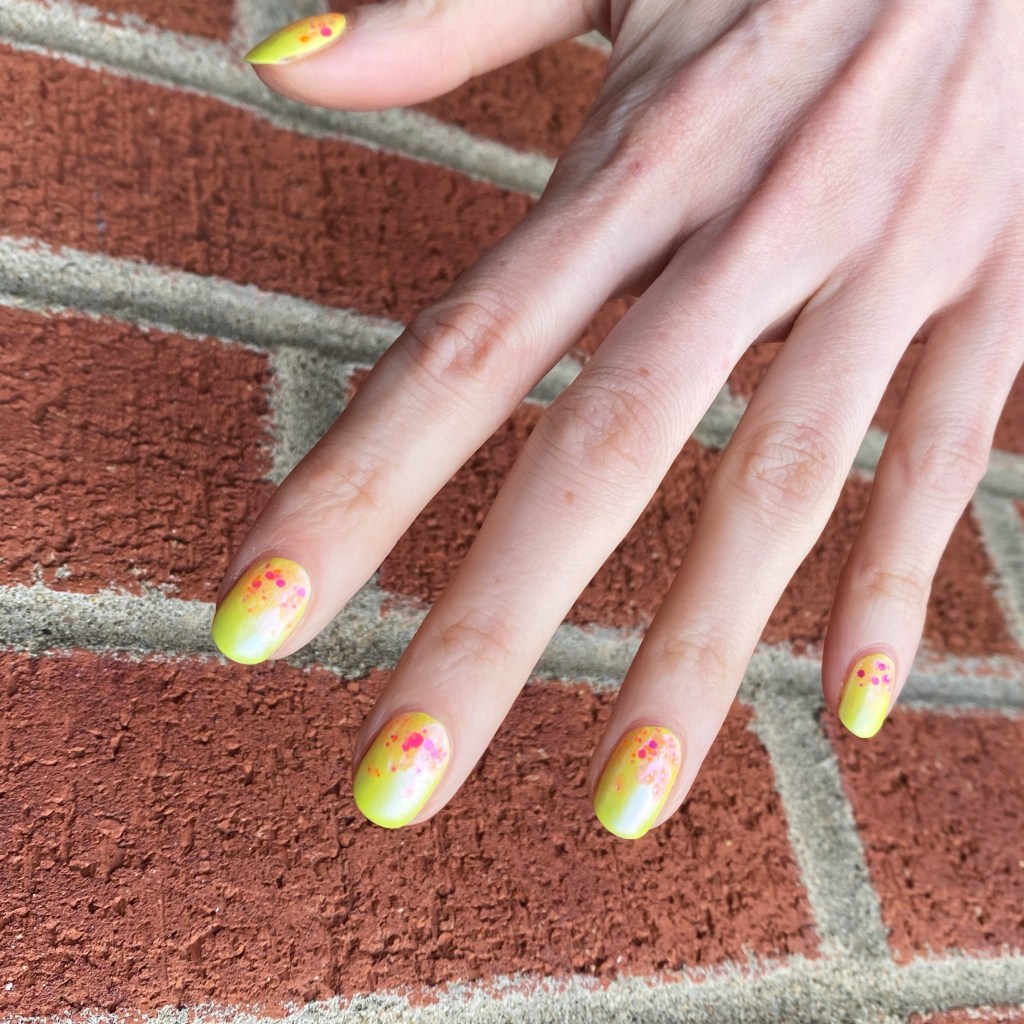
Hello lovelies & happy Tuesday! It’s going to be a very nice warm Spring-y Tuesday, so I feel like today’s manicure is perfect for warmer days!
I was feeling something bright, neon & poppy — & this manicure is all of those things!
The polishes I used for this manicure are:
Base Coat: China Glaze Calcium Gel Fortifer
Top Coat: LA Girl Rapid Dry Top Coat
Ardene Bright Lights, Big City
Essie Expressie FX Iced Out
China Glaze Let The Beat Drop
These feel really fun. I like the pink/orange glitter over the bright neon yellow— which is not a colour I wear frequently—& the little shimmer from Iced Out.
How much fun are these?! I’m so ready for consistently warmer days.
What do you think of my neon glitter gradient? Is it giving off Summer vibes? Let me know all your thoughts in the comments below!
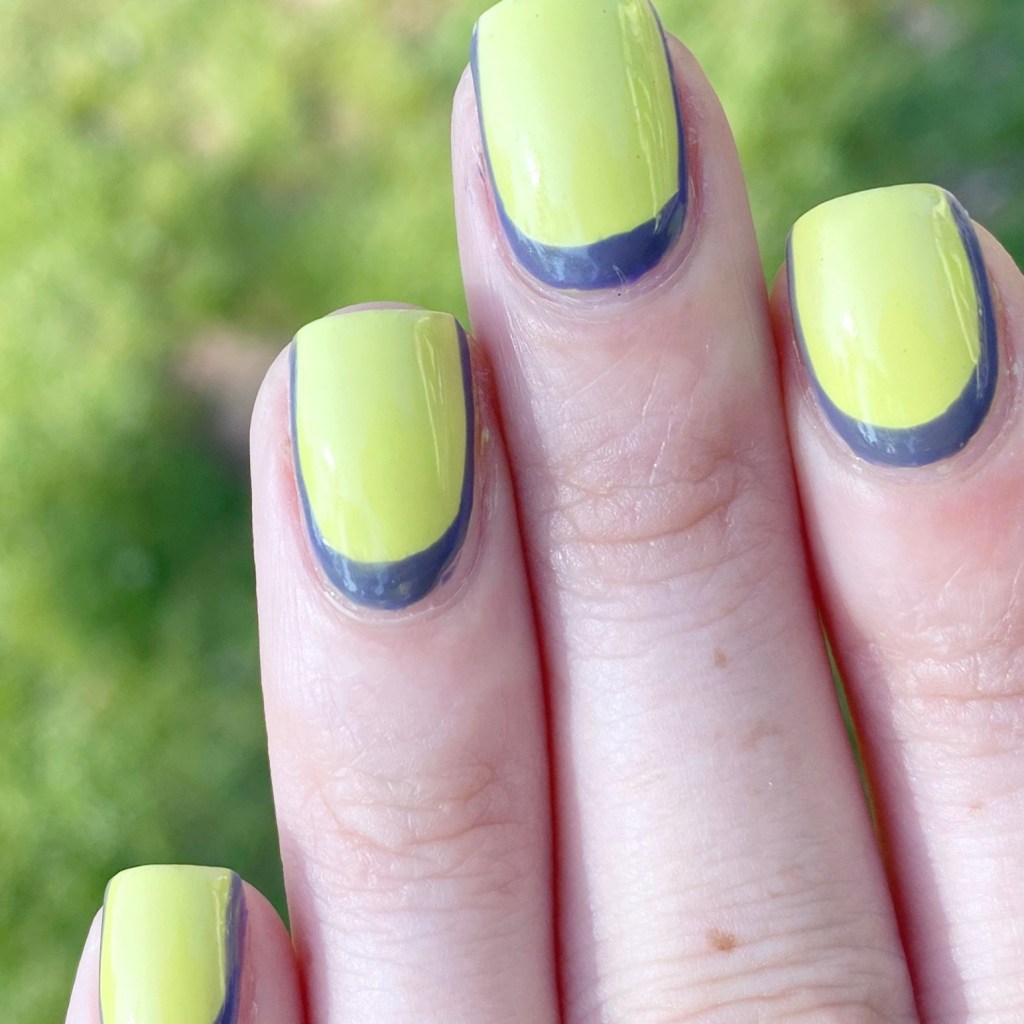
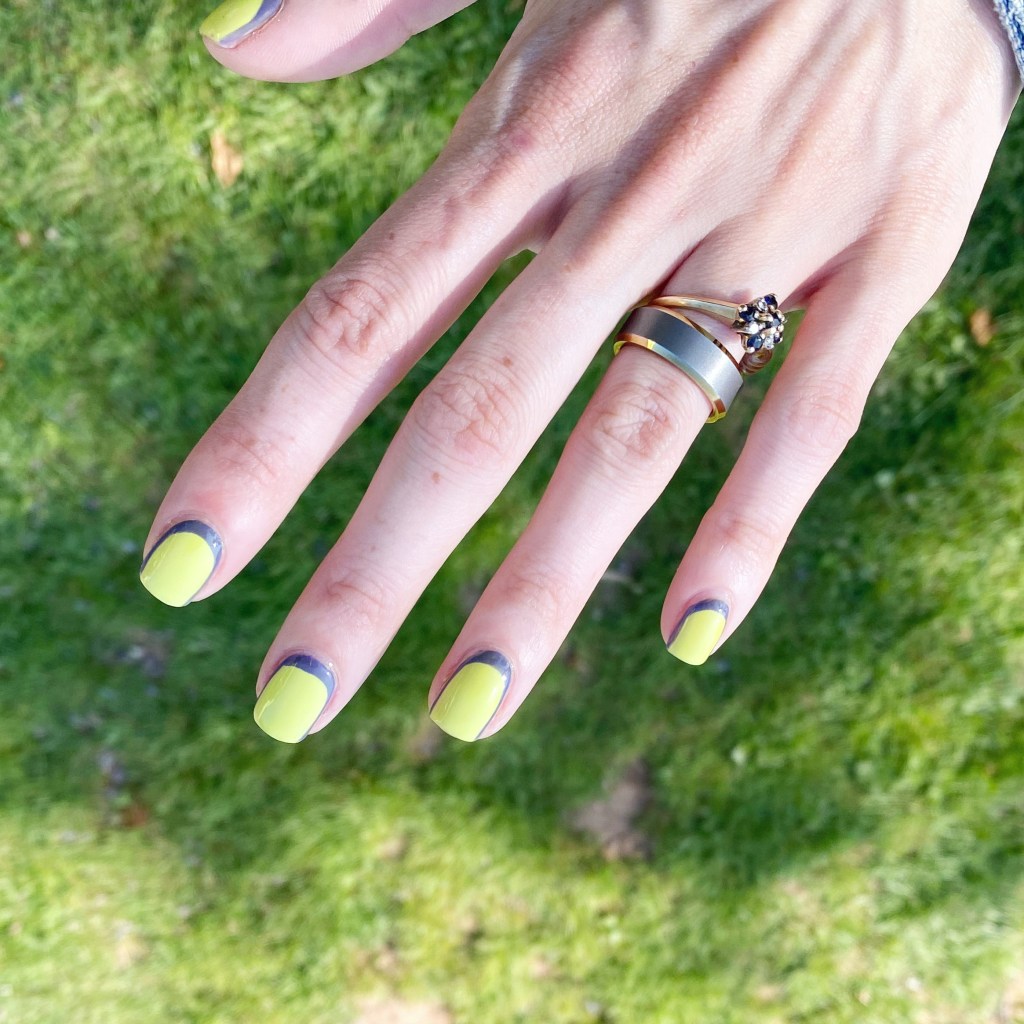
Hello lovelies & happy Wednesday! I’m back from vacation, & very refreshed from my weekend away. We had a great time, & enjoyed a ton of time visiting family. Now it’s back to the real world, & I’m excited to show off the nails I chose to wear for our vacation. I had done an Instagram questionnaire wondering what nails I should wear for my vacation, & the biggest winner was neon yellow.
So I thought I would do a fun neon yellow ruffian for my vacation nails, & I’m just obsessed with how they turned out.
The polishes I used for this manicure are:
Base Coat: Sally Hansen Miracle Gel Colour Grip Primer Base Coat
Top Coat: Sally Hansen Miracle Gel Glossy Top Coat
Sally Hansen Miracle Gel 90s Toadally Buggin’ •pr/gifted•
Color Club Art Club Striper Passion Flower
Please excuse my dry cuticles, haha, as I took these photos after reaching our destination & hadn’t had a chance to reach for my cuticle pen. Even still, I think this look is such cute for a vacation mani! The purple of Color Club Passion Flower kind of went a bit grey against Toadally Buggin’ but that’s okay. I really like my little ruffian outlines, & this was the perfect nail art look for vacation.
Bright & colourful, which is just what I wanted!
Are you enjoying your Summer so far? I can’t believe how quickly September is approaching, & back to school. Crazy. & I can’t lie — I have definitely felt myself grabbing a few darker polishes lately without really thinking. I think the Autumn vibes are starting to seep in!
But I promise… I won’t go full Pumpkin Spice quite yet. I’ll still slip in a few Summery shades & manicures before then!
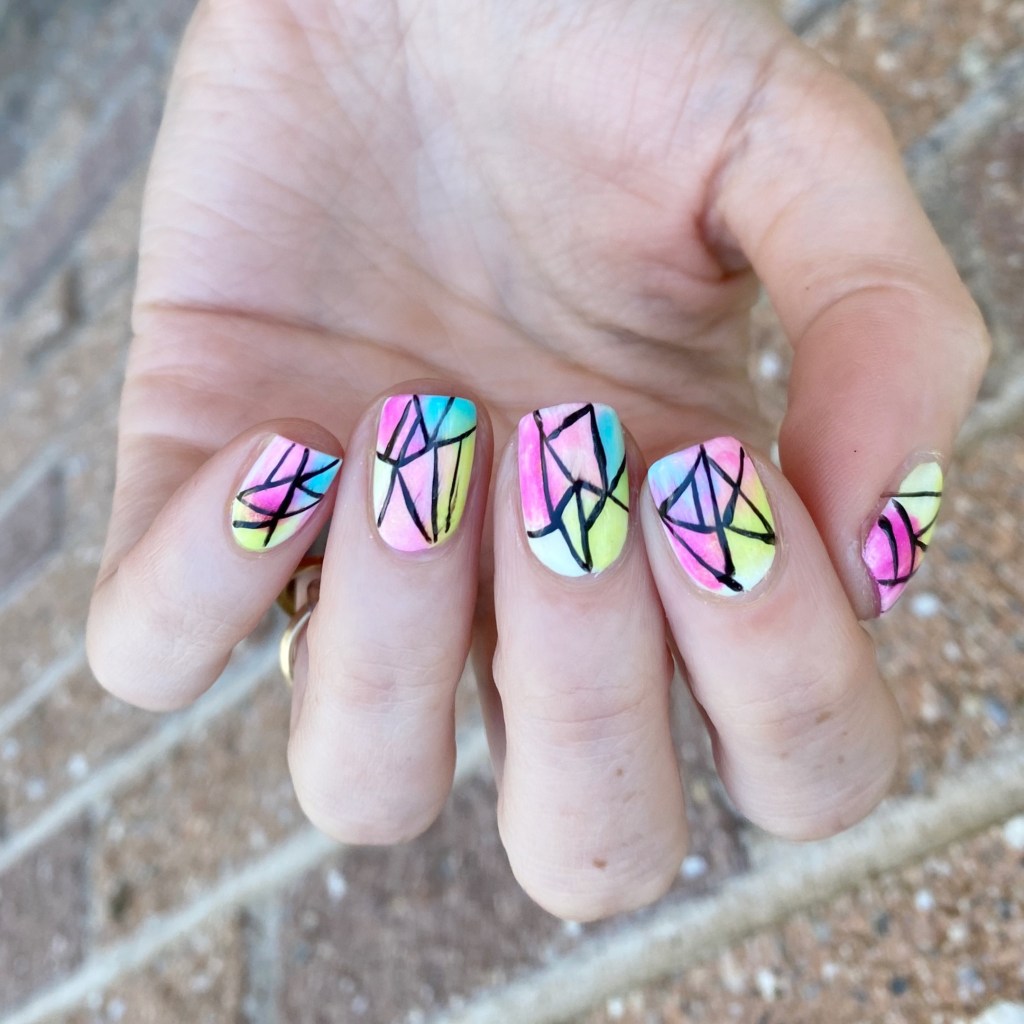
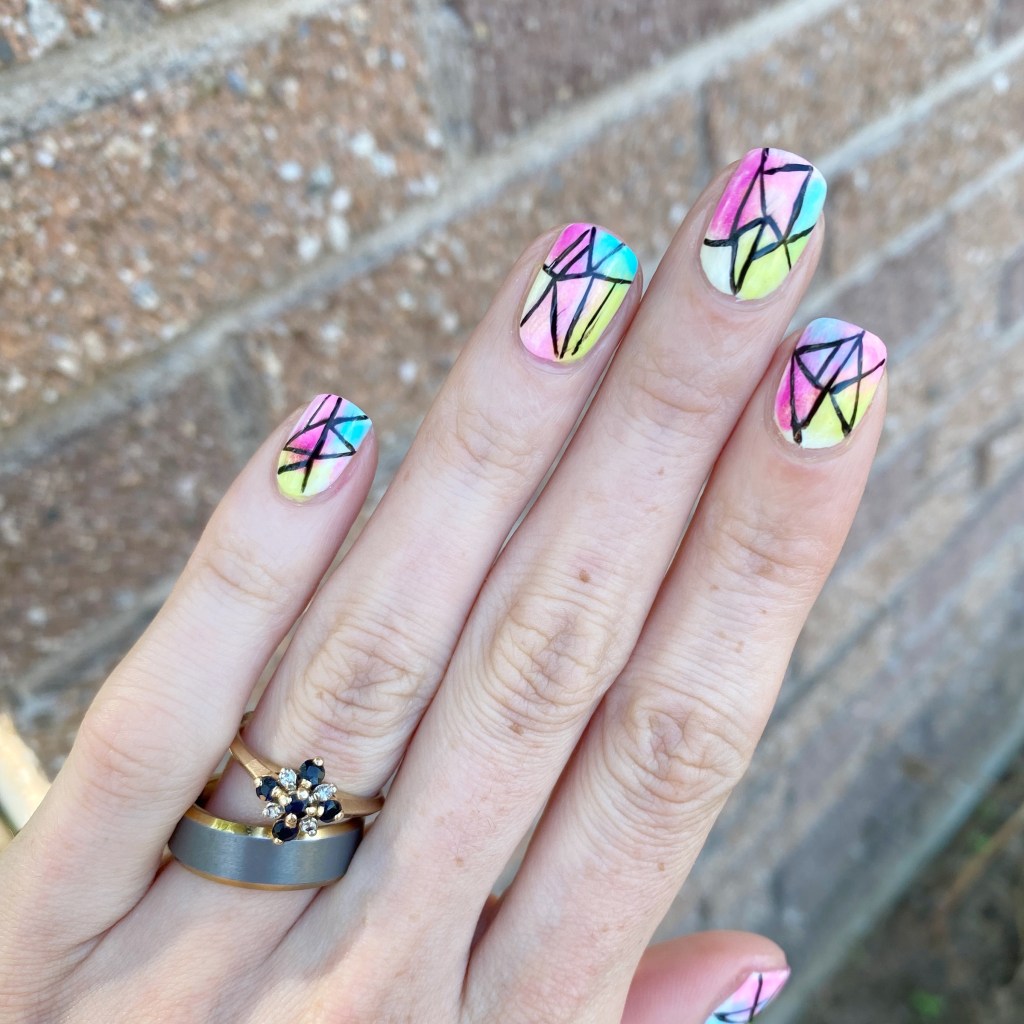
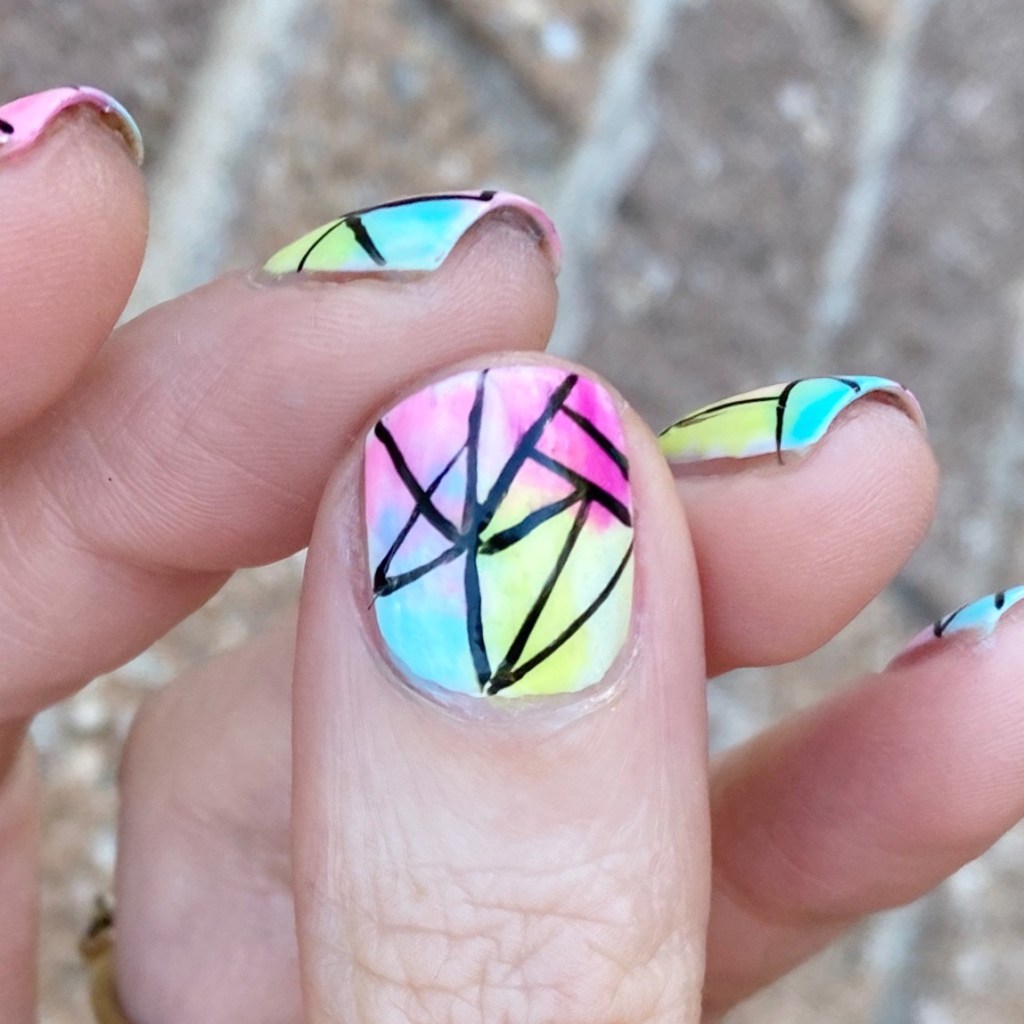
Hello lovelies & happy Friday! It’s a fantastic Friday here… especially since the countdown to our family vacation has officially hit one week, & I could not be more excited! It’s also been hot & beautiful this week, meaning I’m all about the neon. Good thing I reverently received a fun package from Sally Hansen, huh? I wanted to create a beautiful stained glass inspired look since the formula on the shades I received would be perfect for it… & I was not disappointed.
The polishes I used for this manicure are:
Base Coat: Sally Hansen Miracle Gel Colour Grip Primer Base Coat
Top Coat: Sally Hansen Miracle Gel Glossy Top Coat
I’m not going to lie, I’m absolutely obsessed with this nail art look. I wore it from Tuesday to Thursday, & was actually sad to take it off! This is not my first version of this design, but it might be my most favourite I’ve done.. at least in a while! The colours blended so beautifully together, & I think my lines turned out really good. Anytime I freehand a clean line manicure, I always feel some crazy pride!
Especially since it doesn’t always happen, haha.
What do think of this fun stained glass look? Are you feeling the neon shades this weekend? Would you wear a bright & eye-catching look like this? Let me know all your thoughts down in the comments below!
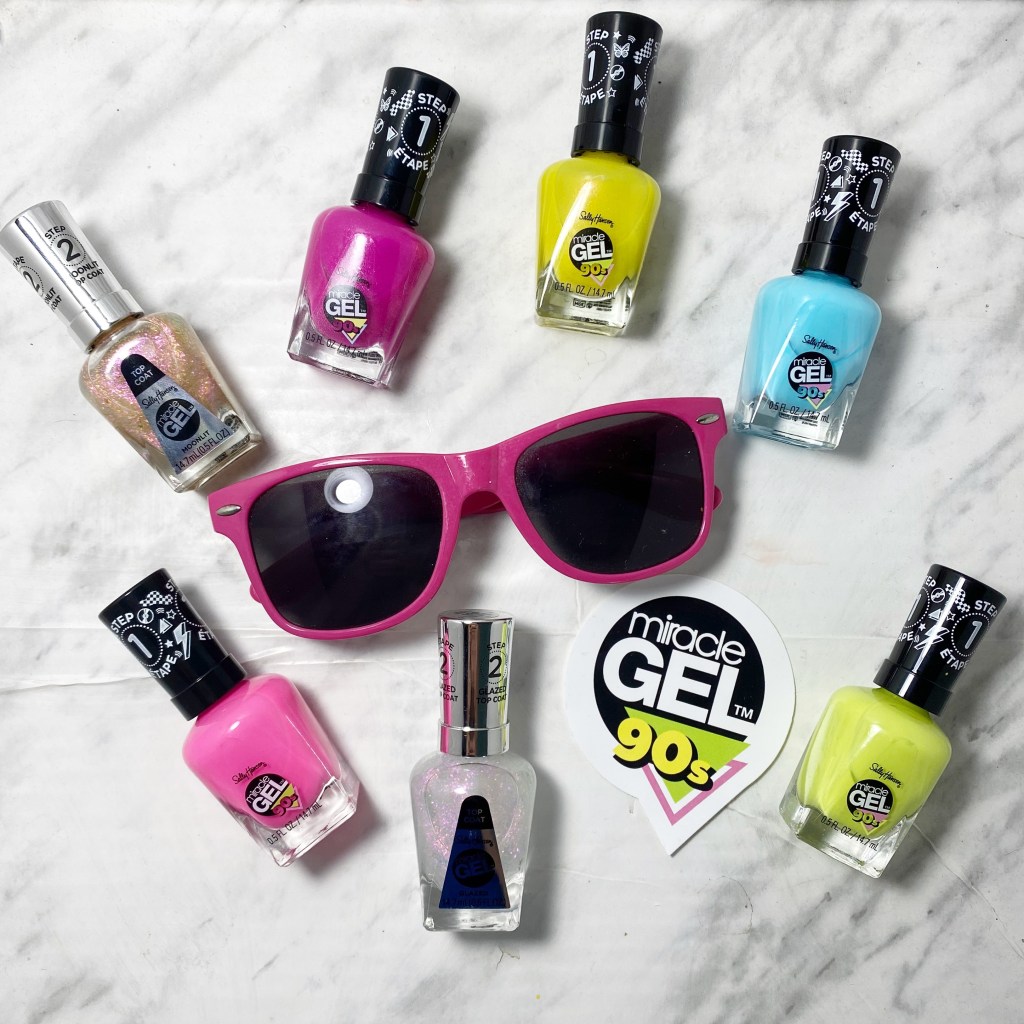
Hello lovelies & happy Sunday! I hope you’re ready, because I have quite the swatch heavy post ready for you today. As I’ve previously mentioned, I was gifted part of the Sally Hansen Miracle Gel 90s collection, & I’m really excited to share these shades with you!
As a child of the 90s, this collection hits me right in the nostalgia. So I was pumped to be able to share these shades with you. The actual collection contains 8 funky 90s inspired shades, & I have 5 of them to share today! I was also lucky enough to receive two of the new Sally Hansen Miracle Gel special effects top coats, to add a little extra sparkle to your manicure.
These limited edition 90s shades can be found wherever you buy Sally Hansen. I’ve found them at my local Shoppers Drug Mart & Walmart stores — both in special edition displays.
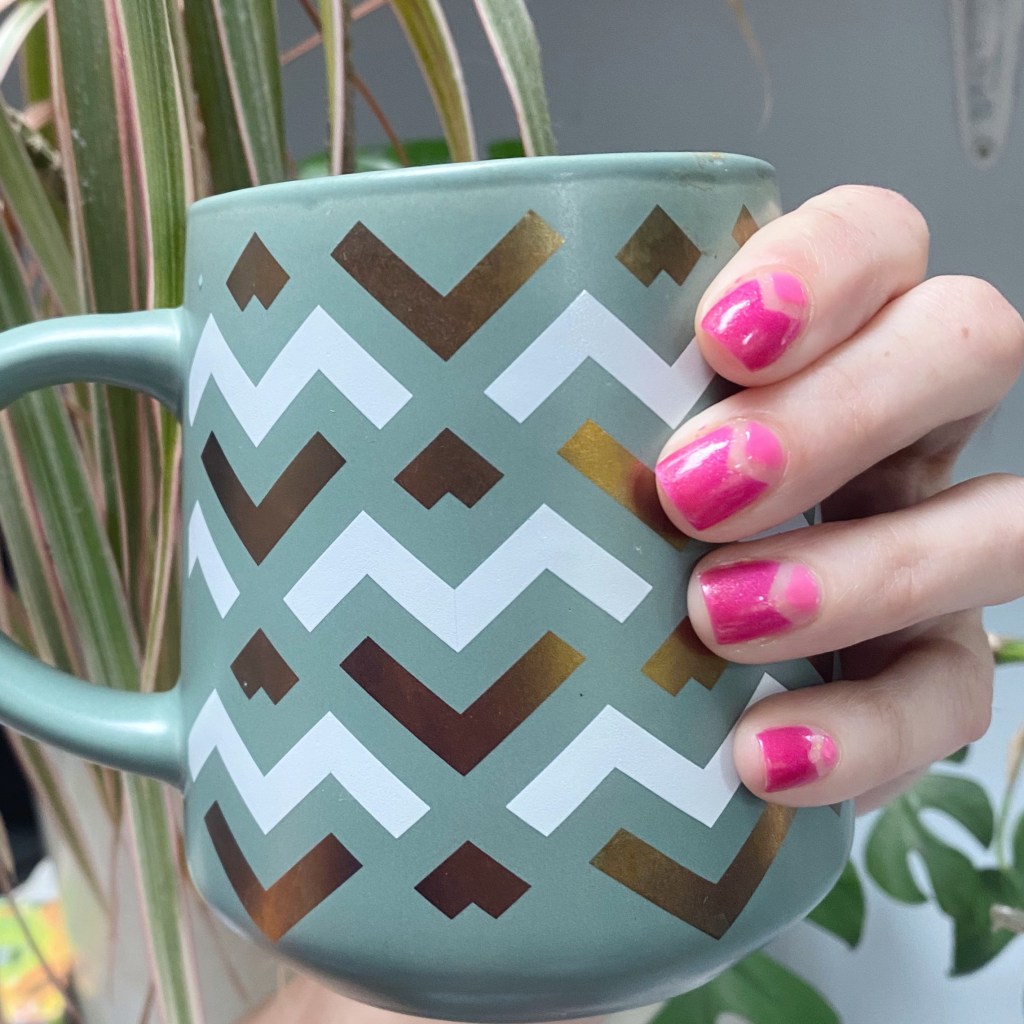
Hello lovelies & happy Friday! I hope everyone has had a lovely week. It’s (almost) the weekend!
I’m super pumped because I am going to see Barbie tonight for a Bachelorette thing — my first time to the movies since I was pregnant with my now six year old! I’m so excited for this movie, so naturally I had to do some Barbie pink nails for the occasion. & I knew that the new pink shades in the Sally Hansen Miracle Gel 90s collection were the perfect choices for my vibrant Barbie look!
The polishes I used for this manicure are:
Base Coat: Sally Hansen Miracle Gel Colour Grip Primer Base Coat
Top Coat: Sally Hansen Miracle Gel Glossy Top Coat
Sally Hansen Miracle Gel Glazed Top Coat (over my base coat)
Sally Hansen Miracle Gel Nostalchick
Sally Hansen Miracle Gel Beet Me At The Mall
TheBaseCoat Stacked Chevron vinyls
I truly think that chevron moon designs (like this) still remain one of my all time favourite nail art looks! & it’s been so long since I did one, which is kind of crazy.
But if there was ever a perfect Barbie nail art look, this one might be it. & I’m very excited to show off this nail art look when sipping my Diet Coke at the movies tonight!
What do you think of my Barbiecore chevron moons? Are you excited for the Barbie movie? Will you be painting your nails special to see it in theatres? Let me know in the comments below!