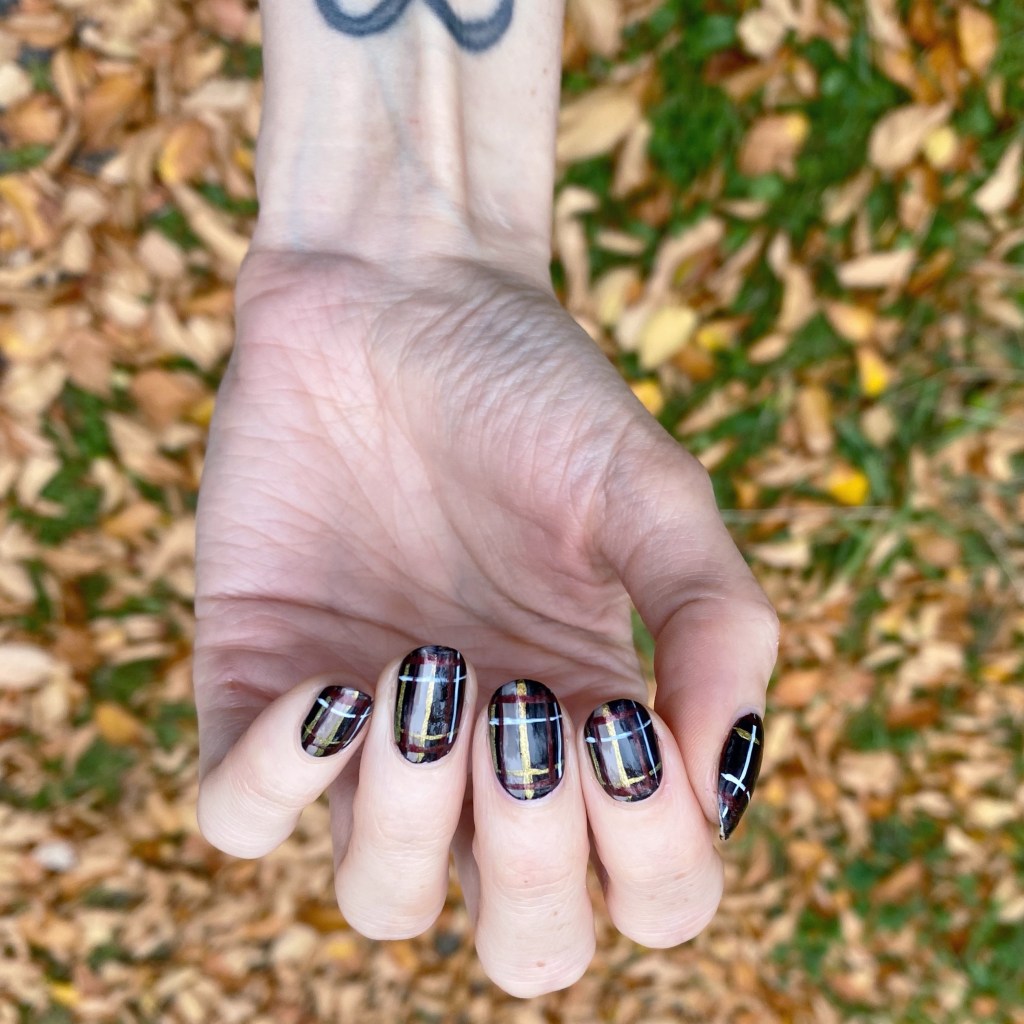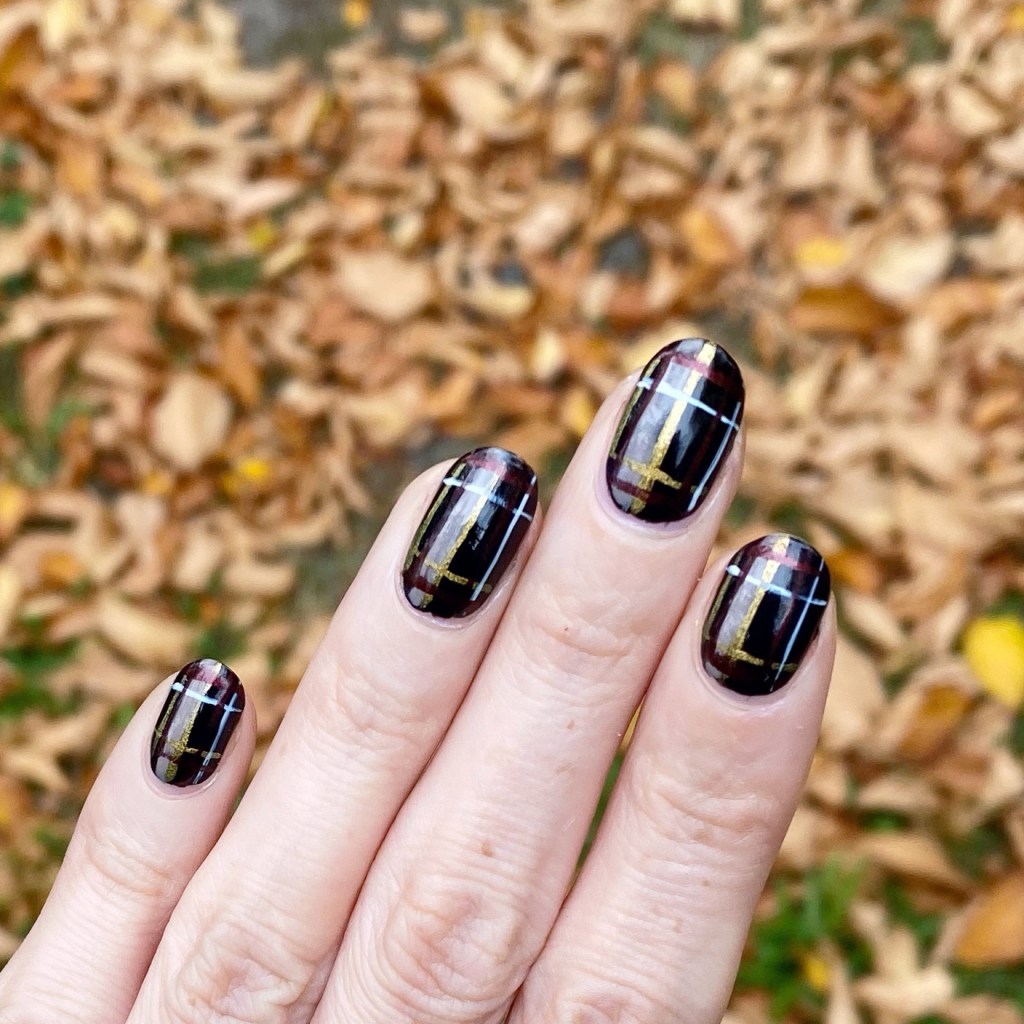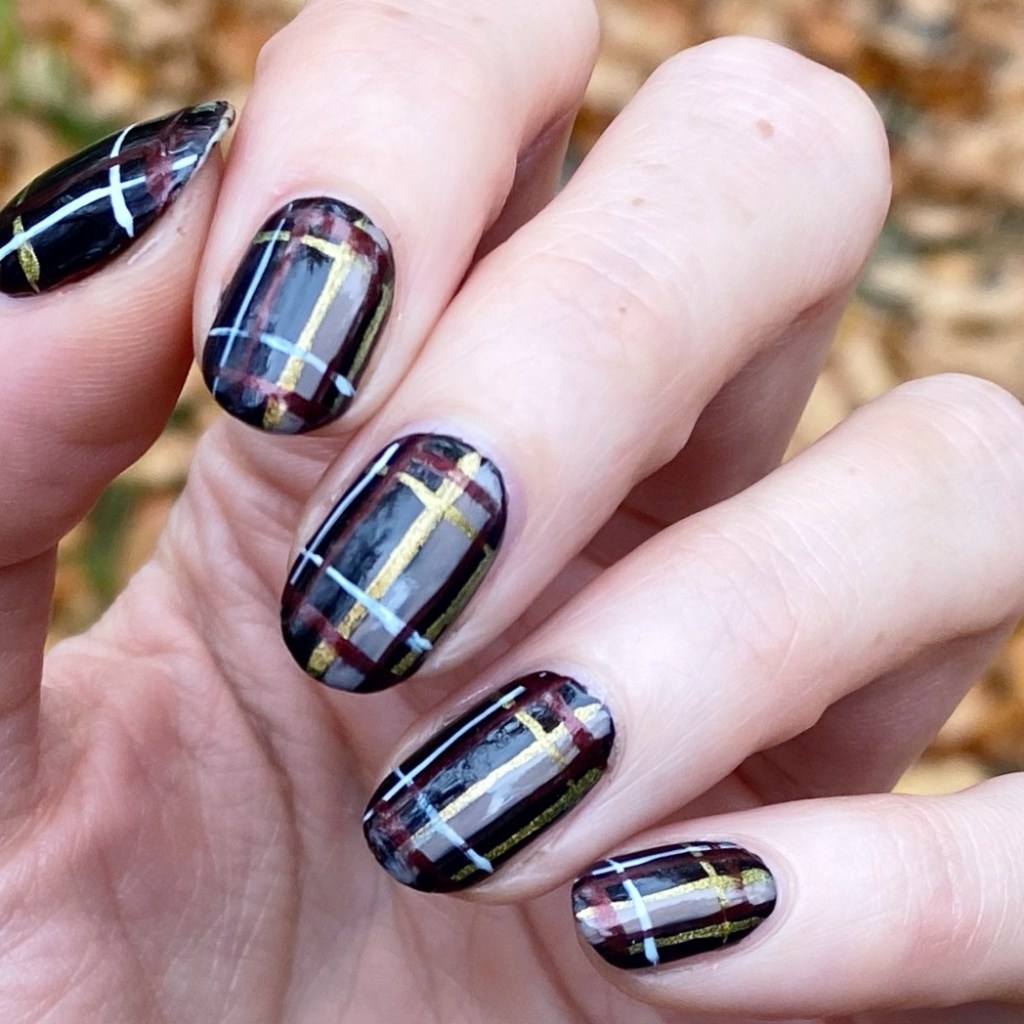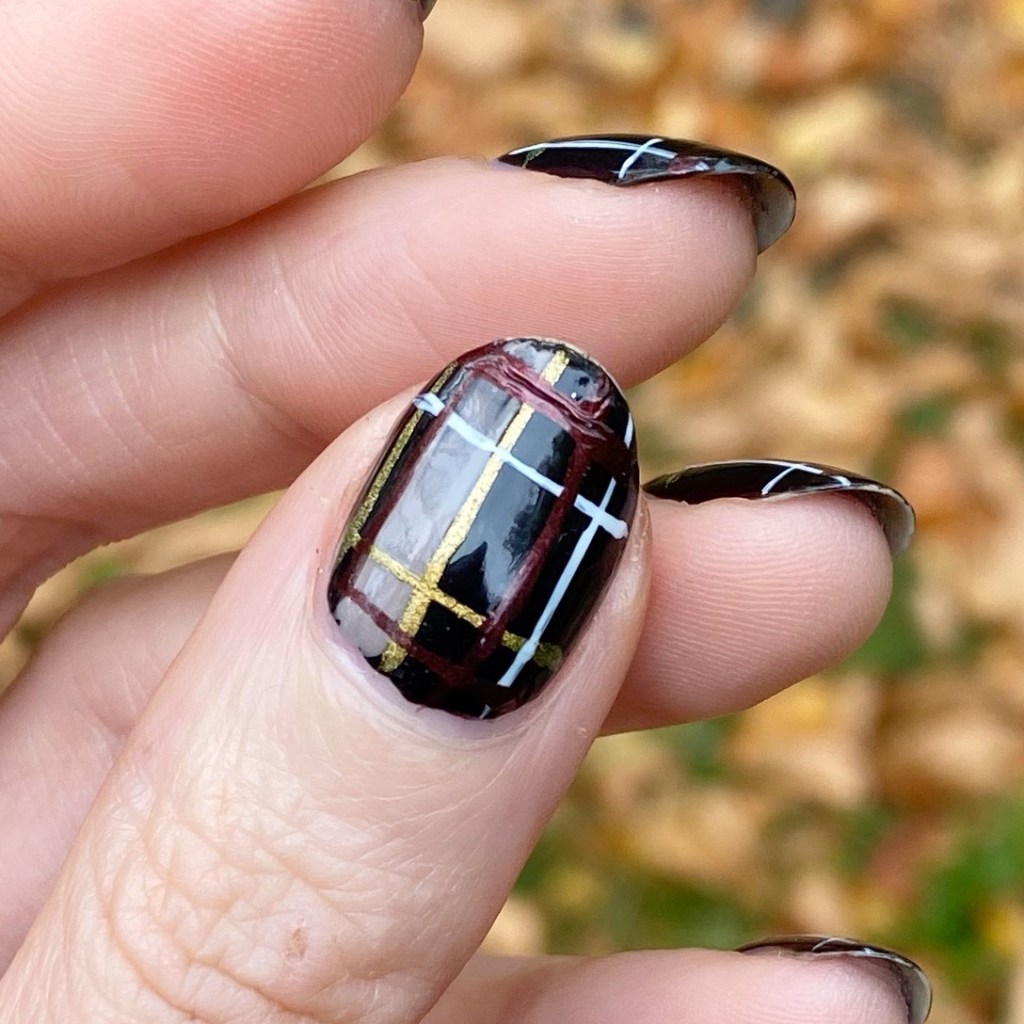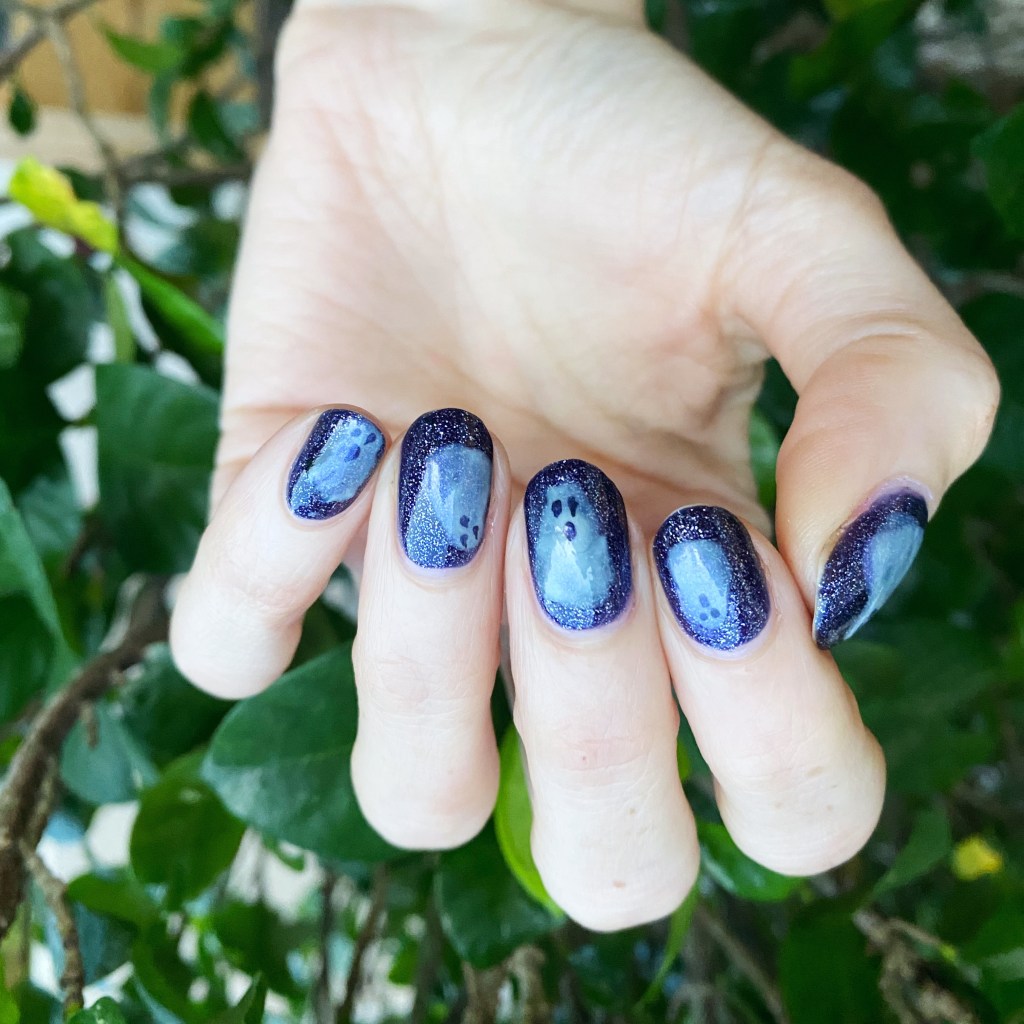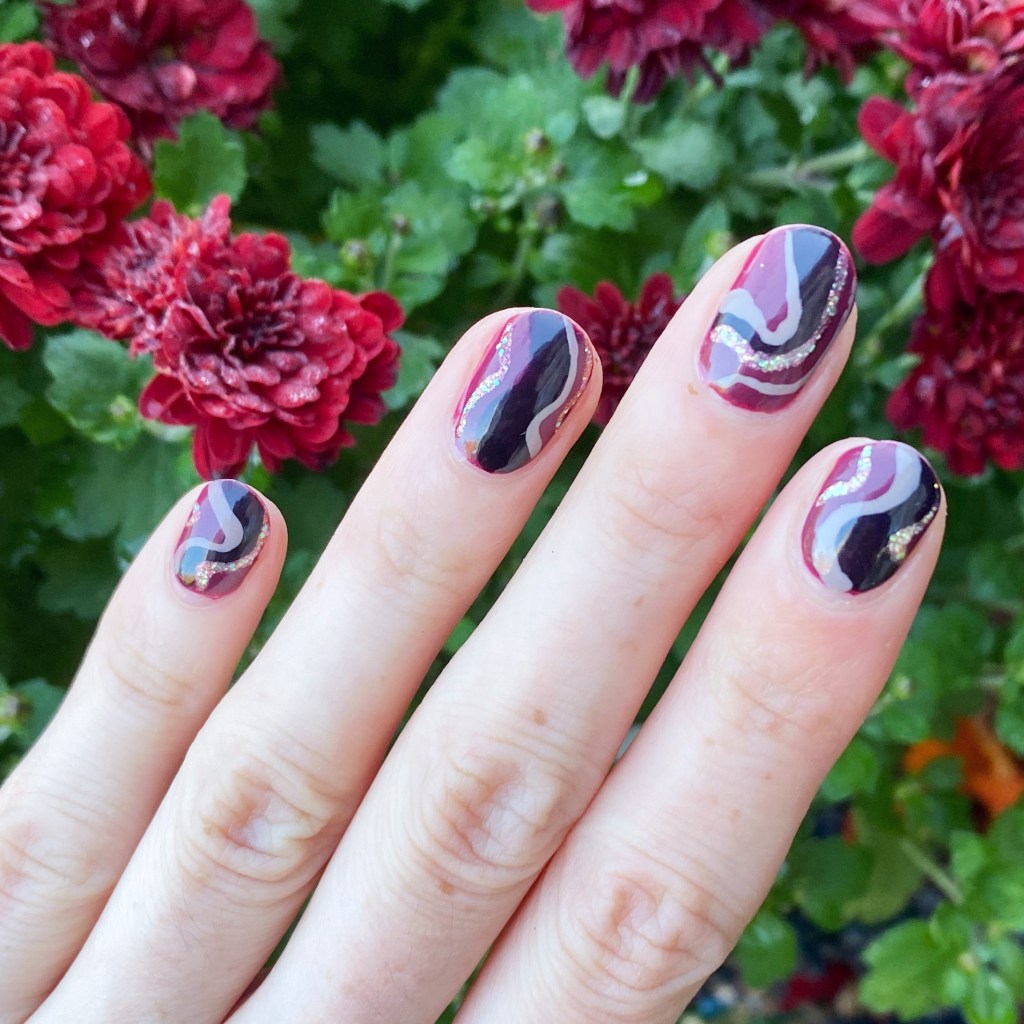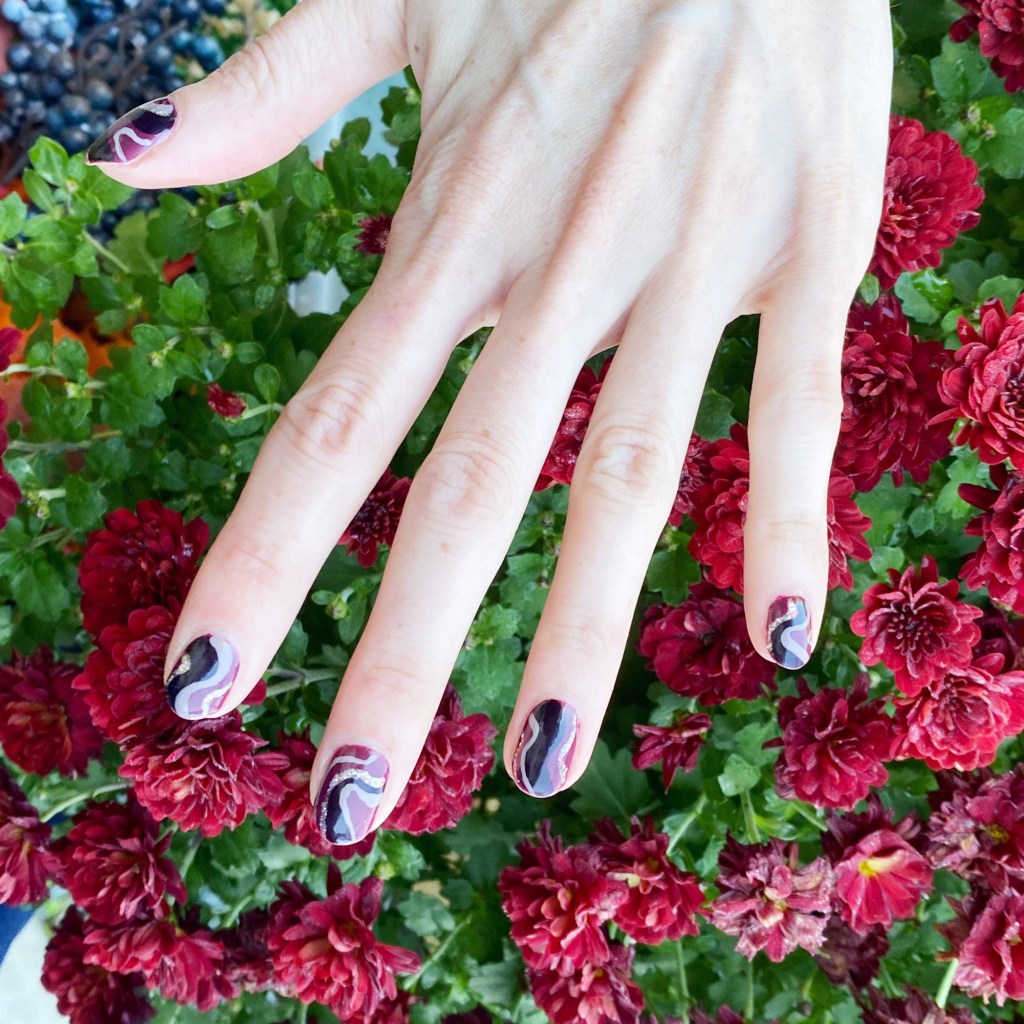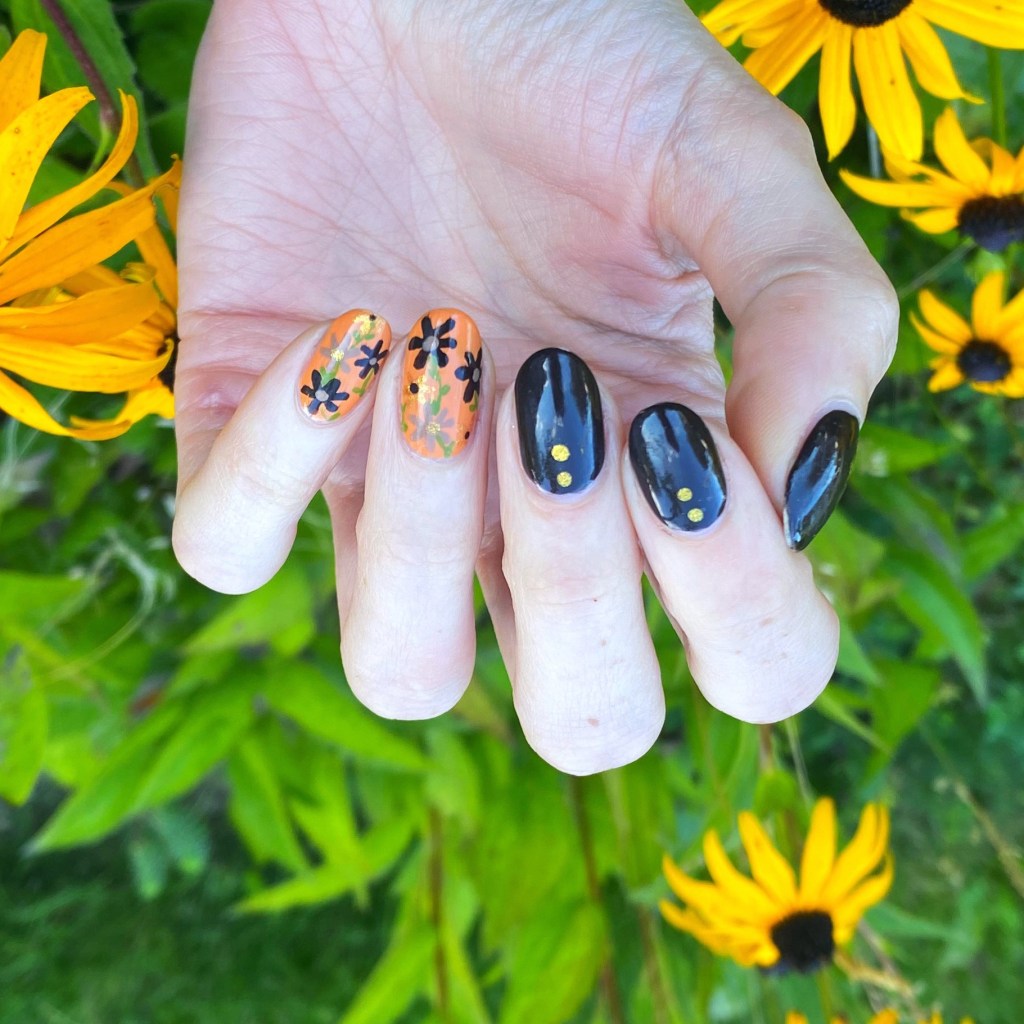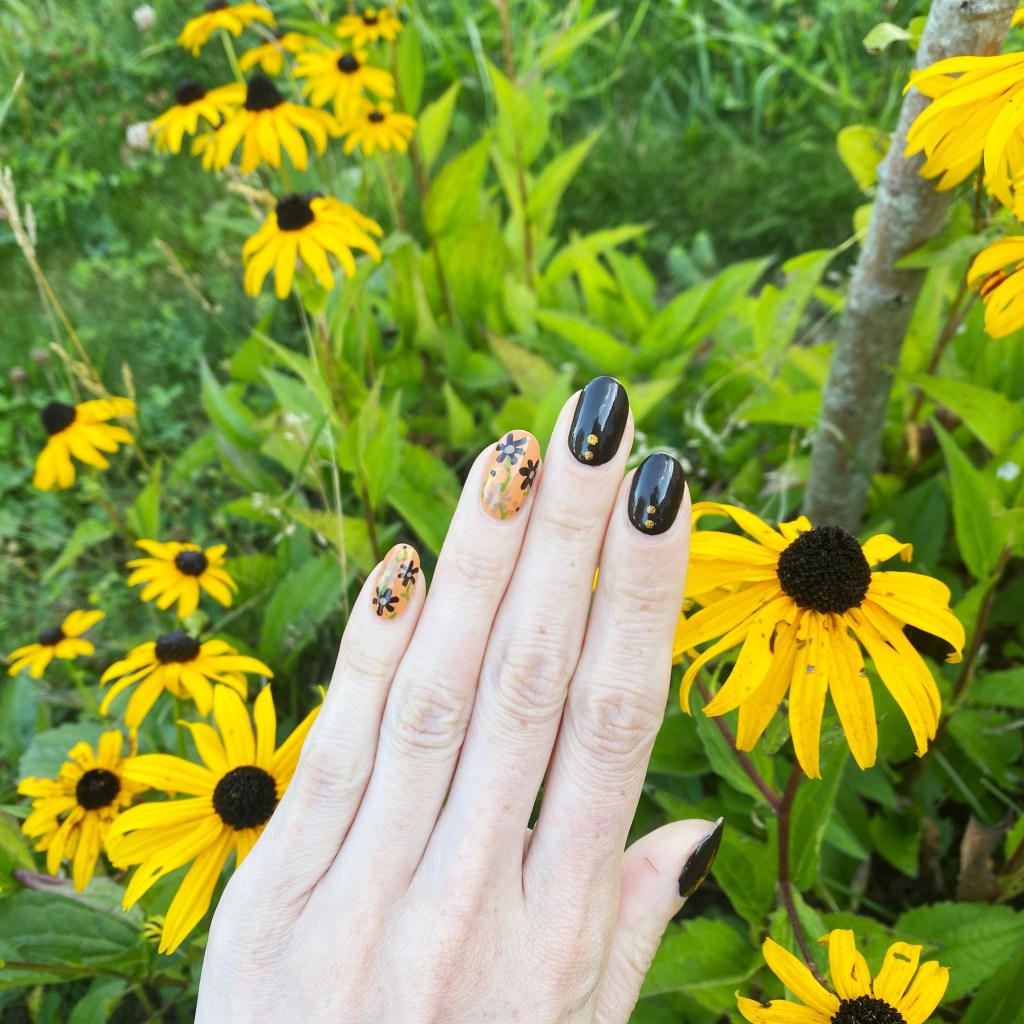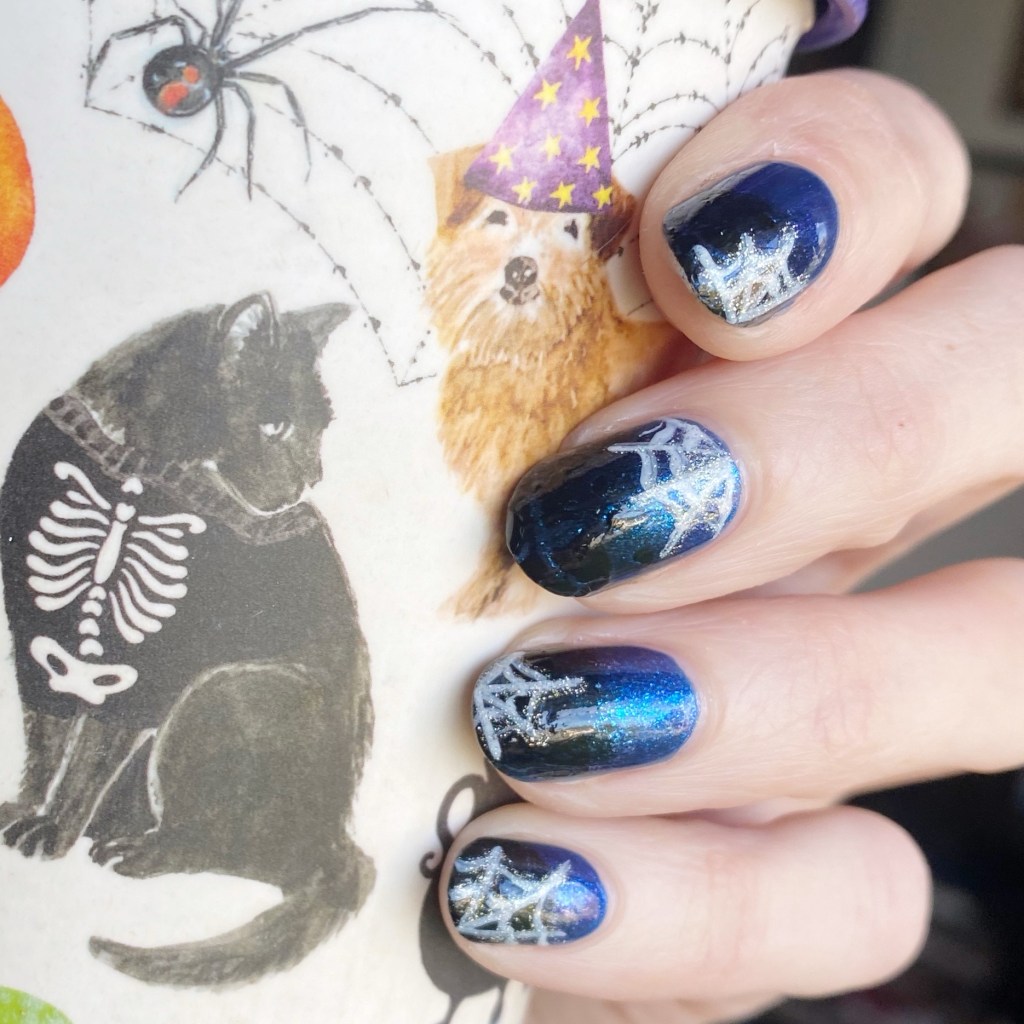
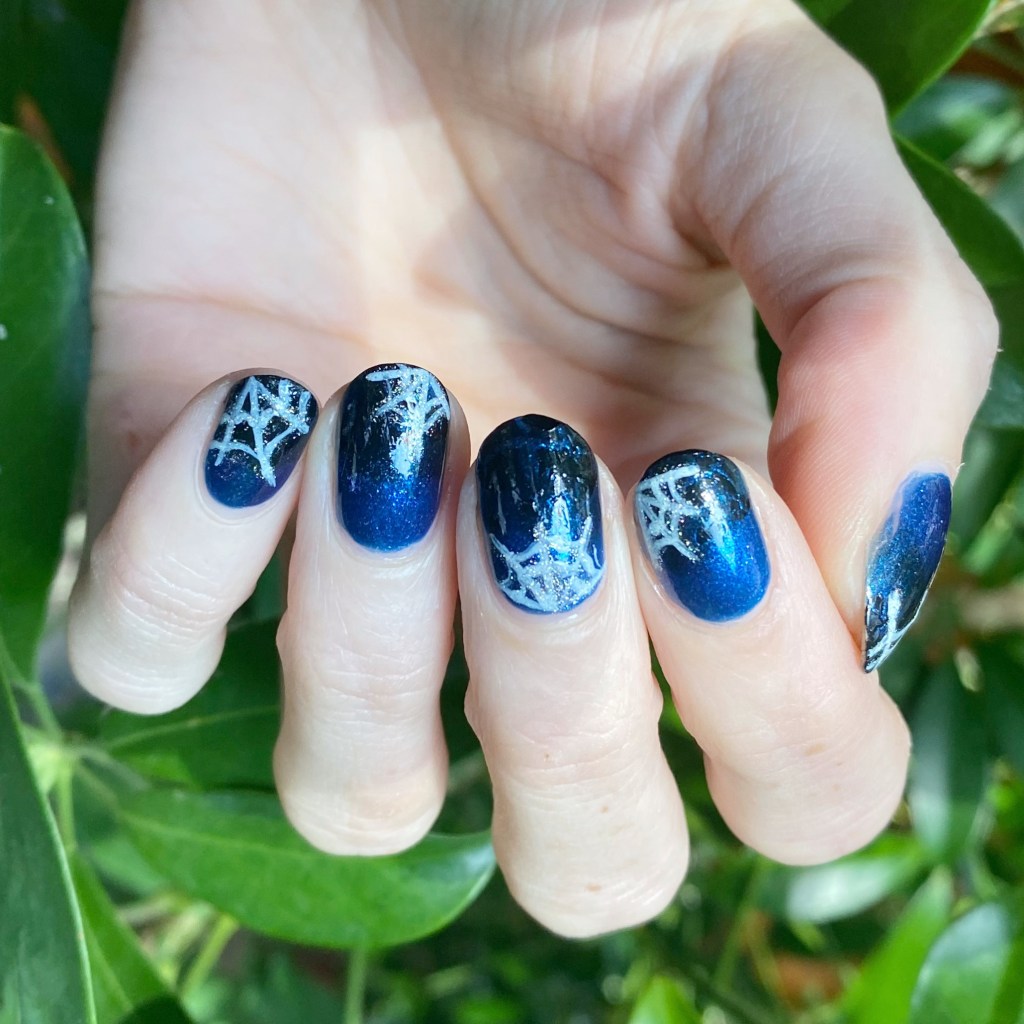
Good morning lovelies & happy Monday! I hope you’re having the most beautiful start to your day. Today, I’m sharing prompt # 4 from Glam Nails Challenge October for 2025: Spiderweb.
Spider’s are probably my least favourite thing, but a good spiderweb nail art look does fit the spooky Halloween vibes.
The polishes I used for this manicure are:
- Top Coat: Sally Hansen InstaDri Top Coat (red bottle)
- Base Coat: Essie Hard to Resist (purple)
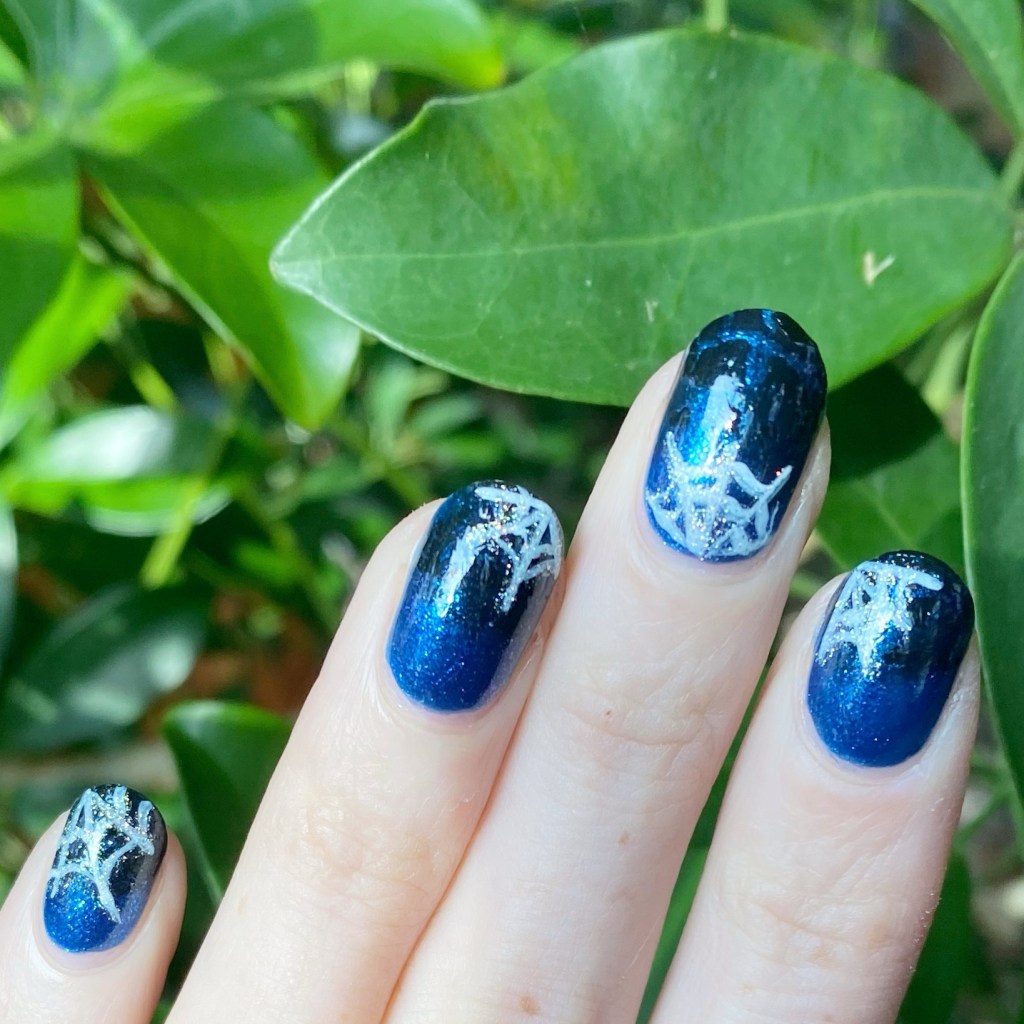
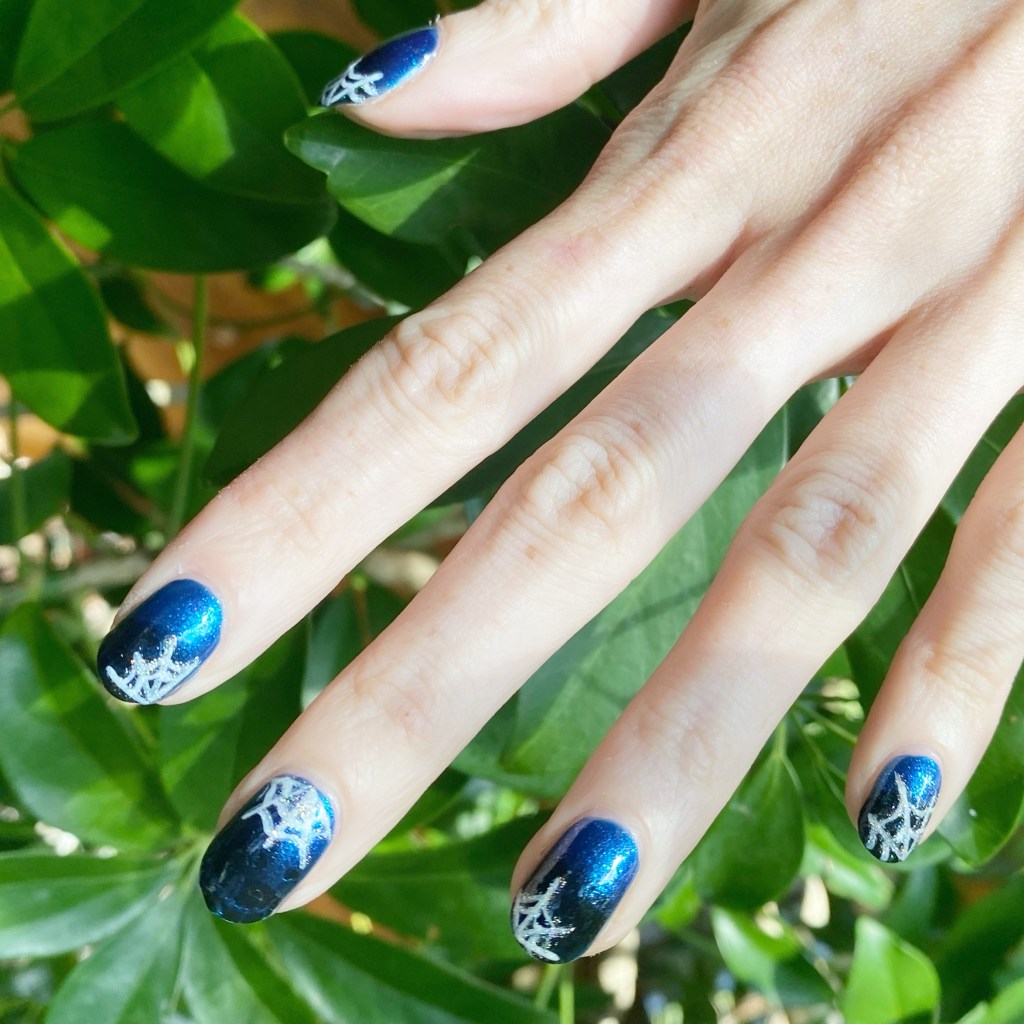
- Sally Hansen Triple Shine Wavy Blue
- NailStuff.ca Essentials Raven
- LA Colors Black Shatter
- OPI I Cannoli Wear OPI
- Sally Hansen Miracle Gel Make It N-Ice
- NailStuff.ca 16mm Liner Brush
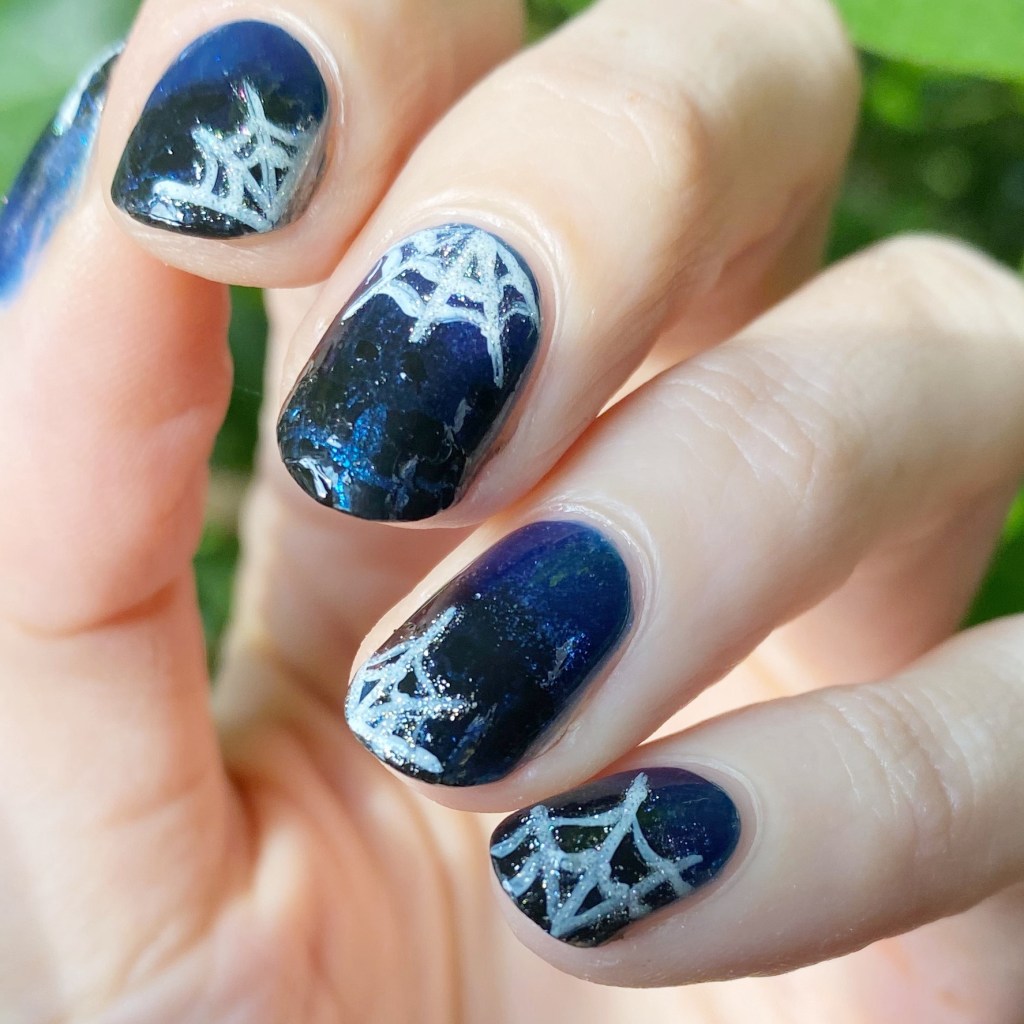
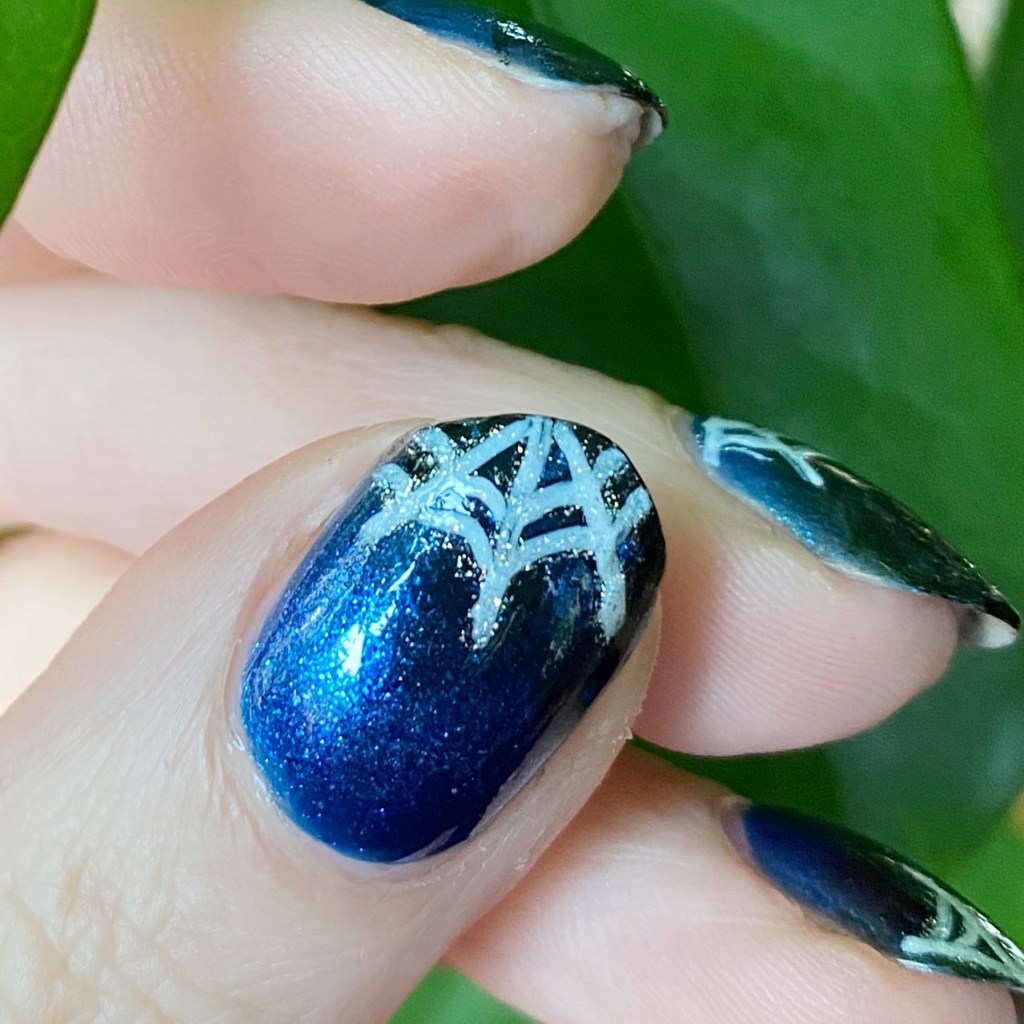
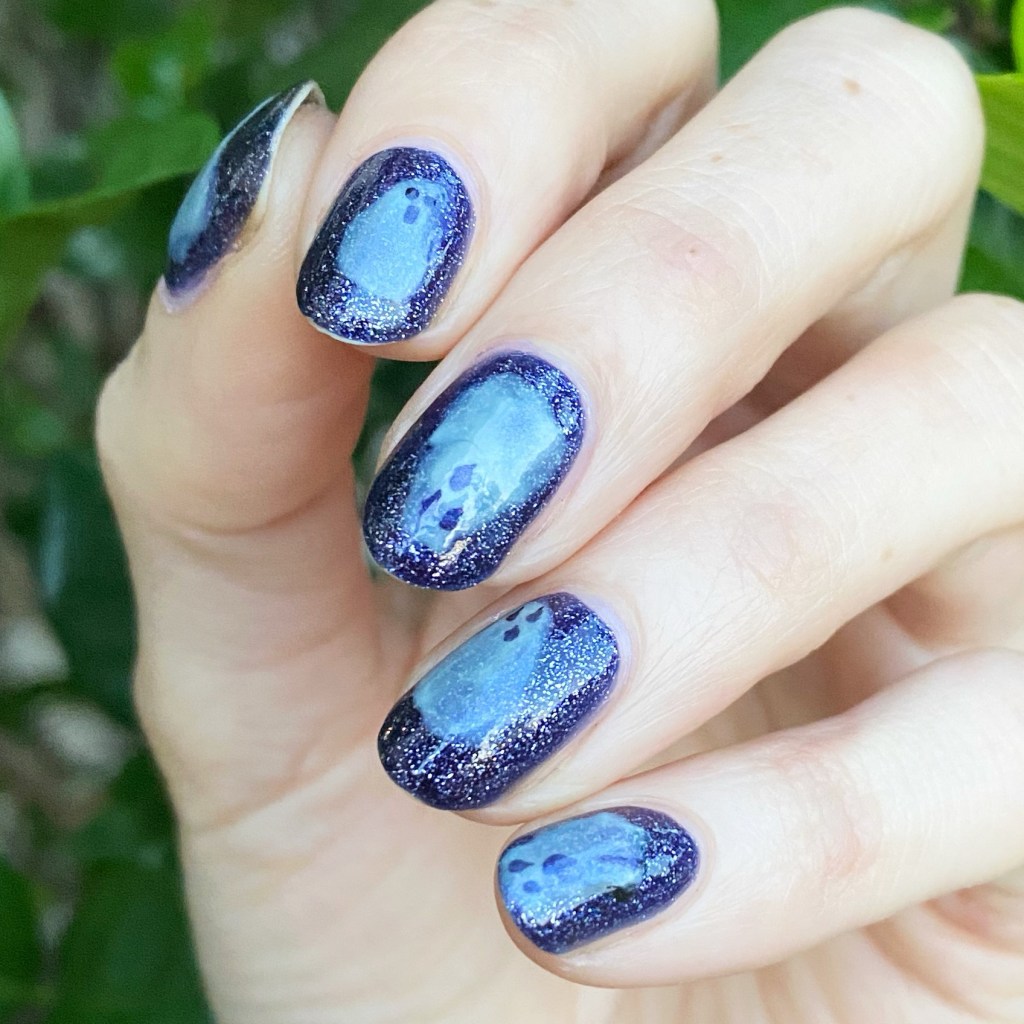
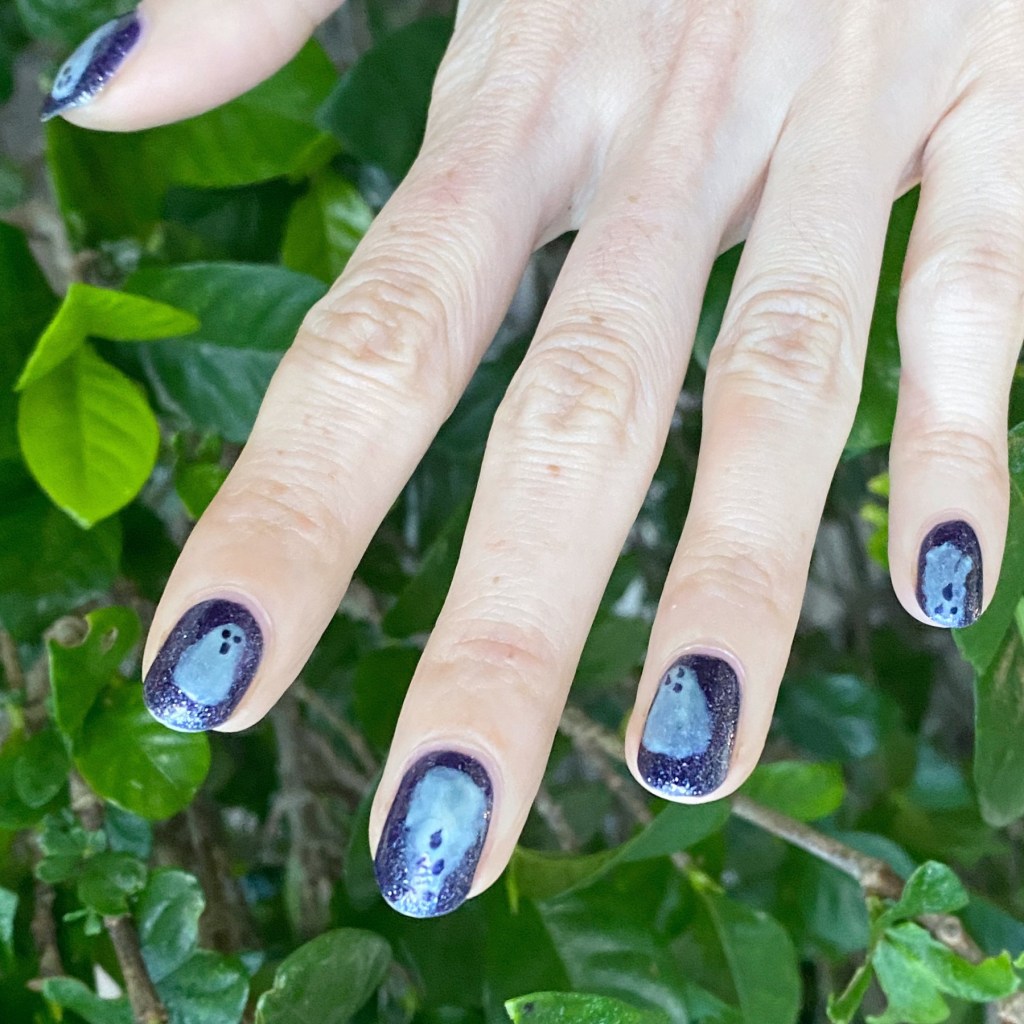
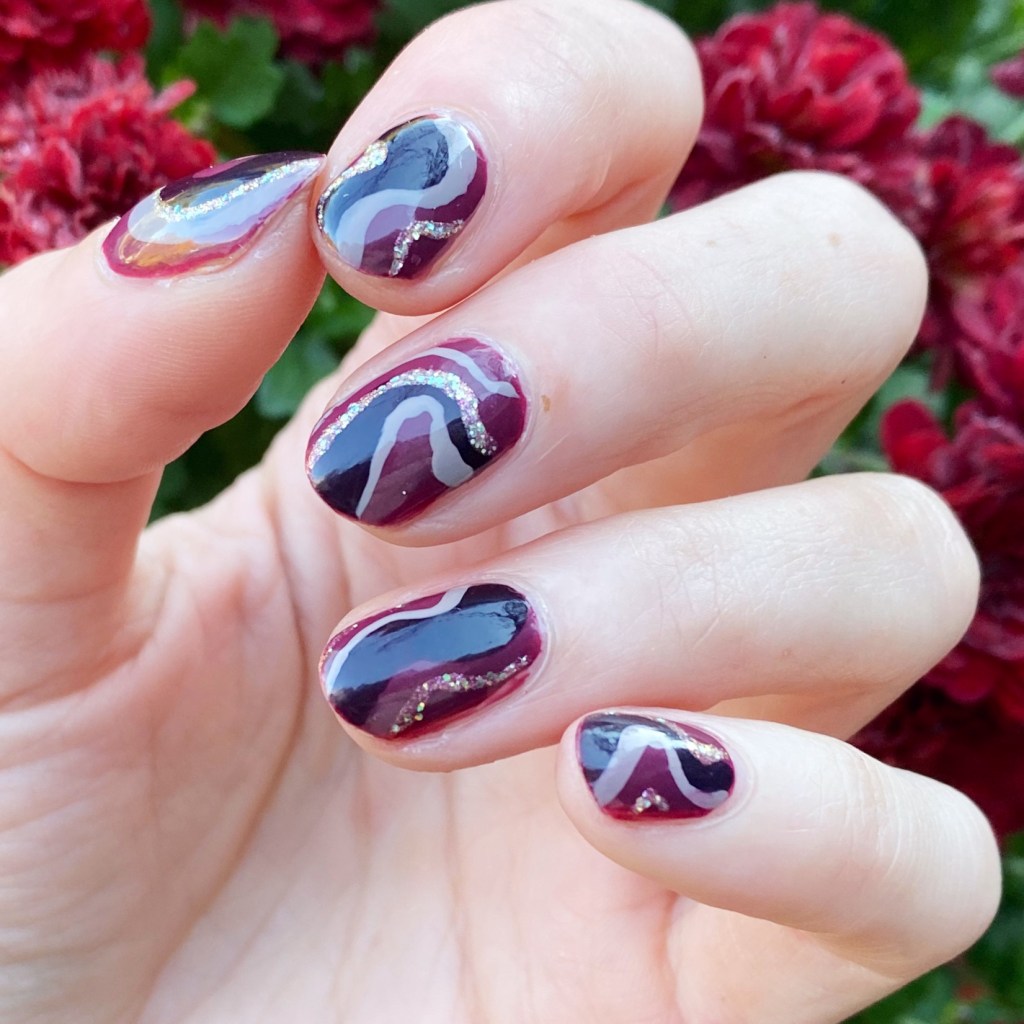
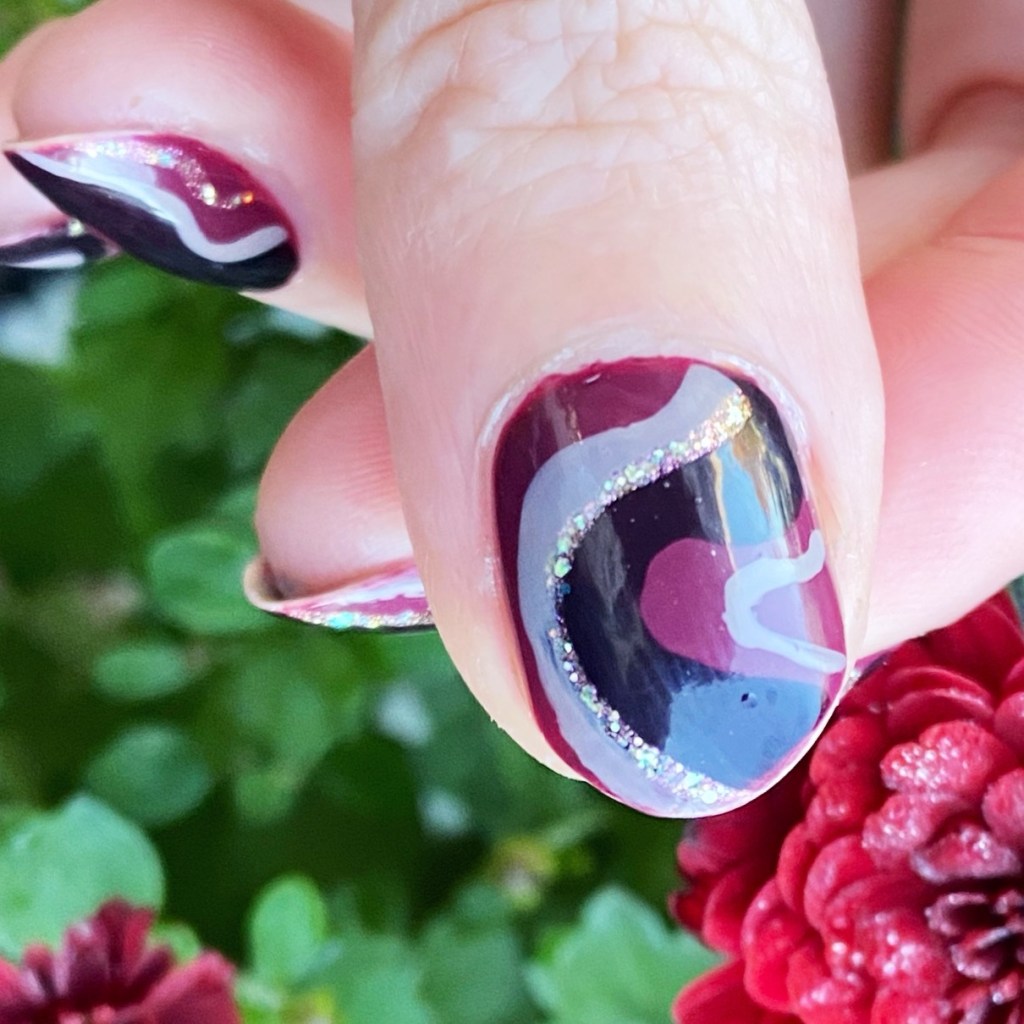
So I tried to do a cute black gradient at the tips of my nails, but it went kind of weird so I created a fun textured effect by adding the LA Colors Shatter at the tips as well — which I like even better than my original idea for a gradient. Then I hand drew my spiderwebs on the tips, with a little extra sparkle.
Is it similar to the same design I do every year? Yes.
Do I still love how it turned out? Also yes.
What do you think of this spiderweb design? Do you like how I created my fun textured gradient on my tips? Let me know your thoughts on this design, & don’t forget to check out #glamnailschallengeoct25 on Instagram to see all the other beautiful looks that have been created so far this month.
Happy Monday!