Holly Jolly Dotticure 🎄

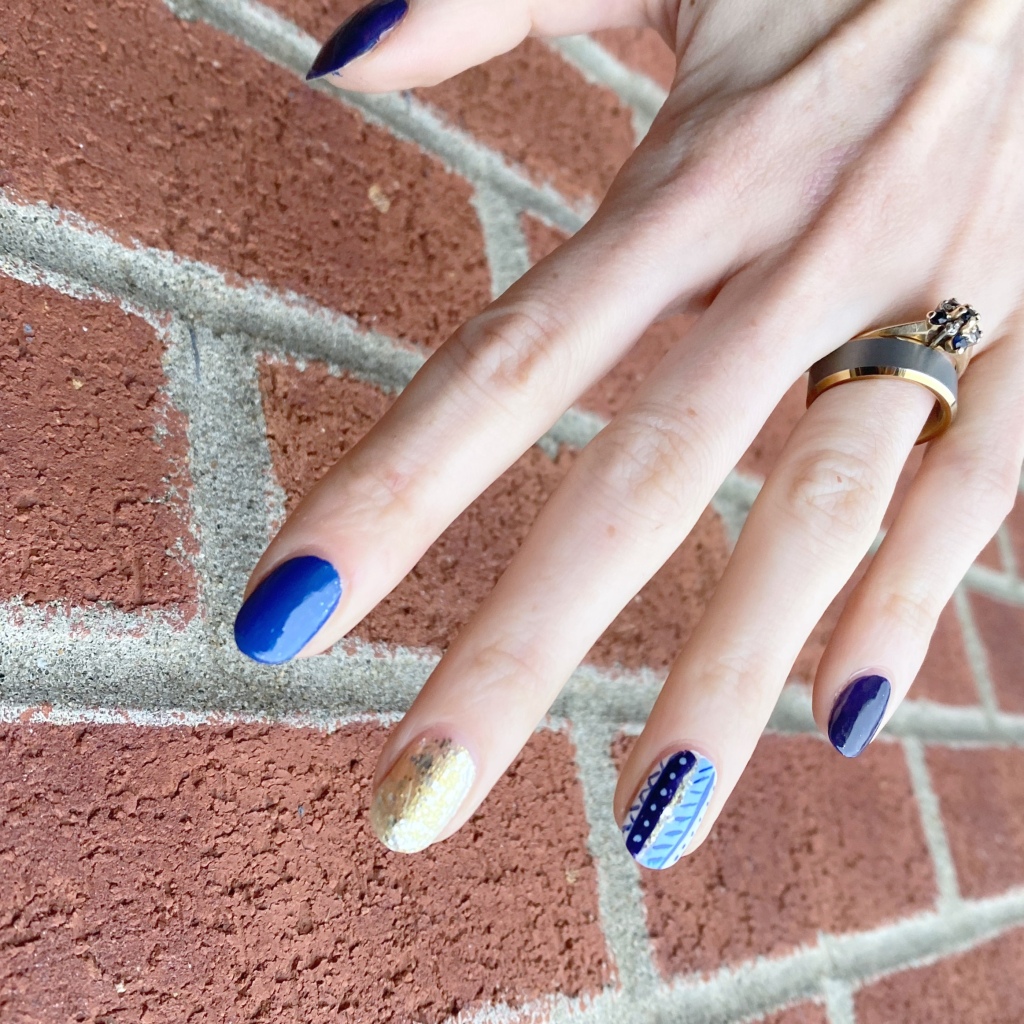
Hello lovelies & happy Wednesday! I hope your week is off to a lovely start so far — & if it’s not, well we’re halfway to the weekend!

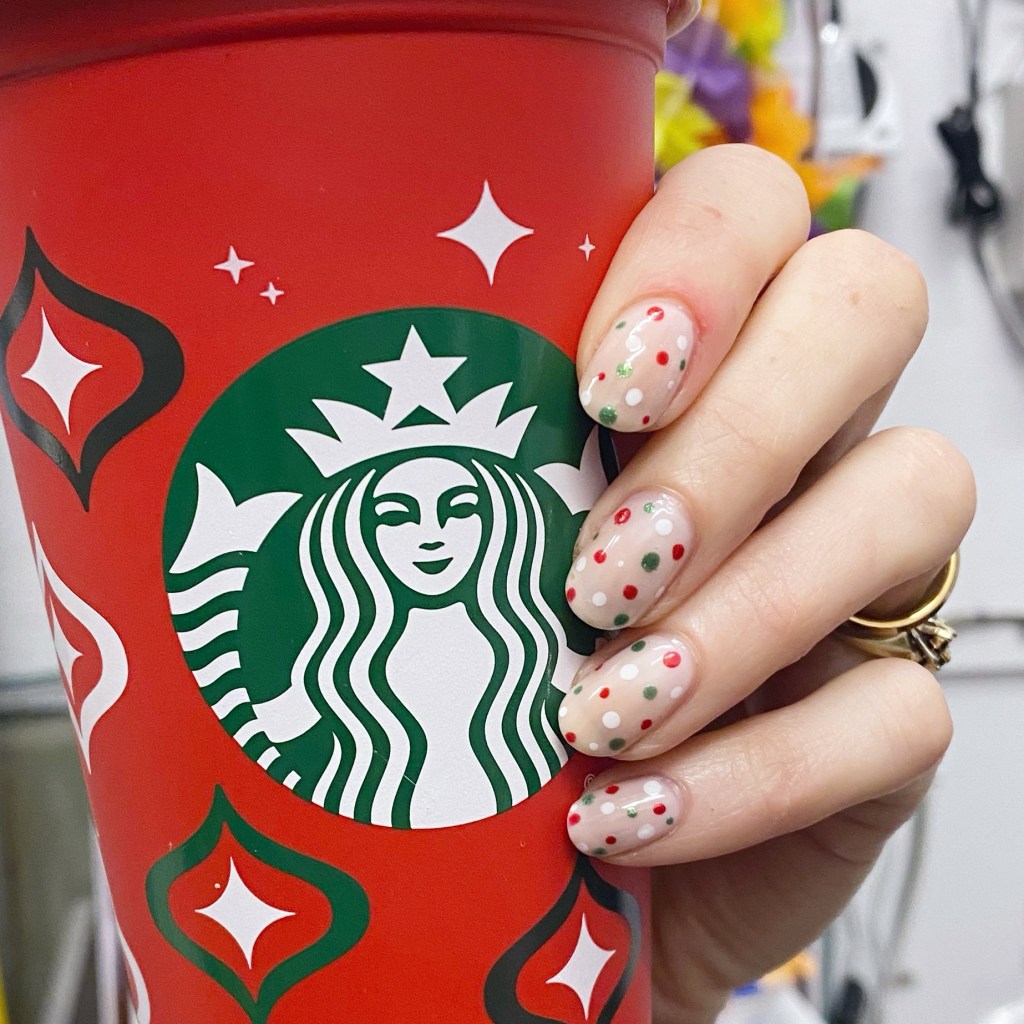
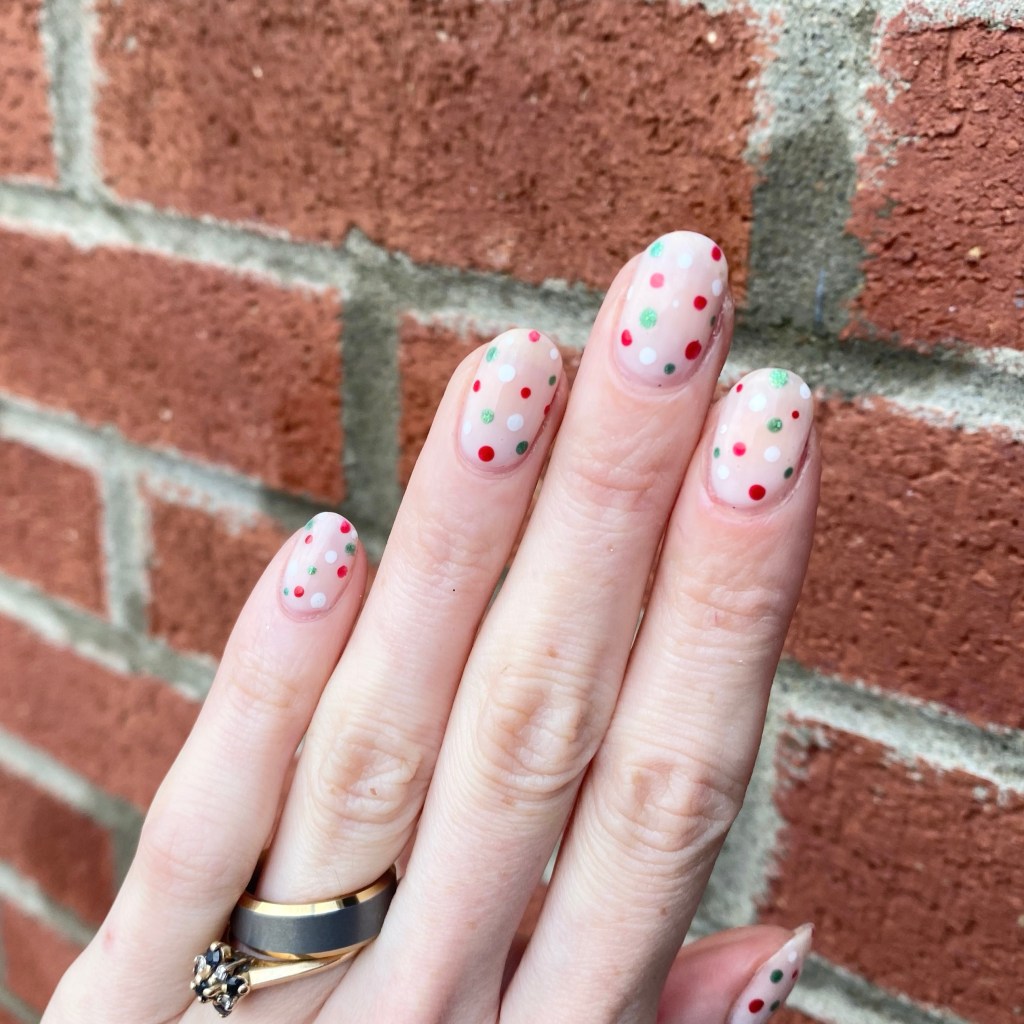
Today I’m officially kickstarting the Christmas & holiday nails with this Christmas inspired dotticure. I wanted red & green, & festive, & I think I captured that look idea perfectly.

The polishes I used for this manicure are: 

  • Base Coat: Sally Hansen Miracle Gel Colour Grip Primer Base Coat 
  • Top Coat: Seche Vive
  • Sally Hansen Miracle Gel has Central Pink
  • Sally Hansen MG A Moo Point
  • Sally Hansen MG Me, My Elf & I
  • Sally Hansen MG Red It Twice
  • NailStuff.ca Dotting Tool Trio

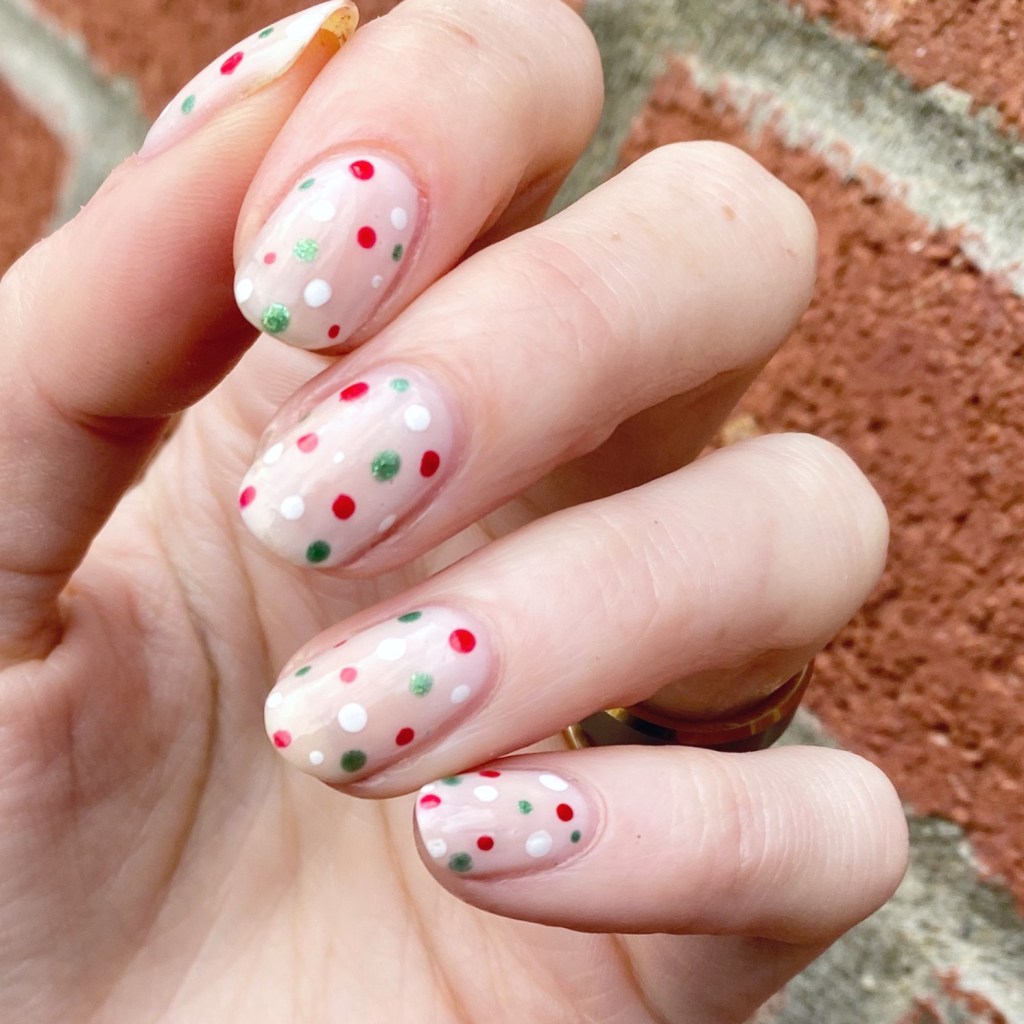
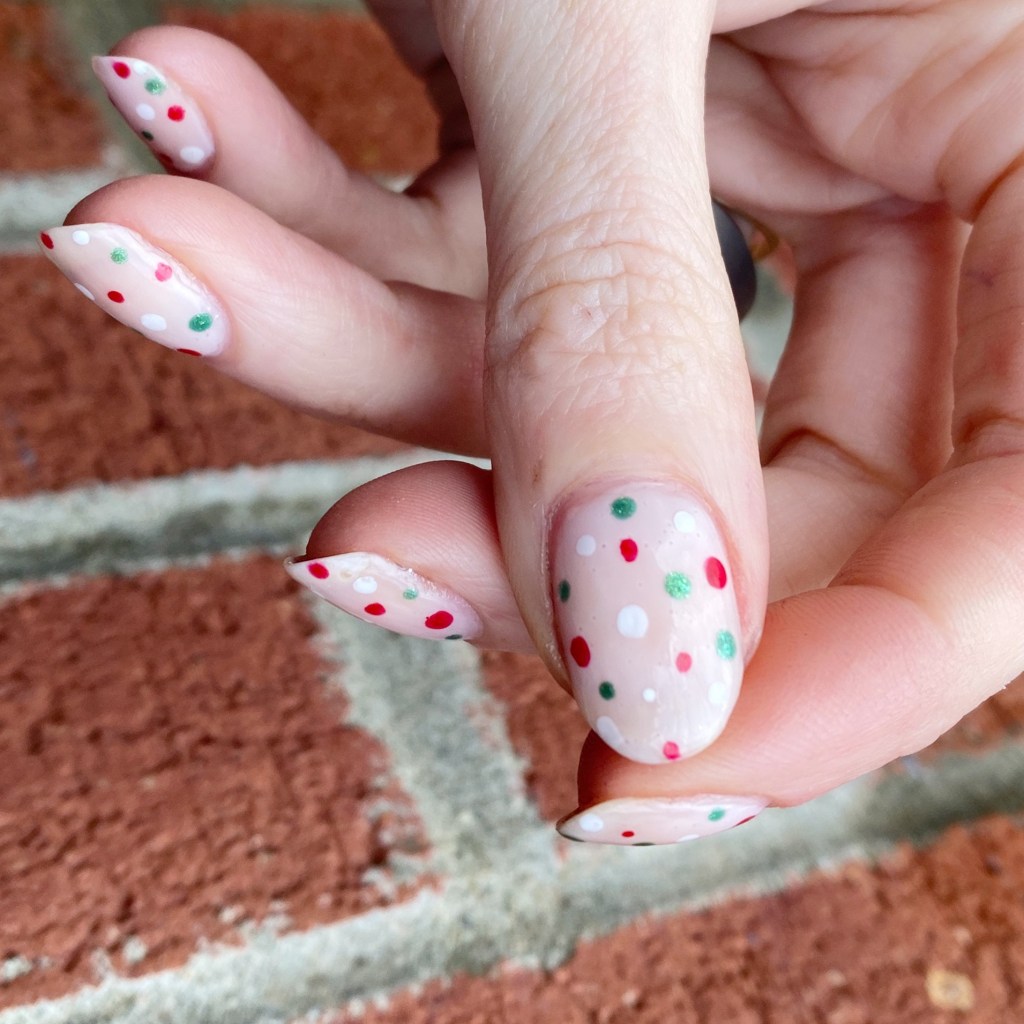
This look was super, super easy to achieve. I started with my semi-sheer base of Central Pink, & then one by one added dots of each colour to my nails, trying my best to make it not look too crowded. Then after I gave the dots a few minutes to dry down, I finished off everything with a thick coat of top coat.

It’s important to wait a few minutes between dotting & adding top coat, just so your dots don’t get smeared. There is nothing worse than a beautiful clean dotticure, & you mess it all up by smearing the polka dots with your top coat.

What do you think of this festive dotticure? Do you like the simplicity of the small polka dots over the sheer base? Let me know all your thoughts in the comments below, & what nail art looks you’re exciting to see upcoming over the next few weeks!

Enjoy your Wednesday loves. 🖤

Winter Sweater Accent Nail

Hello lovelies & happy Monday! It’s a brand new week already, & December is looming. While I’m brainstorming all the nail art I’m planning for December, I thought I would throw things back with a simple accent nail that reminds me of my early nail blogging days (circa 2015).

I used to be obsessed with these freehand sweater/aztec inspired accent nails, so I thought it would be fun to do one — especially as I was struggling with nail art inspiration the other night.

The polishes I used for this manicure are: 

  • Base Coat: Sally Hansen Miracle Gel Colour Grip Primer Base Coat 
  • Top Coat: Seche Vive
  • Essie No More Film
  • Essie All The Wave
  • Essie Hors d’Oeuvres
  • Essie Blanc
  • Essie Bikini So Teeny
  • NailStuff.ca Mermaid Tail Nail Brush Trio (11mm liner brush, 7mm liner brush)

I feel like these are giving off fun sweater vibes, & I like the combination of blues together. I was just going to do a simple skittle look with the different blues, but I decided I wanted it to be more exciting than that!

The end result turned out so fun! I haven’t had as much time for freehand nail art lately, so I really need to start playing around more often. I miss my freehand nails, so I’m definitely going to make more of an effort. Maybe I’ll redo this design in December with a Christmas-y colour scheme, & call them Ugly Christmas Sweater nails.

What do you think of today’s nail art look? Are you a fan of these simpler accent nail designs? Let me know all your thoughts down in the comments below!

🖤 Happy Monday!

SWATCH SUNDAY — China Glaze I Soiree I Didn’t Do It (Holiday 2015 Cheers Collection)

Good Morning lovelies & happy Sunday! It’s the last Sunday of November which is kind of crazy. Yesterday was one month until Christmas Day, so I think it’s time to kick the Christmas nail polish content officially into gear.

Today I have a polish from the 2015 China Glaze Cheers collection. This glitteryblue/greenish shade is called I Soiree I Didn’t Do It.

2 coats + top coat

China Glaze I Soiree I Didn’t Do It is a jelly green base filled will blue, teal & silver glitters. The base is surprisingly dense with glitter, which was nice as I managed my manicure in only 2 coats. I was fully expecting that I was going to need 3-4 coats.

Obviously, you do still see some natural nail peaking through from behind the glitter, but with something as sparkly as this it kind of distracts so the average person isn’t really noticing. I also used one coat of I Soiree I Didn’t Do It layered over a darker shade on my pedicure, & it works great as a glitter topper as well to add a bit of sparkle.

A close up to show off the different glitters all packed into the base. There is definitely holo glitter in there as well. Like I mentioned, this was only two coats, & I was fully expecting I’d need another coat at least. I am glad that I didn’t have to apply another coat though, because this polish was definitely difficult to remove with all that glitter!

I did use my Olive & June polish remover pot •PR• — which I’m overdue on doing a proper review of — which made the process slightly easier.

Now because this is an older special collection shade, it’s not in regular circulation — however, I did find the Gelaze version listed on the China Glaze website, so that’s definitely an option for those who prefer using gel!

& for the non-gel users, China Glaze I Speak Glitter from last years Holiday 2022 collection is very similar in colour as well, except it appears to have some other glitters added to the mix as well. For anyone who owns that shade ( or both), I’d love to know how the two compare!

What do you think about China Glaze I Soiree I Didn’t Do It from the 2015 Cheers collection? Do you remember when this collection was released ? Let me know all your thoughts down in the comments below.

I’m definitely feeling the glittery holiday vibes now, so I’m going to find all the glitter shades I can to share over the next few Sundays!

Have a great day loves! ♥︎

Black Friday Half Moons 🖤🌛

Happy Black Friday lovelies!

I suppose “happy” is a subjective term. But it is Black Friday, & that means that the holiday season is about to kick into high gear. I work in retail, though, which means I’m just trying to survive the weekend! So in honour of this crazy day, I thought I would create a black manicure to represent the day.

The polishes I used for this manicure are: 

  • Base Coat: Sally Hansen Miracle Gel Colour Grip Primer Base Coat 
  • Top Coat: Seche Vive
  • Mary Kay Salon Direct Moonlight
  • Essence Here’s My Number
  • Paper Hole Reinforcements

I wanted black nails, but with a twist, & I think this nail art look was just what I needed. I used a lot of top coat to smooth out Essence Here’s My Number as it’s a sparkle sand effect polish. I think the subtle pearlescent shimmer of Moonlight pairs really well with the more obvious sparkle of Here’s My Number. It’s a very chic look, which half moon designs always are to me, but then you have the black & white pairing, which just makes it feel even more chic.

Also it’s a very easy look, that anyone can do. The perfect nail art look for going into battle for retail war.

What do you think of these Black Friday half moons? Do you think this is as chic a look as I do? Let me know all your thoughts down in the comments below!

Happy Shopping darlings! 🖤

Jewel Toned Stained Glass Nails 💎

Hello my loves! I hope everyone is having a fantastic week so far. It has been absolutely freezing here on the East Coast of Canada. I’ve been wearing legging under my jeans & over the knee socks just to keep warm — crazy! Winter is definitely just around the corner, & I’m never ready for it when it comes.

Today though, I have a beautiful jewel toned design to share with you. I used to do stained glass nails a lot when this blog first started, but it’s been a while since the last time. After finding a few beautiful China Glaze polishes I haven’t worn in a while, I knew I wanted to pair them together in a stained glass look.

The polishes I used for this manicure are: 

  • Base Coat: Sally Hansen Miracle Gel Colour Grip Primer Base Coat 
  • Top Coat: Seche Vive
  • China Glaze OMG
  • China Glaze Fairy Dust
  • China Glaze First Class Ticket
  • China Glaze Don’t Get Elf’d Up
  • China Glaze Pull Me Close
  • Sally Hansen Ghouls Night Out
  • NailStuff.ca 9mm Mermaid Tail Liner Brush

How freaking pretty is this! These shades juts compliment each other so well… it makes me so happy! Originally I had just started with a simple colour block, but it really felt like I was lacking in something, so I decided to add on another colour (Pull Me Close) & the black outlining, & it just brought everything together perfectly.

Even though I’ve been wearing a lot of red nails just on their own, I’m trying really hard to not go too hard on the Christmas nail art\ quite yet. A little sprinkling here & there, but I know that December will be Christmas nail art heavy (I’m doing Glam Nails Challenge December again!), so I’m trying my best to get in everything else in the meantime.

What do you think of this beautiful jewel toned stained glass design? Do you think this is a fun look or do you prefer more simple nail art? Let me know all your thoughts down in the comments below.

&, to all my American followers, Happy Early Thanksgiving!

Enjoy your Wednesday lovelies ♥︎