SWATCH SUNDAY — Rimmel London 619 Pulsating

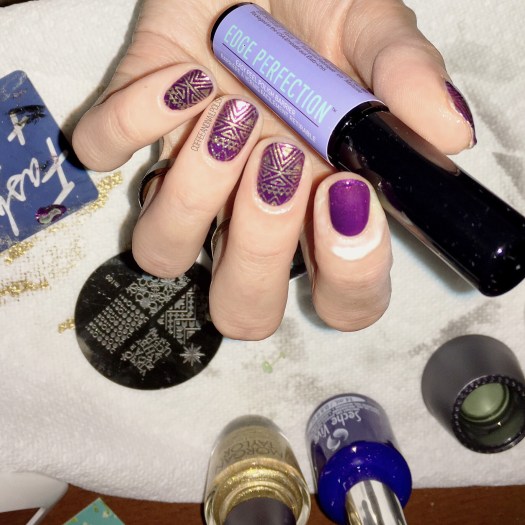
Happy Swatch Sunday Lovelies! Today I’m throwing it back–way back–to 2010 with my polish choice. I reached deep, deep into my stash & one of the few Rimmel London shades I own: 619 Pulsating. This polish was originally purchased at Zellars (who remembers Zellars?!) during my days working at the Mall. I bought it alongside 660 Climax for like… $1.99 each. I don’t really remember, but I do remember that the colour drew me in, but it was name was what made me buy it.

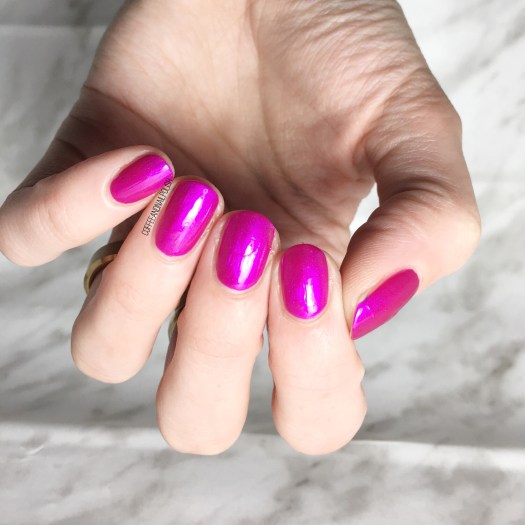
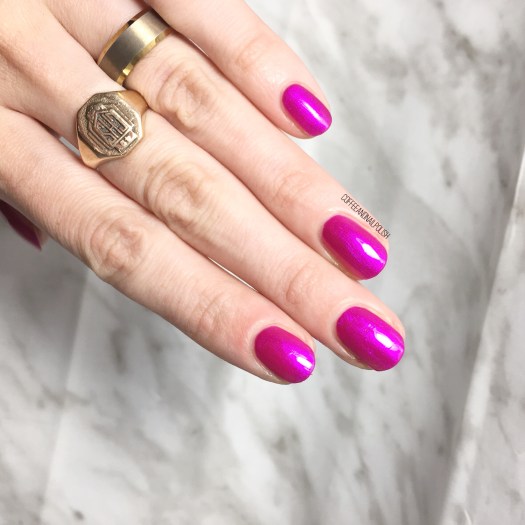
Does Rimmel London even make nail polish any more? I can’t remember the last time I saw one of their little mini bottles not in the clearance section. The internet is leading me to believe they don’t, which is a shame because these are really nice nail polishes. This was 1 coat for opacity plus top coat to really show some shine (& that shimmer). It’s pretty in the bottle, but once it hits the nail it literally glows. I mean, just look!

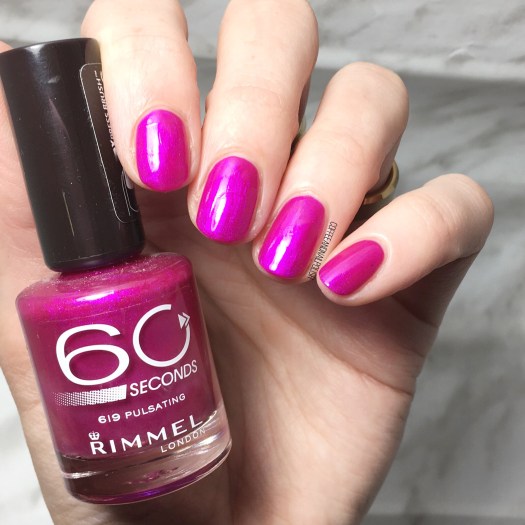
Check out that dusty bottle, oh my. 🙈 She’s definitely an oldie, but slapping it on you’d hardly be able to tell. The polish might possibly be thicker, I can’t really remember how it applied 8 years ago, but it’s not a bad thing. It goes on in one coat, & doesn’t look weird so I’ll definitely keep pulling it out again. Especially when I’m feeling something super duper bright.

<<
at polishes from deep in your stash have you played with lately? Do you have any Rimmel London shades? Let me know your thoughts in the comments below!

Gold Aztec Stamping

Happy Friday everyone! Starting off today with some more stamping. I’m still waiting on an order from Born Pretty Store to arrive (with some new stamping plates) so I guess in the mean time, it’s the same old ones again! This time I was feeling something a little tribal-esque so I decided to go with another one of my discontinued Born Pretty Store plates. I’m thinking I need to branch out & try some other awesome plates so if you have any suggestions of your favourites, leave them below!

The products used for this manicure are:

  • Base Coat: Nailtek 2
  • Top Coat: Seche Vive
  • Morgan Taylor Plum-thing Magical
  • Morgan Taylor Just Tutu Much
  • Edge Perfection Cuticle Barrier
  • Born Pretty Store Clear Jelly Stamper
  • Born Pretty Store stamping plate (discontinued) — this one has similar patterns.

So first off, Morgan Taylor Just Tutu Much is so freaking good for stamping. I mentioned this in my swatch post of these shades, but I’m really impressed. It’s so nice when you find polishes that stamp so fantastically over dark shades. I love it! It makes me really excited to have my new plates arrive, so I have a whole new variety of images to share!

What do you think of this stamped design? Where do you buy your favourite stamping plates? Let me know in the comments below! 💜

*PR SAMPLE* Some of these items were sent to me for review. However, all opinions are my own.
<These polishes were all gifted to me by Morgan Taylor as part of the Preen.Me #PreenMeVIP program>

Sweater Nails with Water Decals from NailsStuff.ca

I’ve written before about my obsession with creating sweater nails. It’s one of my favourite styles for this time of year! So when I received these water nail decals from NailStuff.ca, I couldn’t wait to have a new way to create sweater nails, especially ones that I could do a bit faster (& a little less messier).

You can find my first experience with water decals–also from NailStuff.ca–here.

For this manicure, the products I used were:

  • Base Coat: Nailtek 2
  • Top Coat: Seche Vive
  • Revlon Elusive
  • Quo by ORLY Breathable Power Packed
  • NailStuff.ca Christmas Fair Isle Water Decal in Grey/Black

These decals were super easy to use. There are a whole bunch of different designs you can chose from, & you can pair different ones together or wear just wear the decals alone.

My only struggle was applying top coat–you want to make sure you’re using enough top coat when you seal in your design. My Seche Vive was a little low so I dragged the same spot twice & it pulled on the decal a little bit (on my ring finger). Also I found that sealing in your design with top coat was best before trying to clean up any excess with acetone so you don’t accidents pull your water decal sideways on your nail (if it isn’t dry enough). Since I’m still relatively new to these decals, these issues are definitely all on me. I think as I practice more, I’ll learn more of these little application tricks.

what do you think of these water decals? Would you try out this sweater nail look? Let me know what you think in the comments below! ❄️

*PR SAMPLE* Some of these items were sent to me for review. However, all opinions are my own

SWATCH SUNDAY — Essie Topless & Barefoot

Welcome to the very first Swatch Sunday of 2018! 💅🏻 I’m starting off this year with something fresh & clean… which also happens to be Essie’s Colour of the Month: Topless & Barefoot! While bright & blinding colours can be fun–& who doesn’t love something glittery–something’s you need a good neutral in your life.

Essie Topless & Barefoot is a beige-y nude that leans slightly pink. For full coverage, it took two coats plus top coat to help it completely level out. This shade is just very Essie to me. Even though I have a ton of shades from them in a whole variety of colours, when it comes to nude or neutral shades I feel (at least for me) like Essie is Queen.

I really really really like Topless & Barefoot. This is the first time I’ve actually worn it (I won it this Summer as part of the Essie Suddenly Summer contest.) Usually my go to Essie nudes are Sand Tropez or Cocktails & Coconuts so I like having more options. This is especially important for since my maternity leave is almost up (I know, right?!). Since my store closed while I was on leave, I now get to start the job search for the first time in 7 years! So some job interview friendly shades are must needed!

What do you think of Essie Topless & Barefoot? Do you have a favourite nude/neutral shade you love to wear for important events? Let me know in the comments below!

Holo Stars

We’ve come to that weird time period betweeen Christmas & Valentines Day where I always feel like I have zero inspiration & it feels just a little too early for hearts. I actually created this design before Christmas & a potential New Years design but never shared it so today felt like a good day! ✨

For this manicure, the products I used were:

  • Base Coat: Nailtek 2
  • Top Coat: Seche Vive
  • Sally Hansen Complete Salon Manicure Pat on the Black
  • ORLY Mirrorball
  • Sally Hansen Hard As Nails Black Heart
  • Star print stamping plate (no idea where from)
  • Clear Jelly Stamper from Born Pretty Store (item #24059)
  • Edge Perfection Cuticle Barrier

I really loved how these turned out, so much I wore them for a couple days before I thought to take a picture (hence the tip wear.🤦🏻‍♀️) I found this stamping plate in my collection of plates & had never used it before so I gave it a try & it turned out really nice. I think it’s from the Salon Express Nail Art Stamping Kit which I found at Dollarama almost 5 years ago (before this blog even existed!) & was my first foray into stamping.

What do you think of this design? What designs do you like to do this time of year when it’s too early for Valentine’s Day? Let me know your thoughts in the comments below!