SWATCH SUNDAY — Reese’s x Sally Hansen InstaDri Feeling Hungry

Hello lovelies & happy Sunday. Well, Sunday. Santa had a late present for our house — the stomach flu. My husband & I have avoided it so far, but it’s struck everyone else down. Ugh.

Today I’m sharing a new(ish) shade, which was released this past Halloween. I haven’t been buying much polish lately, but when I saw clearance at my local Shoppers, I couldn’t say no! I actually picked up two shades, & will share number two next week!

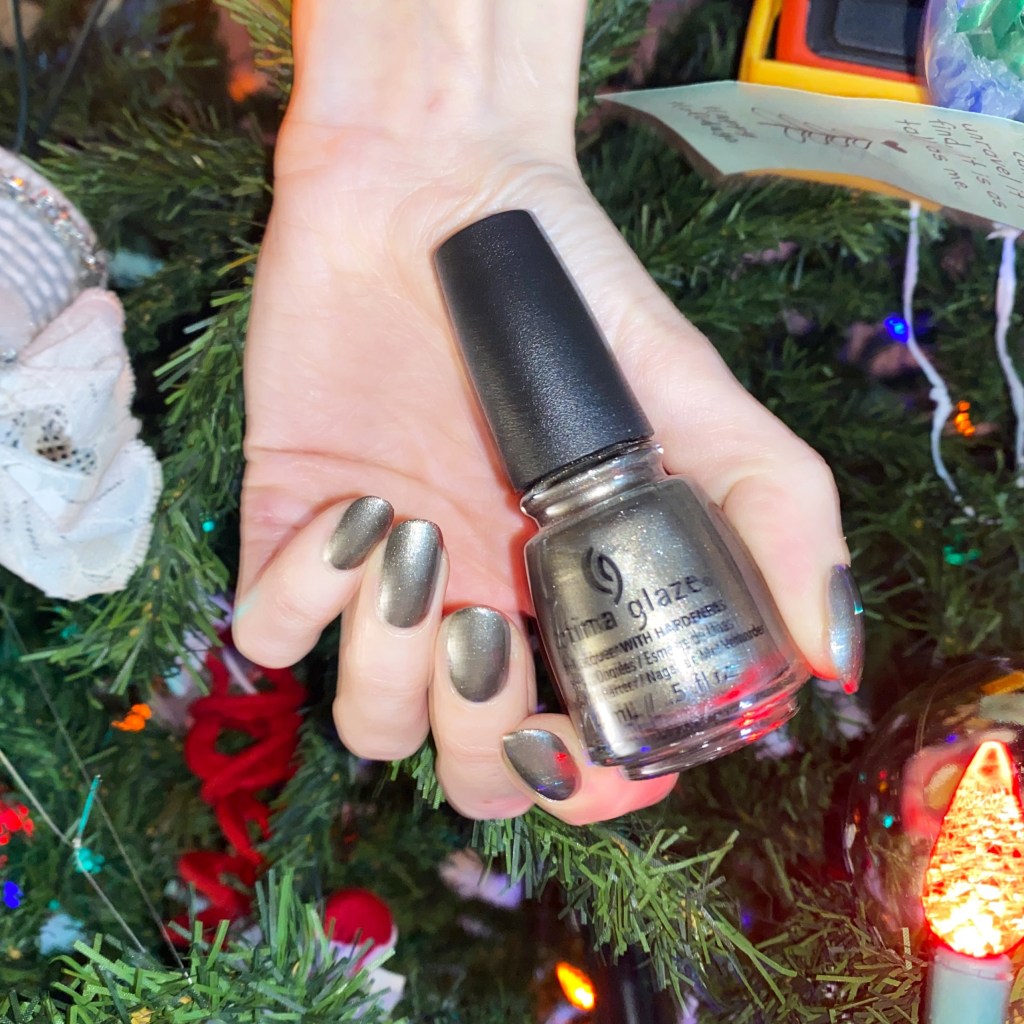
Today’s pick: Reese’s x Sally Hansen InstaDri Feeling Hungry.
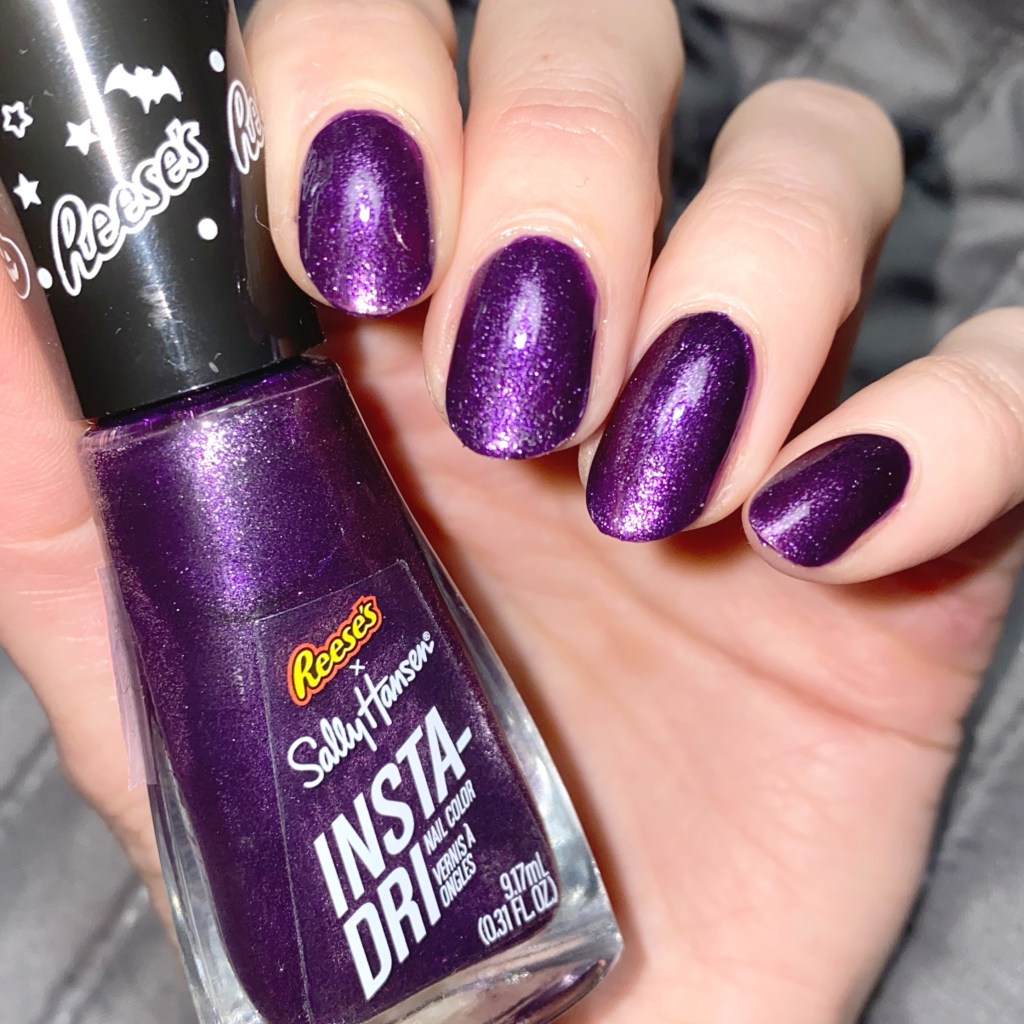
2 coats + Top Coat

I’m such a sucker for a purple, & as soon as I saw this crushed metallic purple, I knew I needed it. I’ll be honest, I didn’t pay too much attention when this collection was first released, but I should have because I was missing out on this polish!

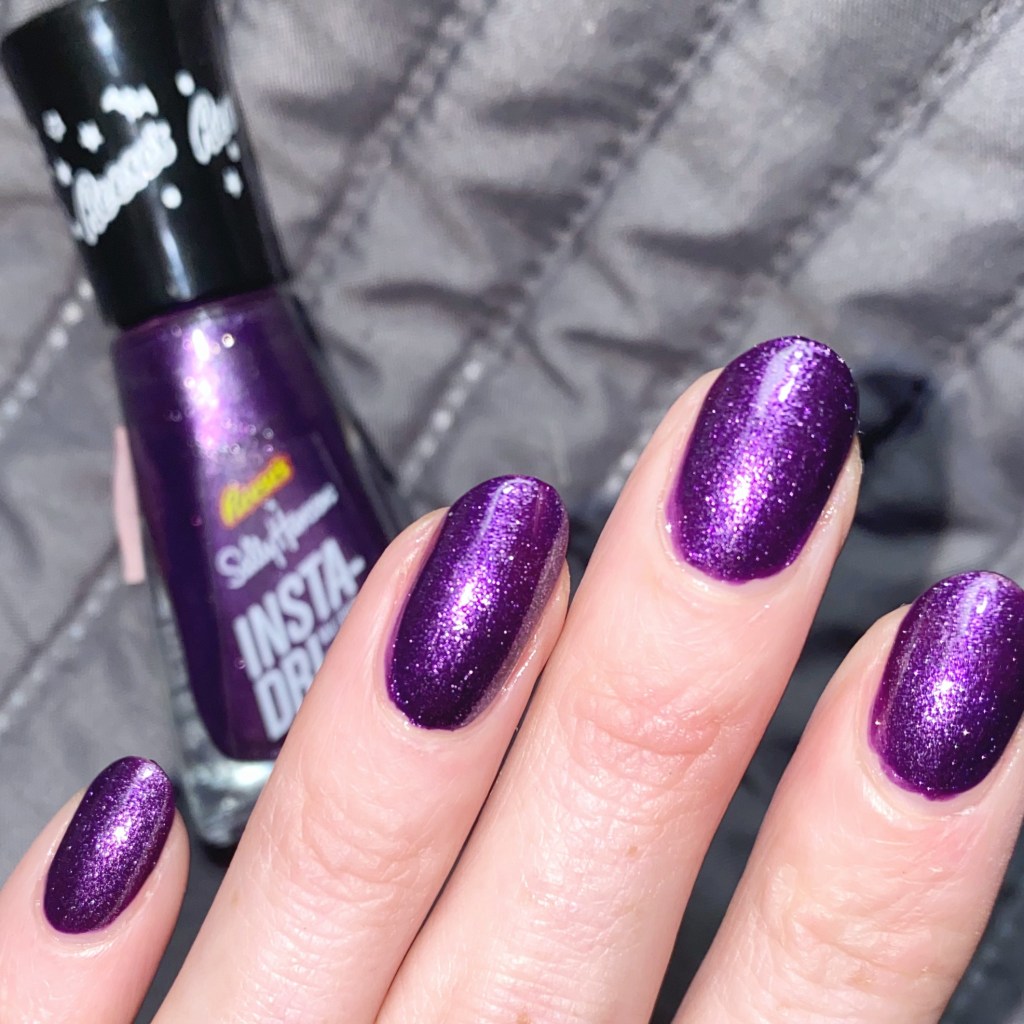
Formula is smooth, easy to apply, & coverage is about what you would expect — one coat is too little, but two coats is perfect. Make sure your getting your second coat down near your cuticles though, or else it creates a weird effect.

I also love the InstaDri brushes, because I find they make application easy. (Unless you’re painting them at 11pm with not enough light & create a wonky cuticle line.)

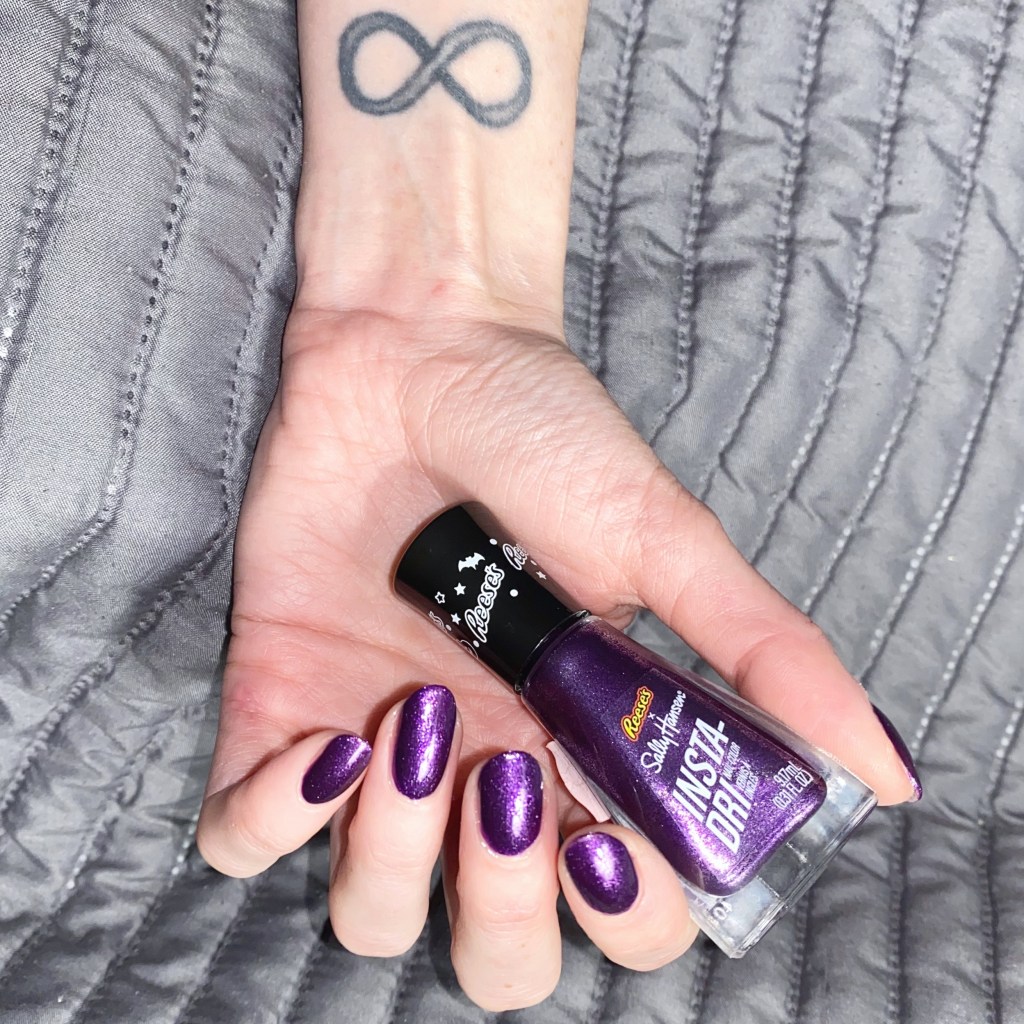
Sadly, this shade was a limited release for Halloween, but check the clearance sections wherever you buy nail polish, because you might get lucky! I purchased this bottle for only $3CAD at my local Shoppers Drug Mart.

What do you think about Sally Hansen InstaDri Feeling Hungry? Do you remember these Reese’s themed shades? Let me know your thoughts in the comments below!

🖤

SWATCH SUNDAY — China Glaze Slay Bells Ring (Holiday 2017 The Glam Finale Collection)

Hello lovelies & happy Sunday! The last Sunday before Christmas! I can’t believe we just blinked & December (& 2024) is basically over. It’s kind of crazy the way this year has just sped by. This year has been… a lot. But I have a good feeling about what 2025 is going to hold.

Today I pulled a Christmas shade from way back in 2017. I got this beauty as part of a two-setter at Winners (or Marshall’s) for like $5, I think. So I’m excited to share, because it’s not usually a shade I would grab for the Holidays. This is China Glaze Slay Bells Ring.

3 coats (probably only needed 2….) + top coat

Slay Bells Ring is a beautiful dark gunmetal grey, which applied smoothly & with minimal streakiness. The formula was easy to apply, & dried quickly. I probably would have been fine with only 2 coats but I thought maybe a third would make it darker. It didn’t.

This colour is beautiful, but I think the reflective quality of it makes it so unique. I posed in front of my Christmas tree, & it very easy reflected the lights which made it so beautiful!

I could definitely see this being perfect for New Years Eve with some holographic glitter or flakies applied overtop. It would give Mirror Ball easily! (& now I’m getting ideas for my New Years Eve celebrations.)

What do you think about this shade Slay Bells Ring from China Glaze? I can’t believe I haven’t bought any Christmas/Holiday polishes this year (or asked for any from Santa). I don’t know if I’m just not feeling the Christmas spirit, or just underwhelmed by the polishes I’ve seen. Either way, I’m glad I still have lots of shades to wear from years past.

Happy Sunday!

🖤

GLAM NAILS CHALLENGE DECEMBER (2024) — Ornaments 🎄✨

Hello loves & happy Friday. It’s a busy Friday here, & Christmas is so close. It is also time for the next prompt of Glam Nails Challenge December which is ornaments. & I had the perfect nail art stickers from NailStuff to create this easy look!

The polishes I used for this manicure are: 

How cute are the holographic gold & white nail art stickers?! I chose a darker base shade so they would really pop against it & show off! & then used a thick & glossy top coat to seal them in best I could so no edges would be pulled. & I just think they look so beautiful — plus they were simple easy to do. & that holographic finish really catches people’s attention.

What do you think about this ornament nails (poised perfectly in front of my own decorated Christmas tree)? I do love a simple nail art look sometimes & there is nothing less time consuming than nail art stickers!

Don’t forget to pop on over to Instagram & follow all the amazing designs using #glamnailschallengedec24.

🖤

GLAM NAILS CHALLENGE DECEMBER (2024) — Christmas Plaid

Hello loves & happy Monday! It’s a sunny albeit chilly Monday here. Definitely feeling like December — although a sprinkling of snow might have been nice. But today is the next prompt for Glam Nails Challenge December, & it is Christmas plaid.

I’m not 100% sure what a Christmas plaid is, though I would assume one done in your typical Christmas colours would make sense. So that’s what I did for today’s look! & they are certainly feeling Christmas-y.

The polishes I used for this manicure are: 

  • Base Coat: NailStuff Essentials Base Coat *
  • Top Coat: Nail Stuff Essentials Quick Dry Top Coat *
  • Santee Magnetic Nail Polish Sandburst
  • Essie Bordeaux*
  • Essie Off Tropic *
  • NailStuff Essentials White Dove *
  • Quo by Orly Black Striper
  • Nailstuff.ca Mermaid Tail 7mm liner brush
  • Largest size from NailStuff.ca Dotting Tool Trio 

*PR/gifted

Ooooh I love how these look. I tried to give this magnetic shade a velvet finish. Honestly think I might have to invest in one of those fancy U-shaped magnets in the new year if I’m going to be playing with my magnet shades more frequently.

I love the hold with the plaid pattern over top, as opposed to using the gold as an accent.

What do you think about my Christmas plaid nails? Are you a fan of this look? Let me know all your thoughts on this look, & if it feels Christmas-y to you.

Don’t forget to pop on over to Instagram & follow all the amazing designs using #glamnailschallengedec24.

🖤

SWATCH SUNDAY — Color Club Magnet Forces Midnight

Good morning loves & happy Sunday. I hope everyone’s week was good, & if not… I hope the week ahead is better. It’s Sunday, so you know what that means — it’s Swatch Sunday!

I was searching through my stash, trying to find a fun polish to wear & ended up stumbling across some of the Color Club magnetics in my stash. I’ve been seeing so many beautiful magnetic polishes done in the velvet style, so I decided I wanted to see if I could make one of my older magnetic polishes do the same.

2 coats + top coat

First off, let’s start with the general facts on this shade. Color Club released these magnetic shades back in early 2012. The original collection came with 6 shades, & each one had their own magnetic which would create a fun pattern on the nail. You can see swatches of the collection from back then here on Scrangie.

The formula is smooth, metallic & easy to apply. I’ve worn this shade on its own, unmagnetized before, & I find the effect really strong compared to some other shades released back then. Which was why I was excited to try out creating a velvet effect!

I don’t have one of those fancy horseshoe magnets that have gone viral, so I used my wand magnet that I have from Starrily, & moved it around the perimeter of my nail to get the effect you see above, including after I applied my top coat.

They’re not perfect—& definitely look better in motion—but they’ve given new life to this polish. It has gotten me excited to try this with my other magnets so I may do a whole series of swatching these old polishes — if only to alleviate a little bit of my FOMA when seeing those beautiful Mooncat Star Wars magnetic polishes.

Do you remember these Color Club Magnetic Force polishes from 2012? Do you have any in your stash? What was your favourite magnetic polish release of the early 2010s?

If you have any old magnetic polishes kicking around, I definitely recommend pulling them out again! Grab a magnetic, & see what kind of fun things you can make them do!

Happy Sunday

🖤