Gold & Plum Splatter Nails

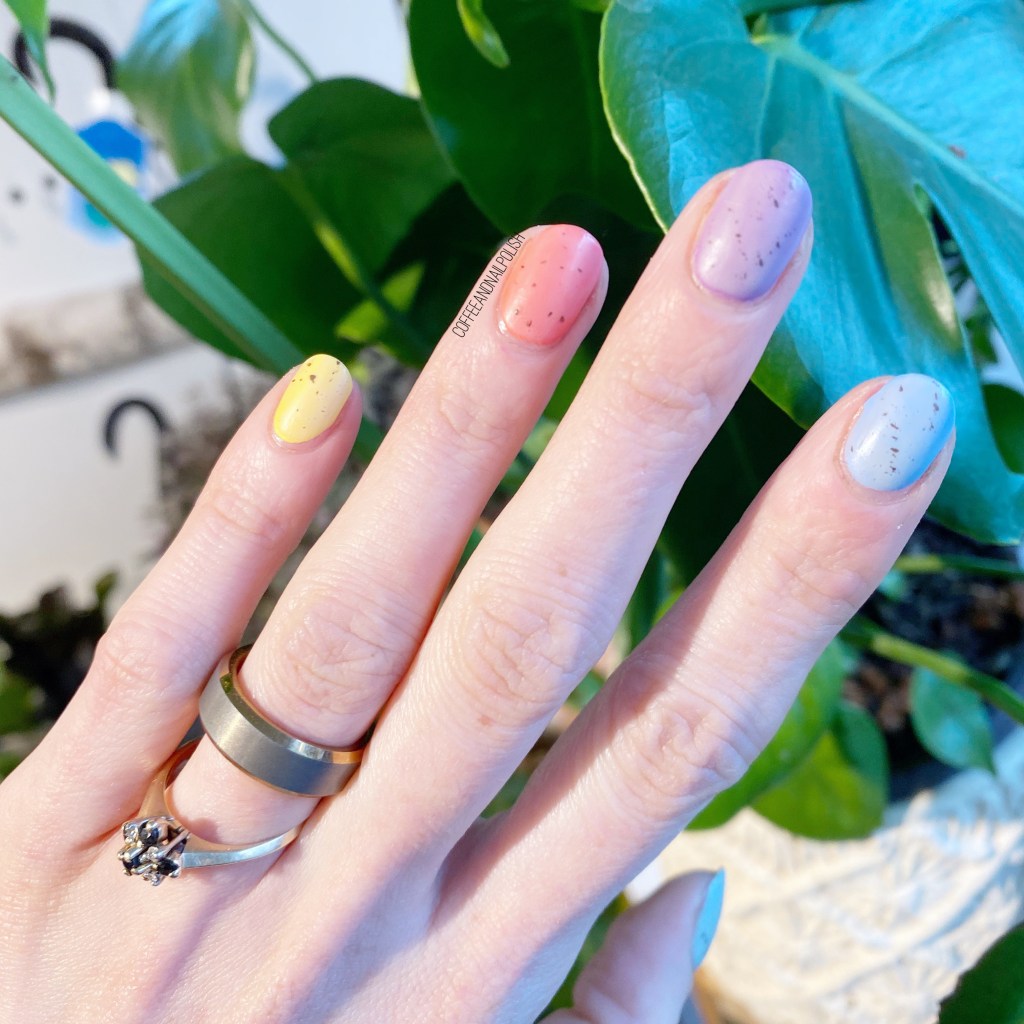
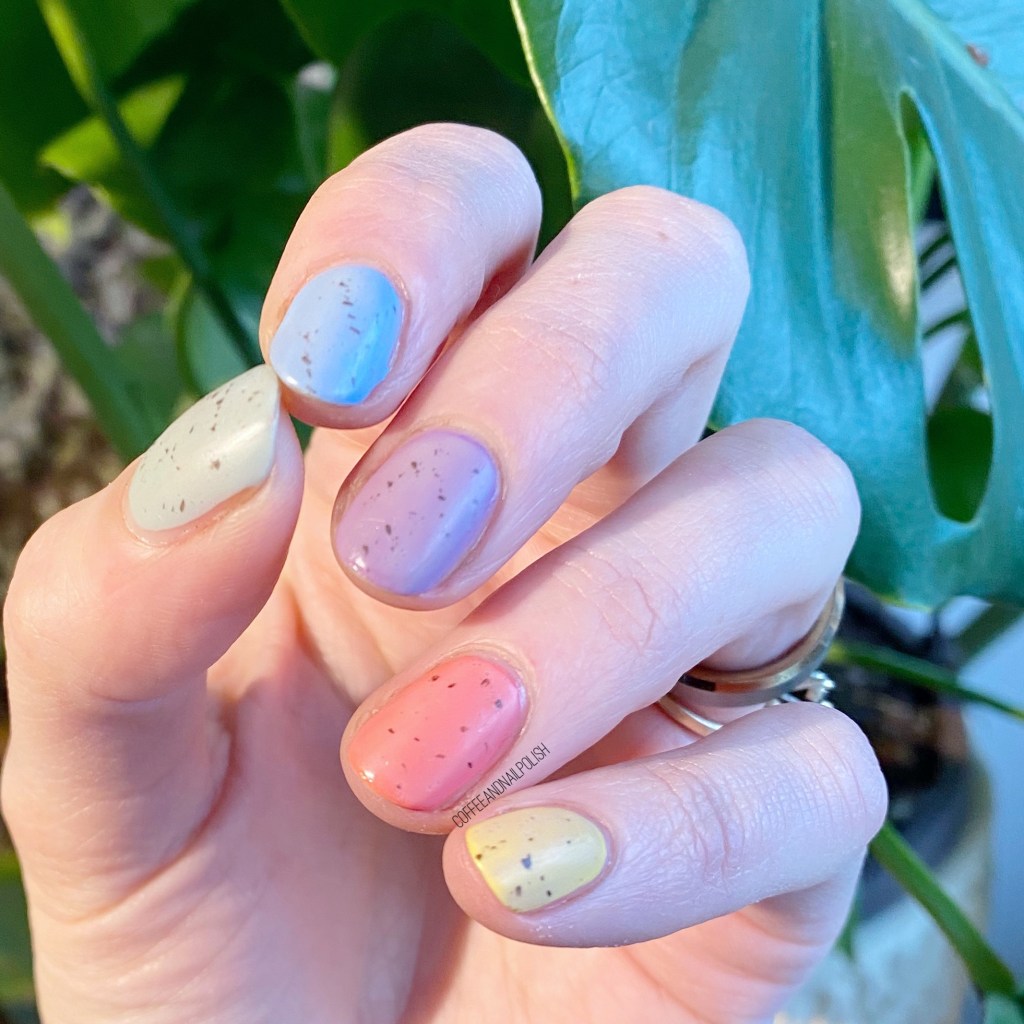
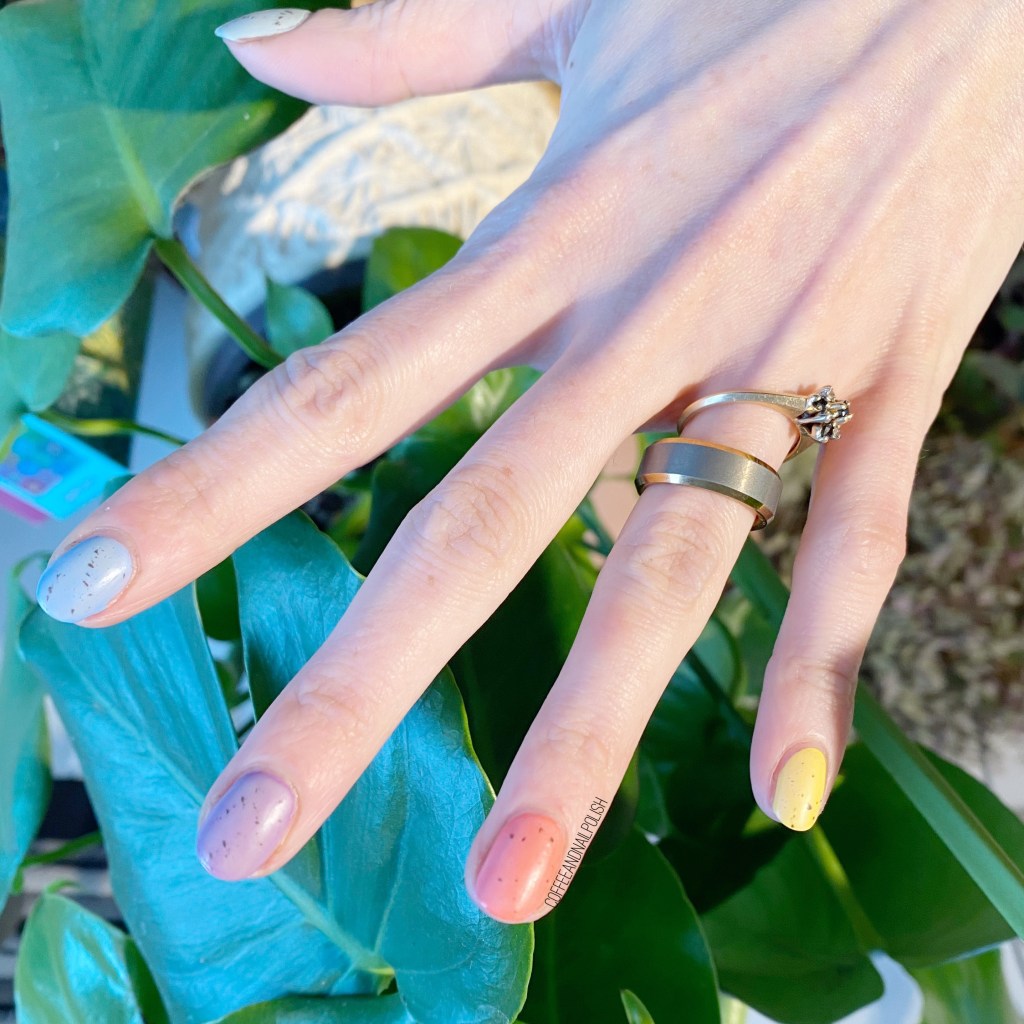
Hello lovelies & happy Tuesday! A beautiful Autumn Tuesday at that.

Today I’m showing off yet another fun splatter look, this time inspired by a tutorial by @nailsdnt on Instagram. She used a stamper & cuticle oil to achieve a fun bubbly splatter look, & as soon as I saw her tutorial I knew I needed to give it a try! I just love a good splatter design, & this seemed like such an easy way to achieve it.

The polishes I used for this manicure are: 

  • Base Coat: Essie Hard To Resist Glow & Shine 
  • Top Coat: Essie Gel Setter
  • Matte Top Coat: Sally Hansen Miracle Gel Matte Top Coat
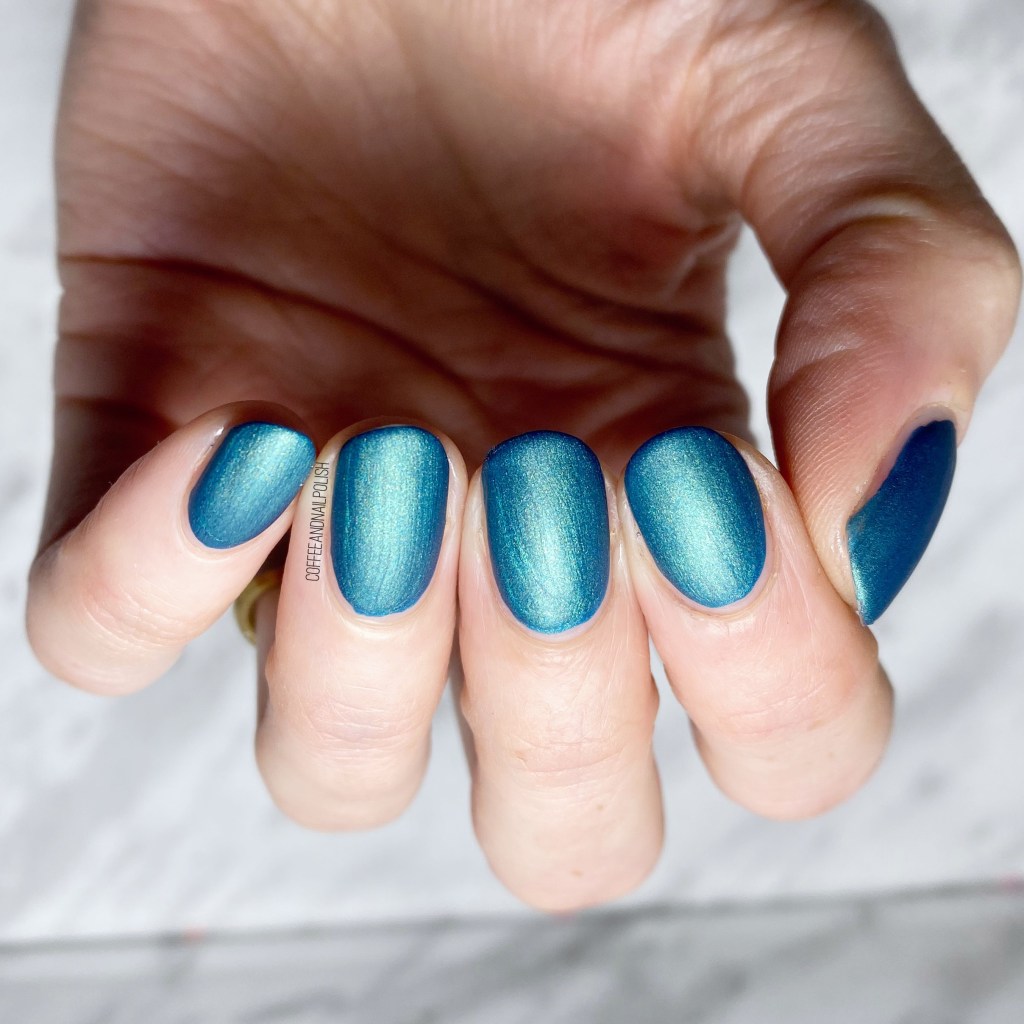
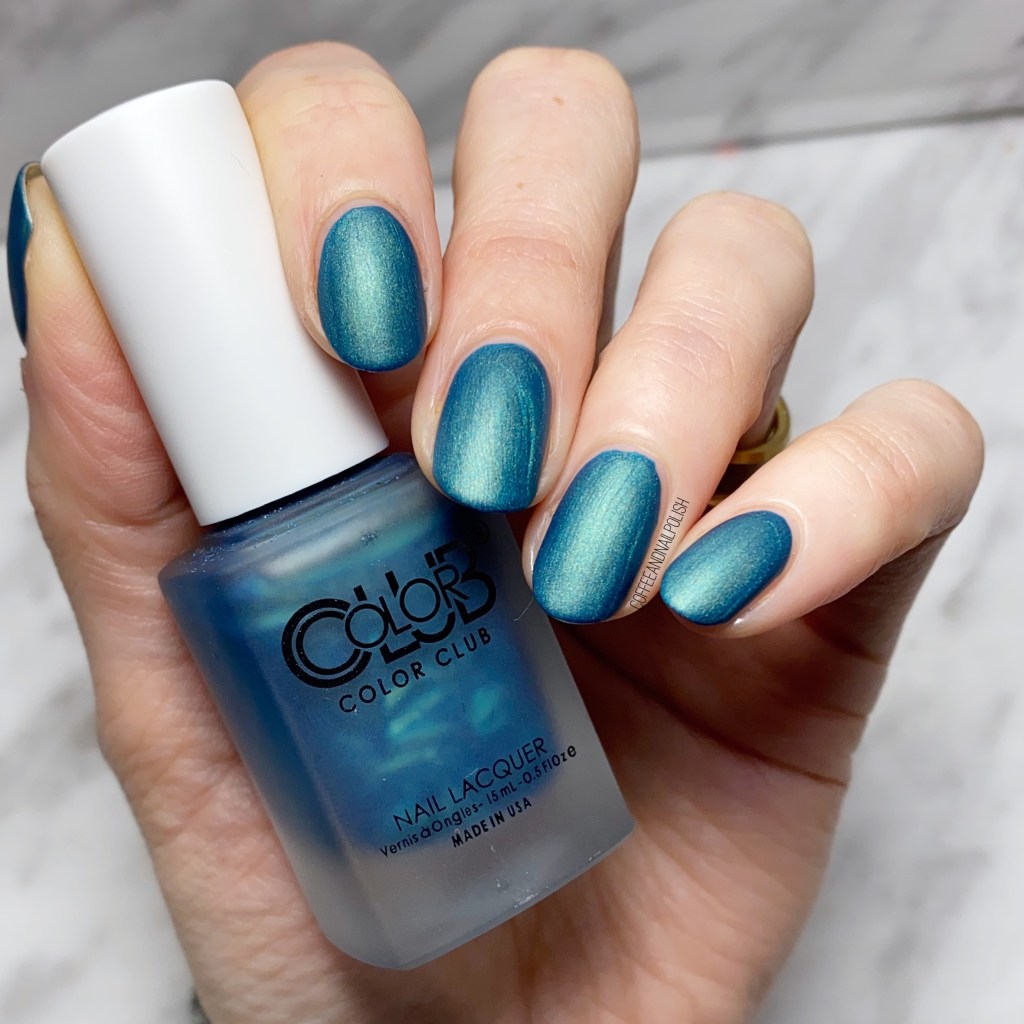
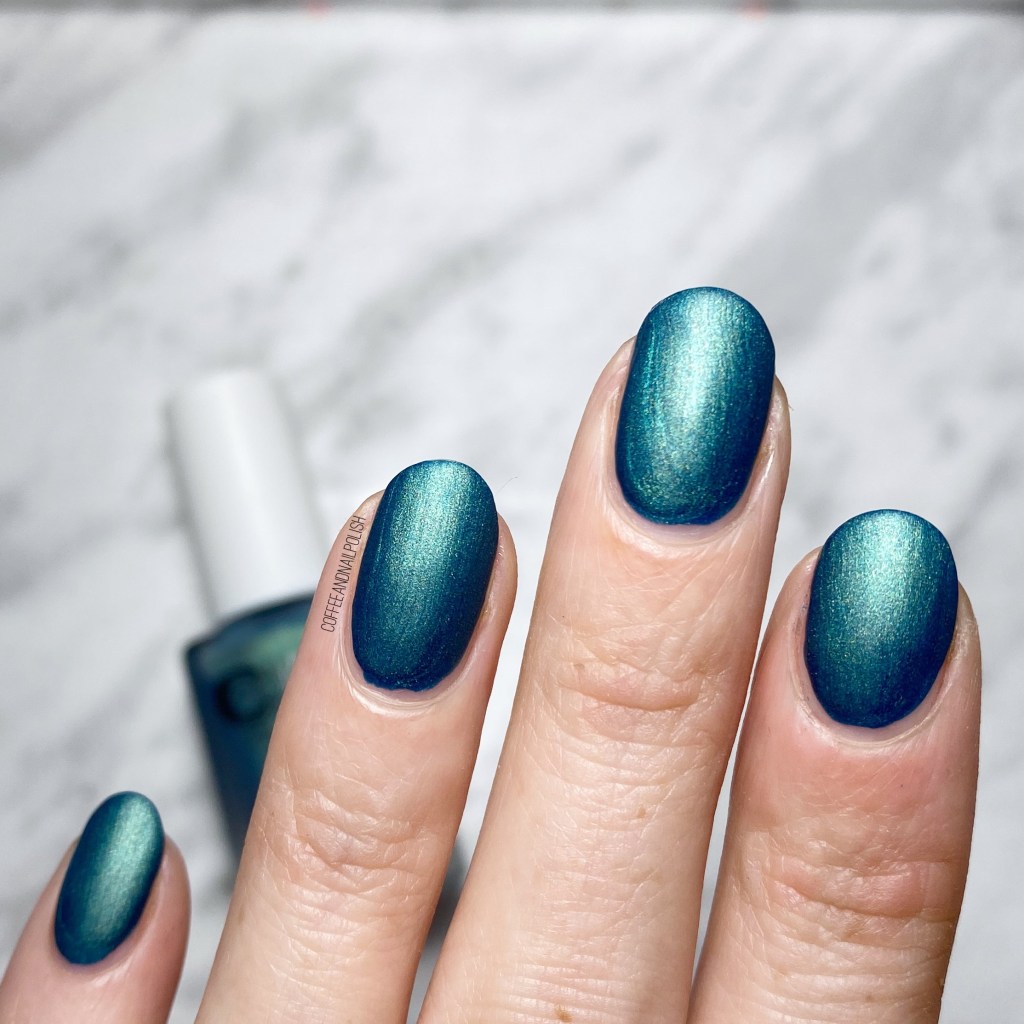
  • Color Club Twice Bitten
  • L’Oreal Feeling Kilty
  • Nailstuff.ca clear stamper
  • Revlon Cuticle Oil

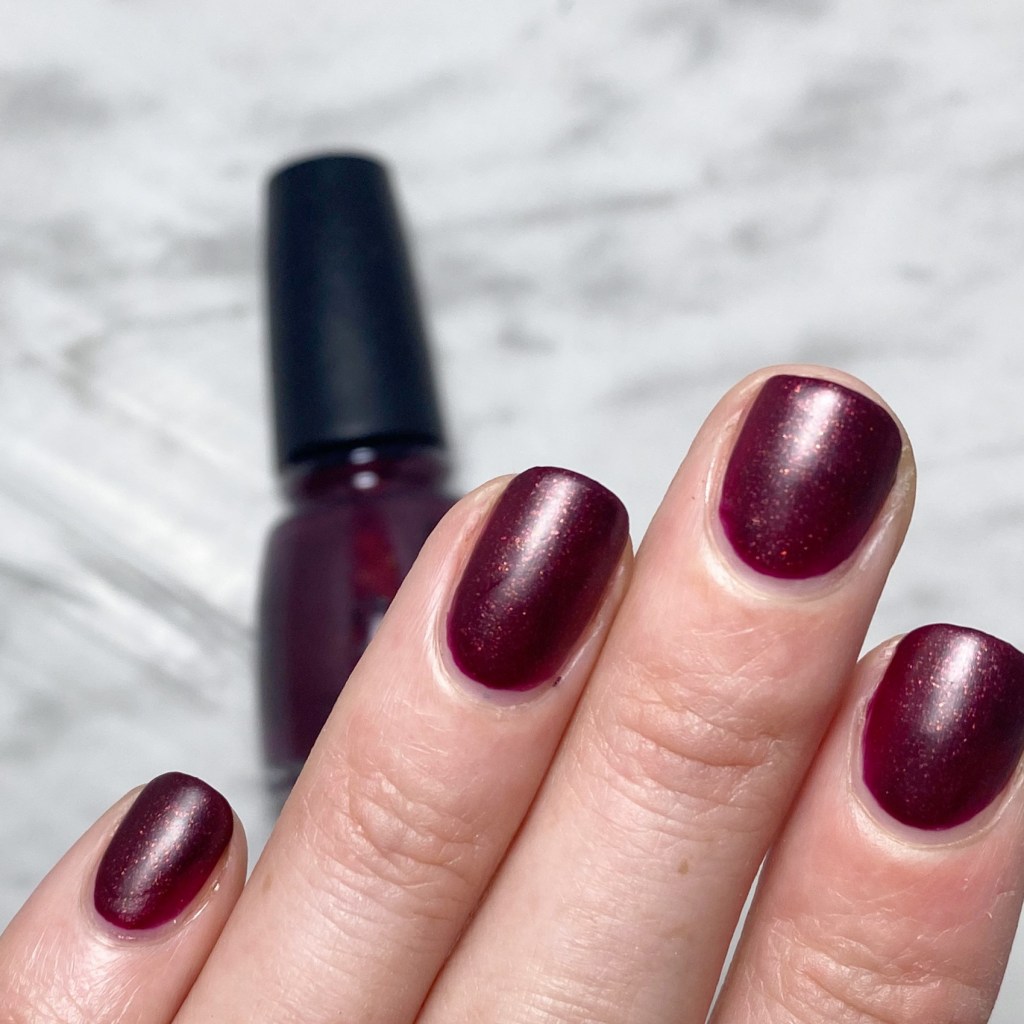
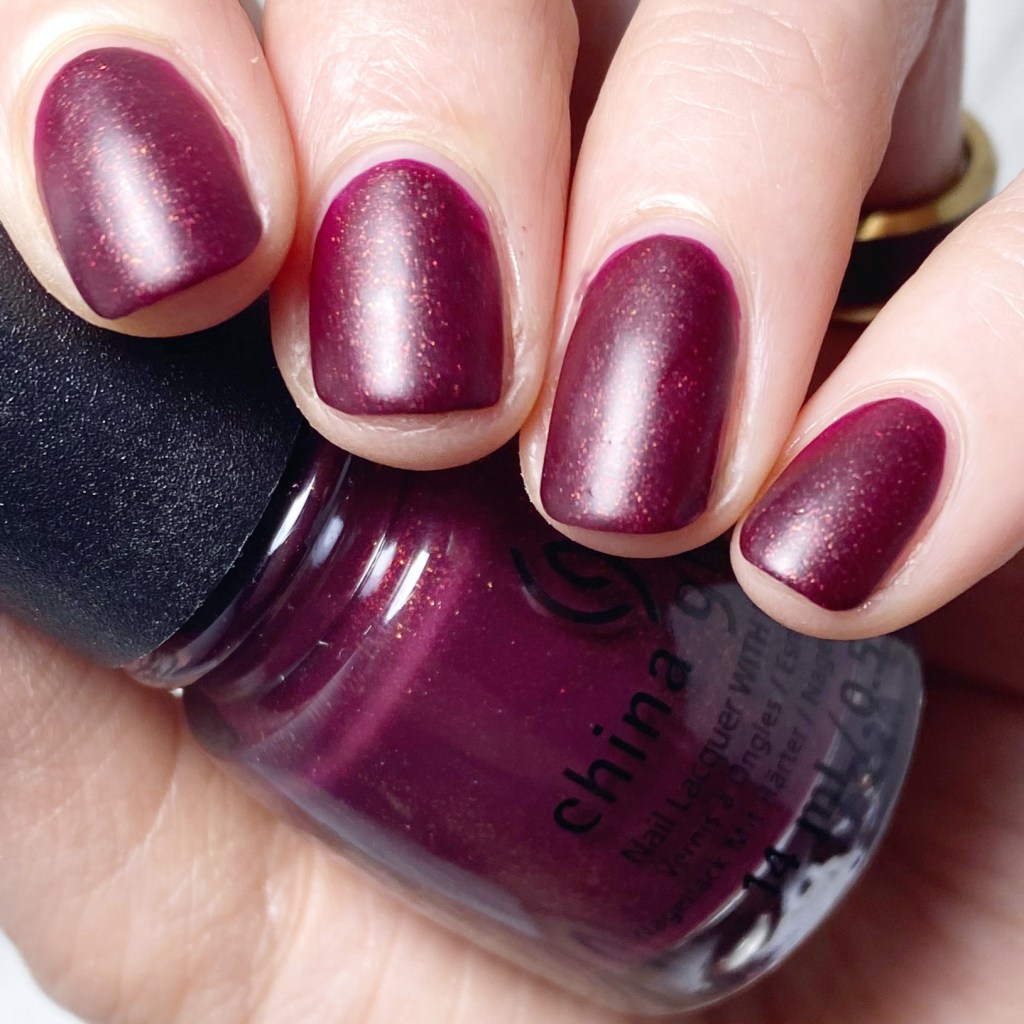
So obviously, first thing is first: I apologize for my weird cuticle area. Between an older top coat, & some weird matte top coat effect, it kind of gave me a messy finish. I’m definitely due for a new bottle of top coat.

Second, as you can see my nails did turn out pretty cool, although there are some differences between my splatter finish & the original design. While the original tutorial used a nail cuticle pen, I chose to use my bottle of Revlon cuticle oil, which I think lead to too much oil on the stamper. Her’s had more of a bubbly effect, while mine reminds me more a classic splatter.

But either way I love the end result. It’s so pretty! & the matte top coat just makes it look even more beautiful — I think the matte top coat just completes the look.

What do you think about this look? Are you enjoying these splatter nails I’ve been wearing lately? Let me know down in the comments below.

SWATCH SUNDAY — China Glaze Kiss & Spell

Hello lovelies & happy Sunday!

I hope everyone is enjoying the second week of September so far. 🍂🍁 The weather here here has been that perfect mix of no humidity & slightly cooler temperatures that always gets me excited to get dressed in the morning!

I’m also excited because today I’m sharing another dark beauty of a polish, which was originally released as part of the 2020 Halloween Spellbound collection: Kiss & Spell.

2 coats, no top coat.

How pretty is this beautiful purple-y burgundy packed with red & golden flakies. Kiss & Spell takes two coats for full opacity, & dries down to a lovely matte finish. I didn’t have any issues with application, which can sometimes happen with matte shades, & I found it dried relatively quickly. Of course, if I was wearing this for a few days, I would probably still apply a quick dry top coat, & then apply a matte top coat over that as well.

Sadly, while beautiful, the matte finish definitely hides the beauty of the glitters — applying a shiny top coat definitely shows off those flakies. You can see in my bottle shot how gorgeous the colours are!

I know a lot of people are still in Summer mode, & I don’t blame them, but wearing this polish makes me realize just how freaking excited I am for Fall, & Halloween! There is something about a deep reddish burgundy shade that is perfect for this time of year as we get those cooler mornings & evenings. This just makes me happy for knee high boots, sweaters, & tights. Plus all that Halloween candy that is just calling my name!

Do you remember China Glaze Kiss & Spell from the Halloween 2020 collection?

It feels like so long since that release. I found this beauty last Halloween at my local Winners, so if you missed out on this shade upon first release, definitely check out your local Winners/Marshalls for a lingering bottle. It is a perfect Autumn shade, & definitely perfect for spooky season.

Have a lovely day!

SWATCH SUNDAY — China Glaze Shocking Pink

Hello lovelies & happy Sunday!

It’s the first week of June, which means it’s only a couple weeks of Summer here in this part of the world. & that means I want all the neon I can get my hands on!

Todays Swatch Sunday pick is a classic from my stash: Shocking Pink. Yep… we’re all about the pink again!

3 coats, matte top coat

First things first, the formula on this shade was a bit complicated to work with. I ended up needing 3 coats for full coverage, but it was a bit thick, & had a little bit of trouble smoothing (you can see it a bit in some of the pictures.) Like many neons, it does dry to a soft matte on its own. I added matte top coat to smooth things out while keeping the matte finish the polish has.

The colour is definitely tricky to photograph. If you look online, I feel like everyone’s swatches of this are just a little bit different. It looks lighter, or darker, depending on the lighting. The colour though, is definitely Summer in a bottle. It’s bright & blinding, & the kind of pink you throw on your toes while laying on the beach, sunglasses on, soaking in the Summer (while wearing a high SPF, don’t get too crazy!)

This was the first time, that I can remember, I’ve put this shade on as a full manicure — I’ve usually only grabbed it for nail art accents. With the bit of trouble I had applying it, I’m not 100% sure it would be my first pick for my nails, as I change them so often. But I definitely think it is a great pedicure choice, & I’m definitely saving it for my next one.

I found a few places where you can purchase Shocking Pink:

Do you have China Glaze Shocking Pink in your stash?

Let me know what you think about this shade down in the comments below, & share your favourite neon shade for Summer!

Speckled Easter Eggs

Hello loves & happy Tuesday! I hope everyone is having a lovely week so far. It’s almost Easter, so I thought it was about time to share a somewhat Easter-y design. & what is more fun than a speckled Easter egg design!

I literally do a version of this look every year, & if never gets old to me. It’s such an easy & festive look to do. Plus I always joke since I can’t actually eat mini eggs, wearing them on my nails is the next best thing!

The polishes I used for this manicure are: 

  • Base Coat: Sally Hansen Good. Kind. Pure Hardener
  • Top Coat: Essie Speed Setter
  • Matte Top Coat: Sally Hansen Miracle Gel Matte Top Coat
  • Julep Alyssa (thumb)
  • Sally Hansen Miracle Gel Sugar Fix (pointer)
  • Essie Play Date (Middle)
  • Essie Gel Couture On The List (ring)
  • Sinful Colors Yolo Yellow (pinky)
  • Wet N Wild 2% Milk
  • OPI How Great Is Your Dane?
  • Fan Brush

I’ve tried a few different versions of this look over the years, like I said, but (I think) this was my first time attempting using a fan brush for the speckled look. Usually I used the saran wrap splatter look, but I think I like using a fan brush even more! It gives a much daintier speckled effect. I think this look is much more true to actual speckled eggs, & I’m obsessed.

What do you think about this speckled nail look? Would you wear these for your own Easter festivities? Let me know all your thoughts down in the comments below!

SWATCH SUNDAY — Color Club Matte About You

Hello lovelies & happy Sunday! Who else is excited for another Swatch Sunday post?

I’ve been digging through my stash lately for the most perfect holiday-worthy polish. I bought a few fun Color Club polishes last year at Winners, after Christmas, but haven’t really had a chance to wear them. I decided to pull one of those shades — Color Club Matte About You — & it might be the perfect jewel toned teal for the holidays. I’m

2 coats, no top coat.

The formula on this shade is pretty thick, but still applied fairly easily. There is a really nice shimmer, the matte finish is very nice. It also dried down fairly quickly — not too quick that it was impossible to apply the polish evenly, but quick enough you don’t have to wait around forever for it to dry.

Seriously, how pretty is this polish!?

You can see from the macro shot how lovely the metallic finish is. Couldn’t you just imagine a flakie topper over this shade? It would be so gorgeous! I also think it would be absolutely fabulous as a base for some sweater/snowflake stamping.

What do you think about the beauty of this polish? I did find a listing for it on NailPolishCanada.com, so it doesn’t seem like an impossible to find shade.

Let me know your thoughts down below on your opinions on this polish, & what polishes you look forward to wearing for the holidays? I’m always looking to add more to my Christmas list for Santa!