Golden Drag Marble

Hello lovelies & happy Monday. Well, as happy as a Monday can be in November. They’re calling for snow today on my side of the country, but not sure if it’s going to amount of anything. But… can it be Summer again? I miss Summer.

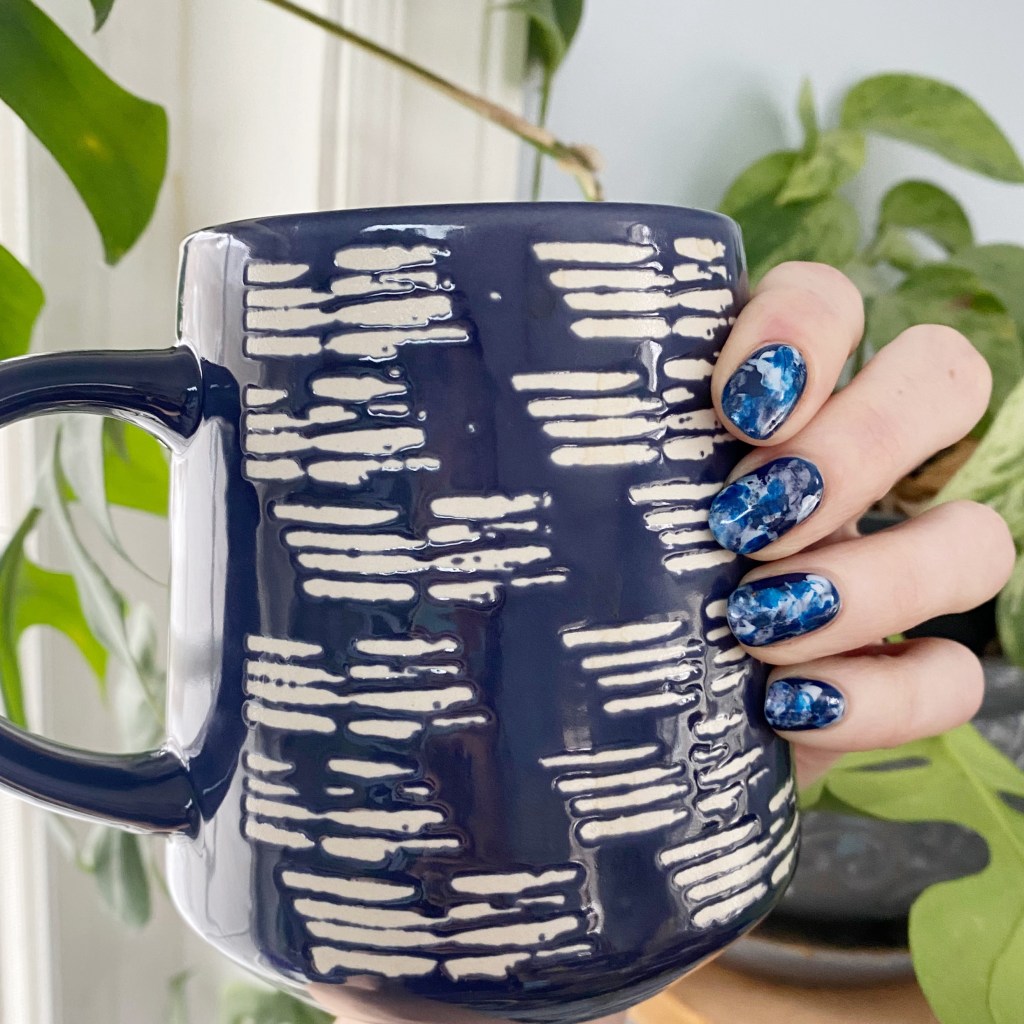
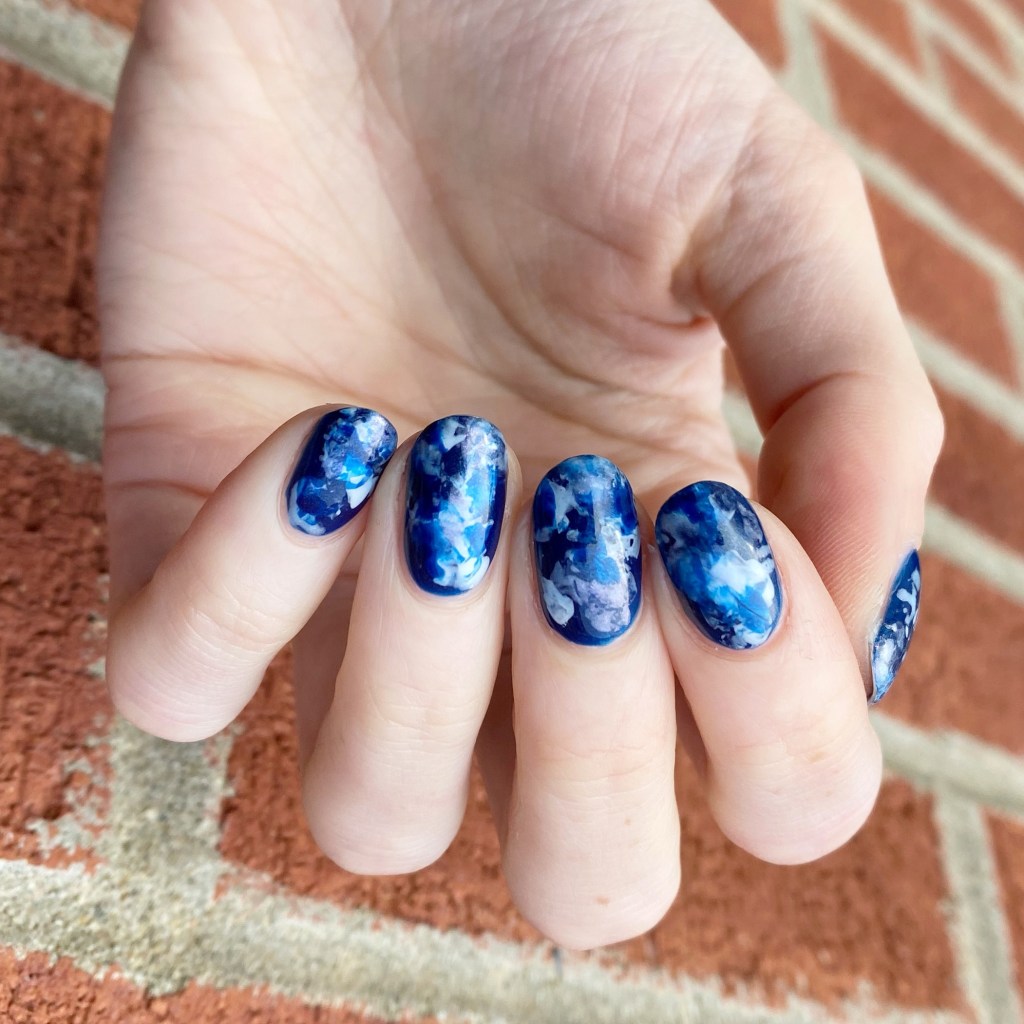
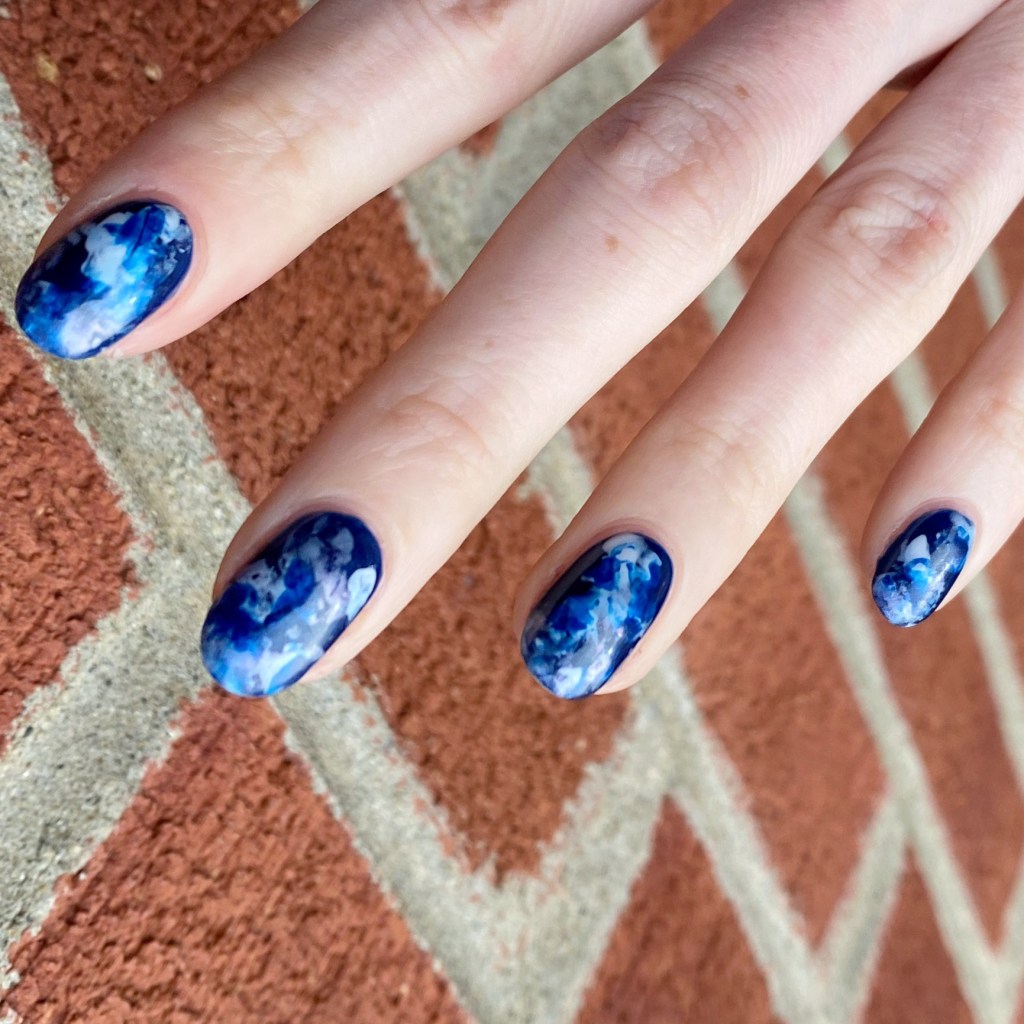
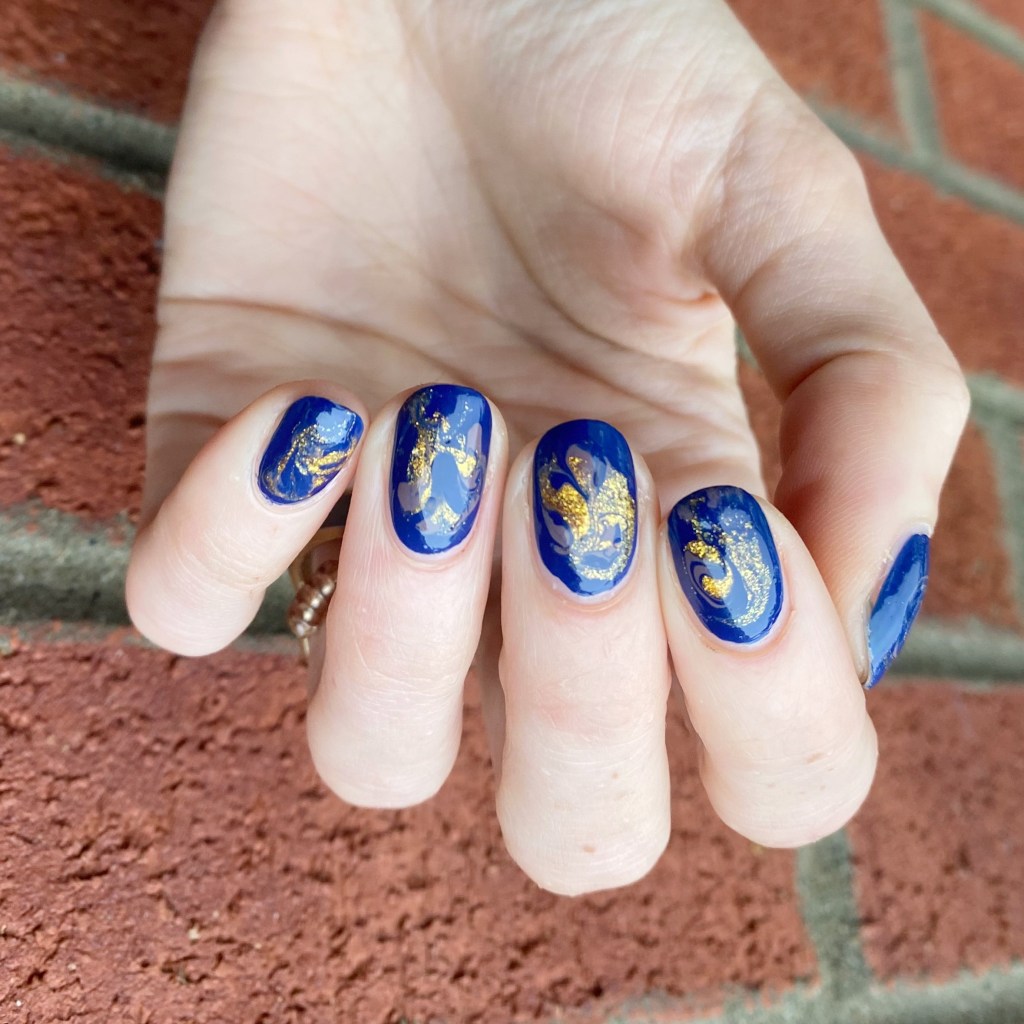
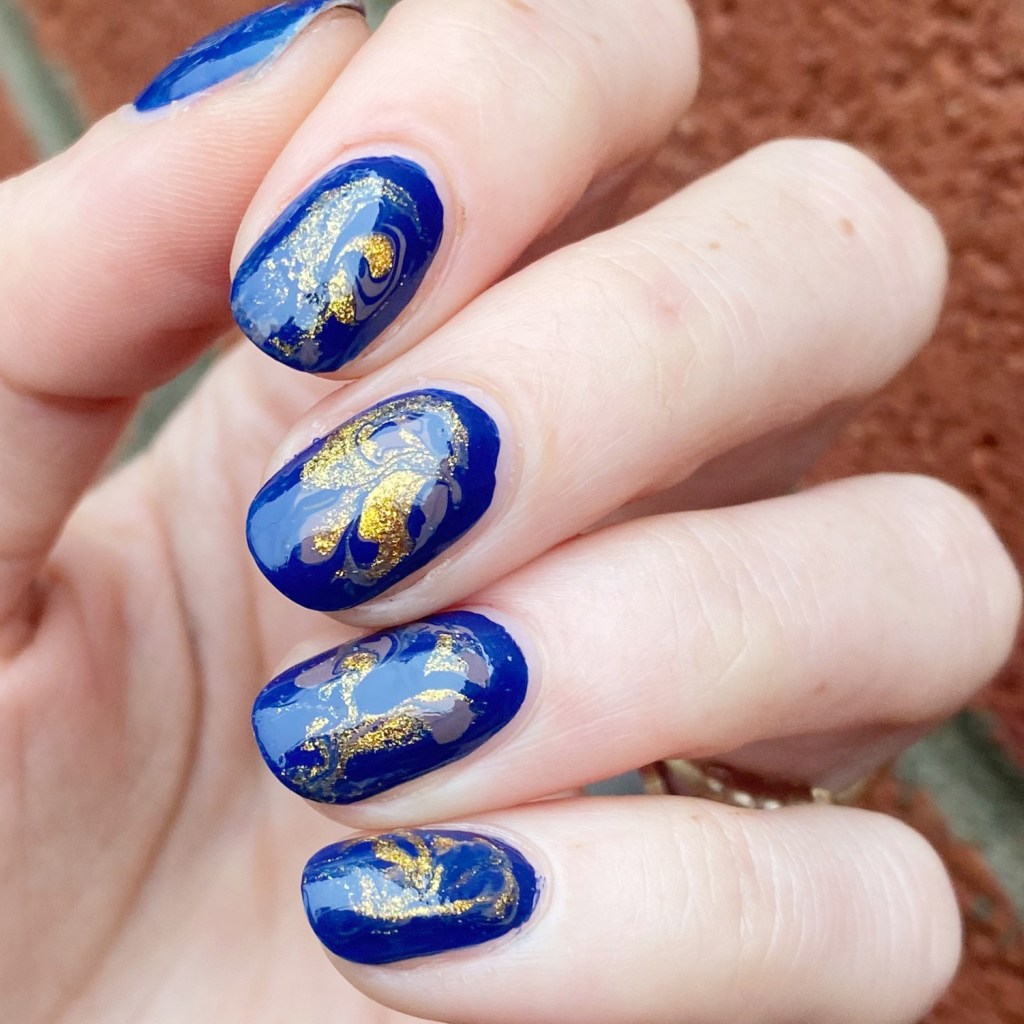
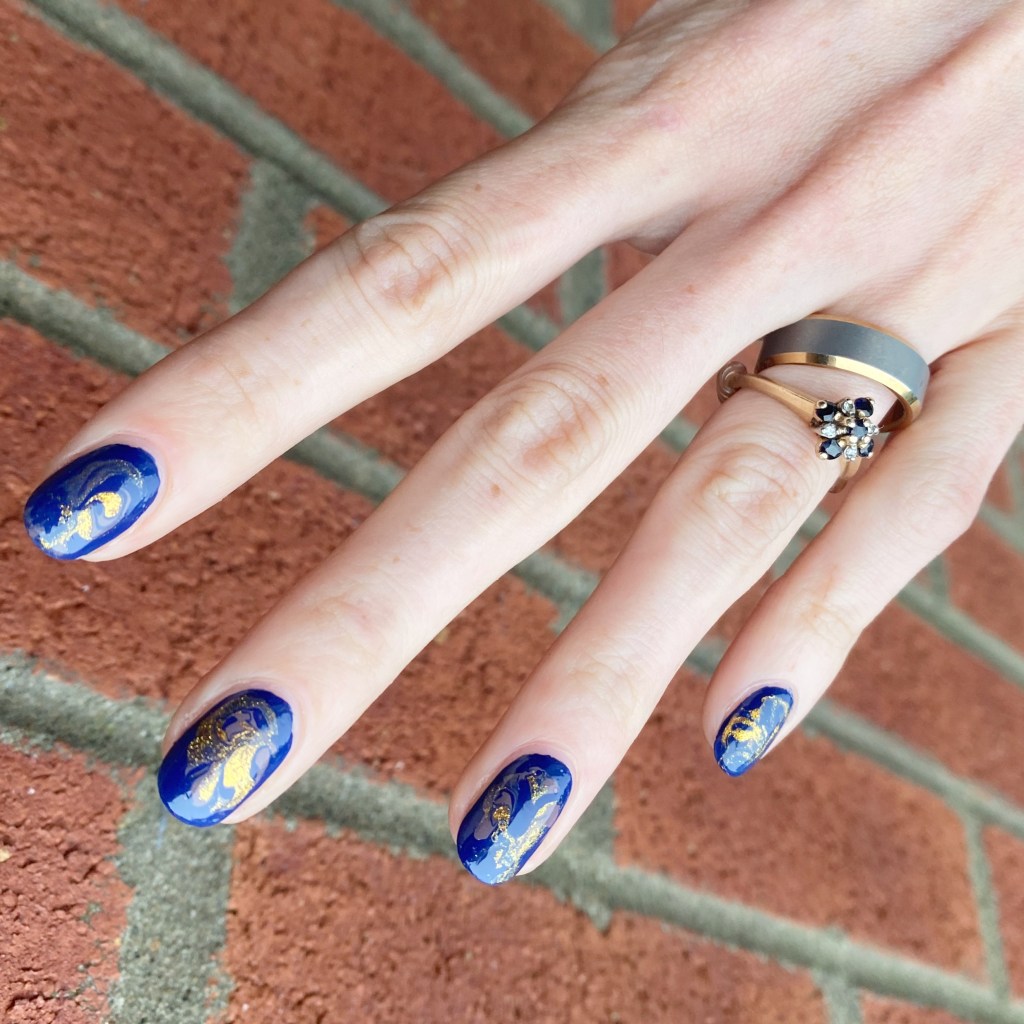
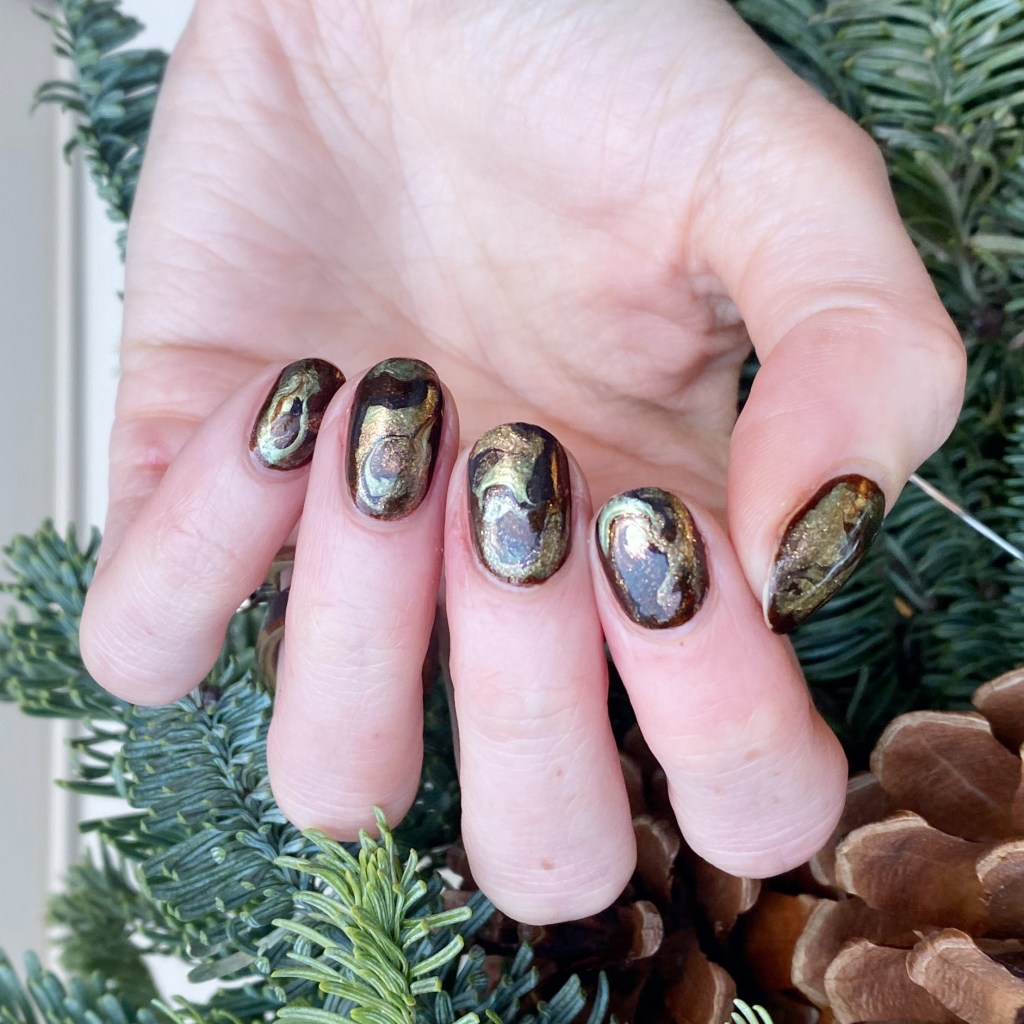
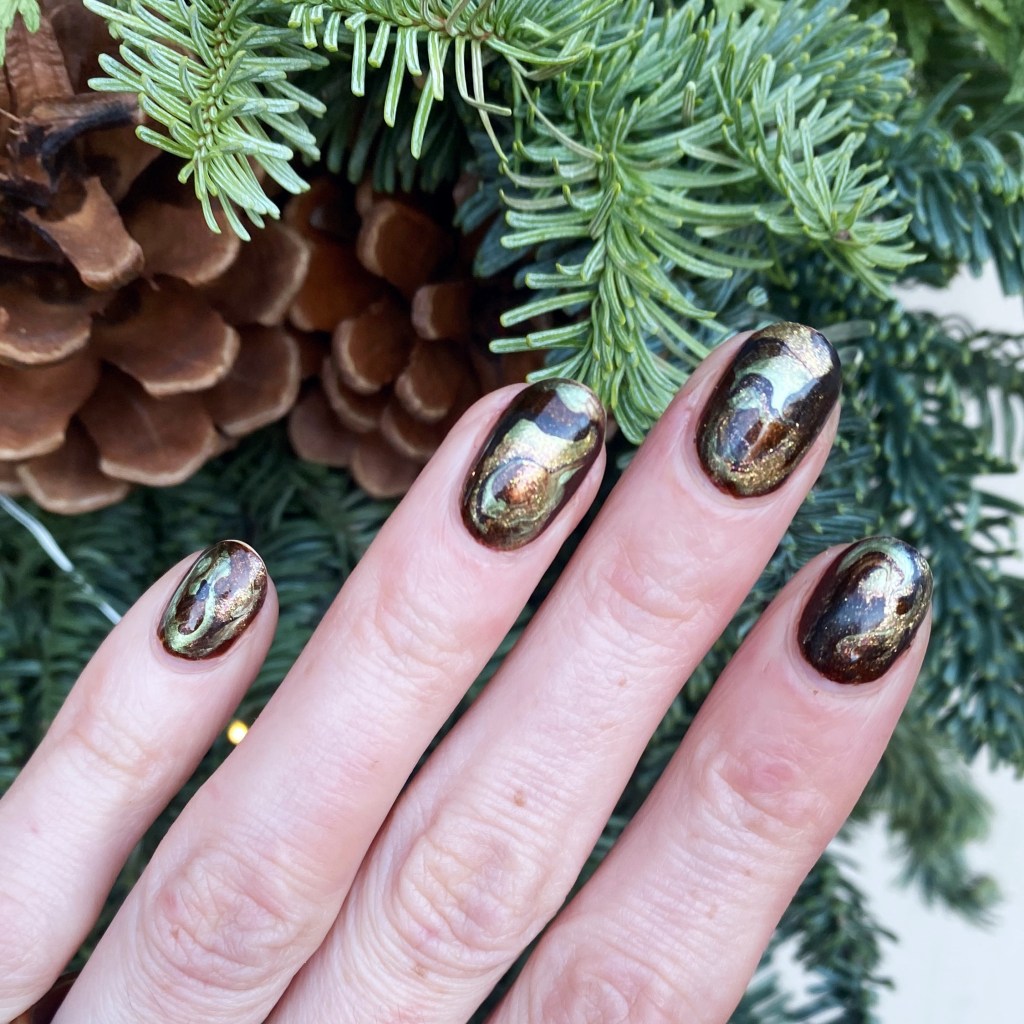
Today I have a really pretty nail art look to share with you, leaning into these late Autumn vibes. 🍁🍂 The colour scheme is pure Fall, & I really enjoy how it turned out!

The polishes I used for this manicure are: 

  • Base Coat: Sally Hansen Miracle Cure
  • Top Coat: Sally Hansen InstaDri Top Coat (red bottle) 
  • ORLY Buried Alive
  • Sally Hansen Miracle Gel Terra Coppa
  • Essie Frock ‘n Roll
  • Essie Nail Art Studio Cosmic Chrome
  • Wide Nail Art Brush

So I tried a bit of a different technique for this marbling, with a wider nail art brush (like the side of a clean up brush) versus the skinny dotting tool I usually use, & I like the effect it gave me. Kind of reminds me more of a real stone. Sometimes I find with a dotting tool I end up muddling my marble a bit, but this way didn’t do that which I really like!

& the colours compliment each other so well. I love the bronze-y golden look of it all together. It’s definitely giving Autumn vibes.

What do you think of this golden drag marble design? Do you like the kind of wider marble effect versus my usual drag marble designs?

Let me know all your thoughts in the comments below!

Happy Monday 🖤

Pastel Marble Sponging

Hello lovelies & happy Wednesday. A brand new week — & this month is certainly speeding quickly by. It’s already the 13th of August, & while that means I’m that much closer to PSL season, the velocity at which this Summer is passing can slow down just a smidge.

Today’s nail art look was kind of a happy accident. Originally I was going to try to create some pastel galaxies, but it turned into more of a marble effect. Either way, I think they turned out absolutely stunning. & I love them.

The polishes I used for this manicure are: 

  • Top Coat: Essie Good To Go Top Coat
  • Base Coat: China Glaze Calcium Gel Fortifier
  • Sensationail Nailtural Born to Explore
  • Essie Mint Candy Apple
  • Sally Hansen Miracle Gel Beatnik
  • Sally Hansen Miracle Gel Feelin’ Grape
  • Essie Separated Starlight
  • Latex free Make Up Sponge

Such a neat effect. & I added the little bit of sparkle to give it a more dimension effect & I really think it looks cool. Like little geodes on my nails.

What do you think about this marble nail effect? Do you like the combination of colours? Let me know what you think down in the comments below! I’ve been really trying to switch up & do some new nail art looks I haven’t done in a while — so please share any old designs you’d love to see me recreate!

Happy Wednesday

🖤

Blue Marble

Hello lovelies & happy Friday. I know it’s been a quiet week here. I’ll be honest, it’s been a rough week on my end, so blogging hasn’t really been my main priority. But—it’s almost the weekend & I’m feeling better, so let’s share some nails, shall we?

Today’s look is an easy marble effect I did using my favourite Saran Wrap splatter effect. These are giving deep space/ deep ocean vibes, & I quite love it.

The polishes I used for this manicure are: 

  • Base Coat: China Glaze Calcium Gel Fortifer
  • Top Coat: Essie Speed Setter
  • Ardene Electric Chic
  • Sally Hansen InstaDri Cosmic Blue
  • OPI I Cannoli Wear OPI
  • Crinkled Saran Wrap

I went a little heavier with my dabbing for this look, layering the colours over one another, which is what I think gave it the cool marble effect.

What do you think about these marble nails? Are you a fan of looks like these, or do you prefer more detailed nail art? Let me know all your thoughts down in the comments below.

🖤

Blue Jewel Drag Marble Nails 💎

Hello lovelies & happy Friday. & Happy September 1st! It maybe not be Fall to most people — or, okay, the calendar, but September 1st definitely feels like the beginning of Fall to me. So you can probably look forward to seeing more & more Autumn-eque designs moving forward.

Today’s look was what happens when it’s late at night & I’m stick on nail ideas. I wanted to paint my nails, but I was uncertain with what I should do. Naturally, I decided on a drag marble. I think they turned out really pretty, so I’m excited to share them with you!

The polishes I used for this manicure are: 

  • Base Coat: Sally Hansen Miracle Gel Colour Grip Primer Base Coat 
  • Top Coat: Sally Hansen Miracle Gel Glossy Top Coat
  • Essie License to Thrill
  • Essie Get Your Grove On
  • Essie Merino Cool
  • Smallest dotting tool (NailStuff.ca Dotting Tool Trio)

How beautiful did this turn out? Honestly, sometimes I do drag marbles & I hate the result –they get a bit muddled — but I think the colours on this one really compliment each other, & it turned out really looking like some kind of stone/marble.

What do you think of this drag marble design? Do you like this colour combination as much as I do? How does the beginning of a new month have you feeling? Let me know all your thoughts in the comments below!

GLAM NAILS CHALLENGE APRIL — Birds 🕊️

Hello lovelies & happy Wednesday! This post probably finds you late in the day — especially those of you not in North America. But this morning was a busy one, so my posting got messed up a smidge. Today, I have another prompt for Glam Nails Challenge April to share & it’s the second to last one of the challenge!

It’s almost May, how crazy is that?

Today’s prompt is birds. I looked through my stamping plates, because I wasn’t sure I was up to free handing a bird, & surprisingly I don’t really have many plates with bird images on them. BUT I did have an Essence one with a flying sparrow design, so I thought that would look pretty.

The polishes I used for this manicure are: 

  • Base Coat: Essie Hard To Resist Glow & Shine 
  • Top Coat: Seche Vive Fast Dry Top
  • Kozmic Colours shimmery blue (no name — bought at Dollarama)
  • Kozmic Colours teal (no name — bought at Dollarama)
  • Kokie Professional Rock Star
  • Starrily Vantablack
  • Essence “Stamp It!” plate (no longer available)
  • Nailstuff.ca clear stamper & scraper set

I started off this design by creating a kind of “smoosh” design. My base shade was originally just the Kosmic Colours blue, but I found it a bit thin & patchy, so I decided a kind of marble base would look pretty. I smooshed a few other colours using my stamper & then sealed everything in with top coat. Then one by one, I stamped on the bird image, trying to give it the effect of them kind of flying. Simple, for sure, but I think over all the design turned out really cute.

What do you think of this bird design for Glam Nails Challenge April? Are you a fan of a simpler look like this?

I also have to say I enjoyed taking these pictures in my own garden, listening to all the birds finally fluttering around. Spring is such a beautiful time of year, & I’m excited about these warmer days!

Have a lovely day! ♥︎