*contains PR
Good morning lovelies & happy Friday. & happy (almost) weekend! Can you believe we’re halfway through November? I know I say this every month, but it’s truly astonishing how quickly this year is coming to a close.
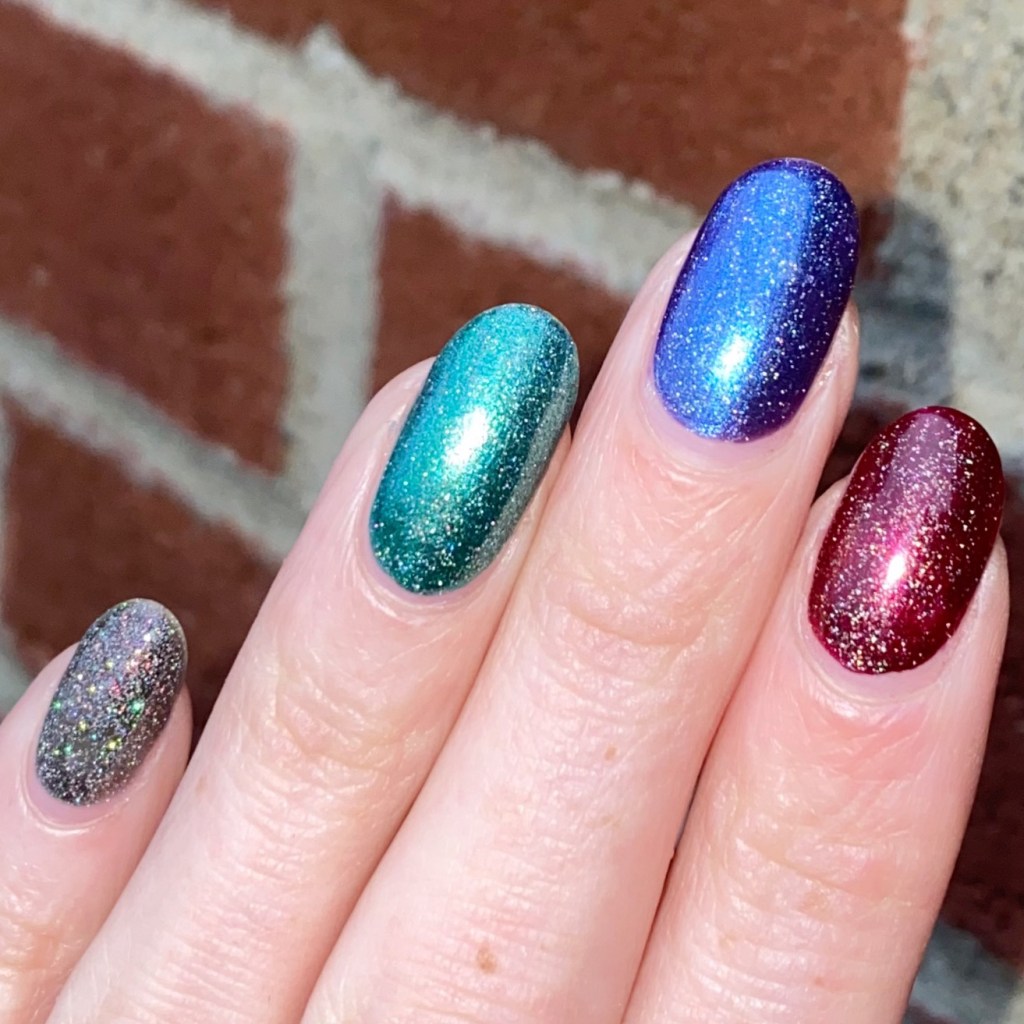
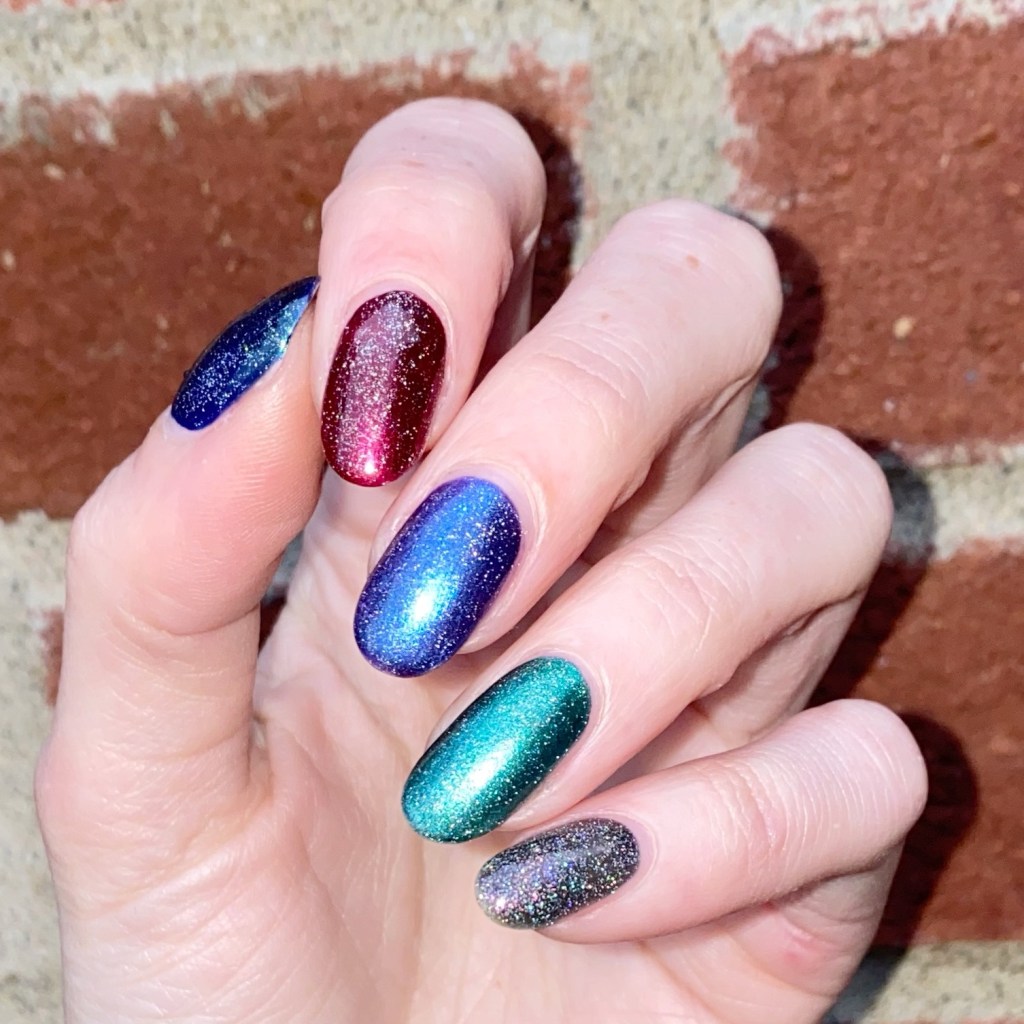
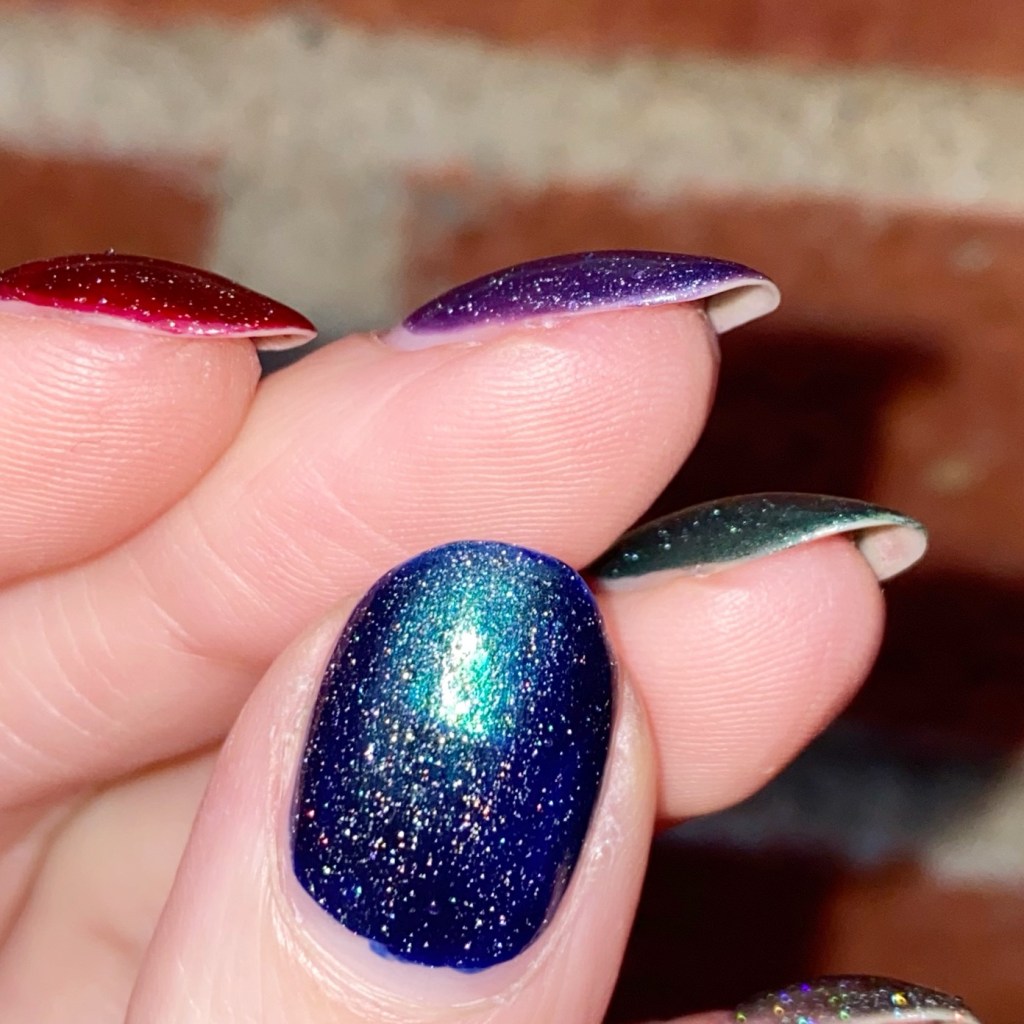
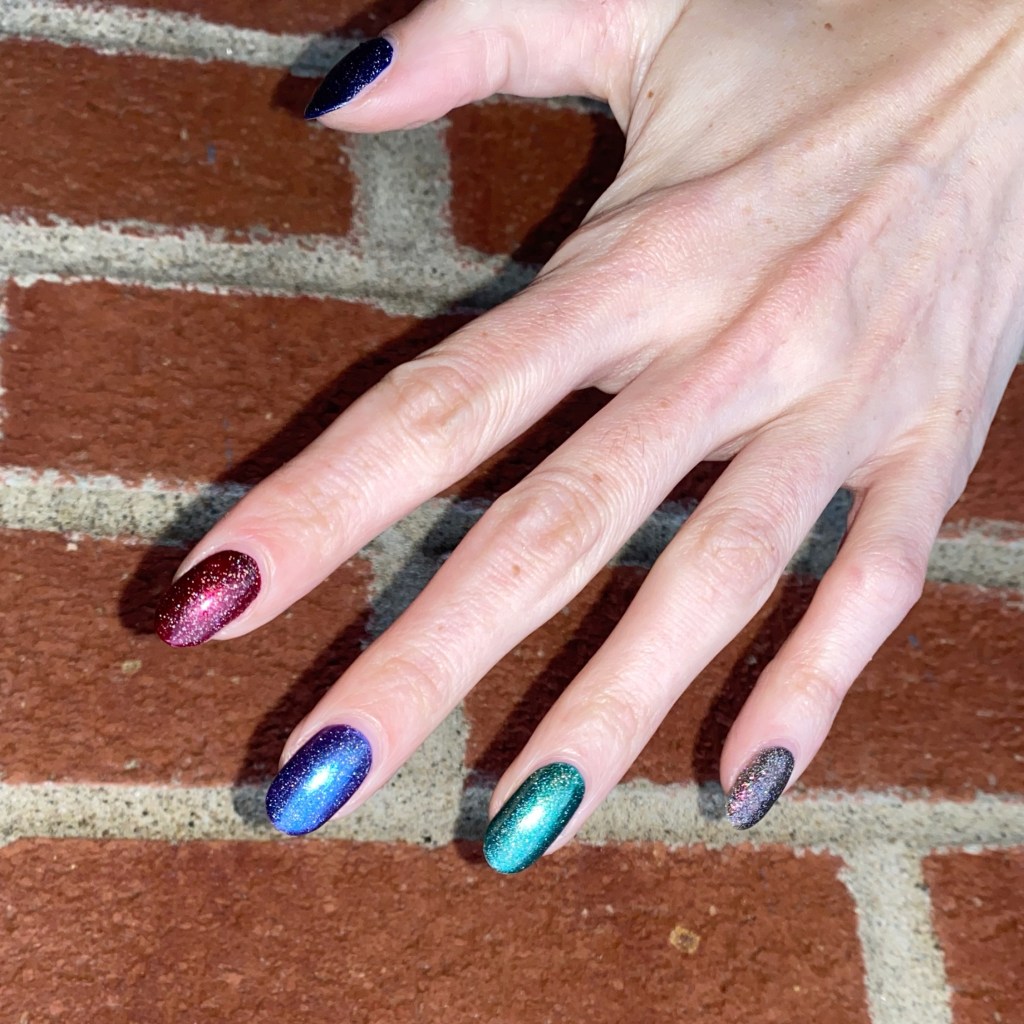
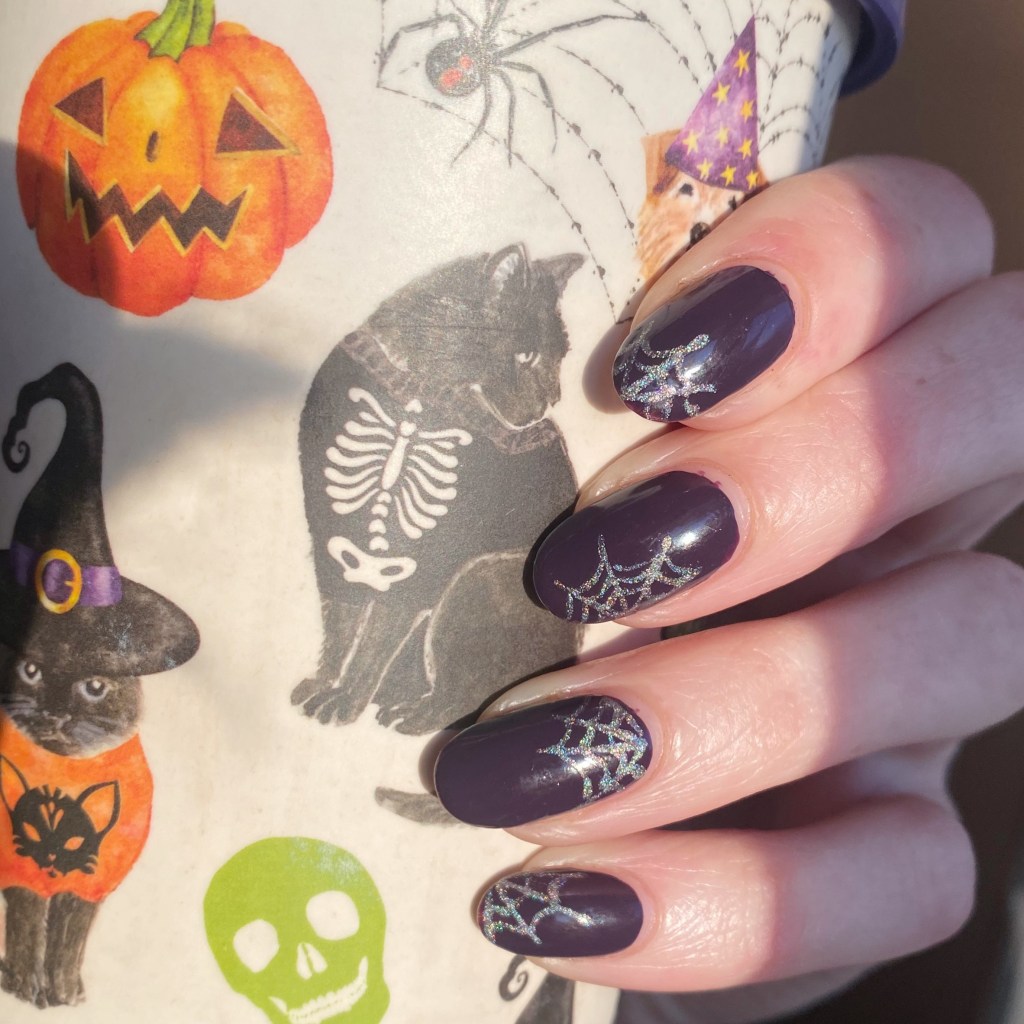
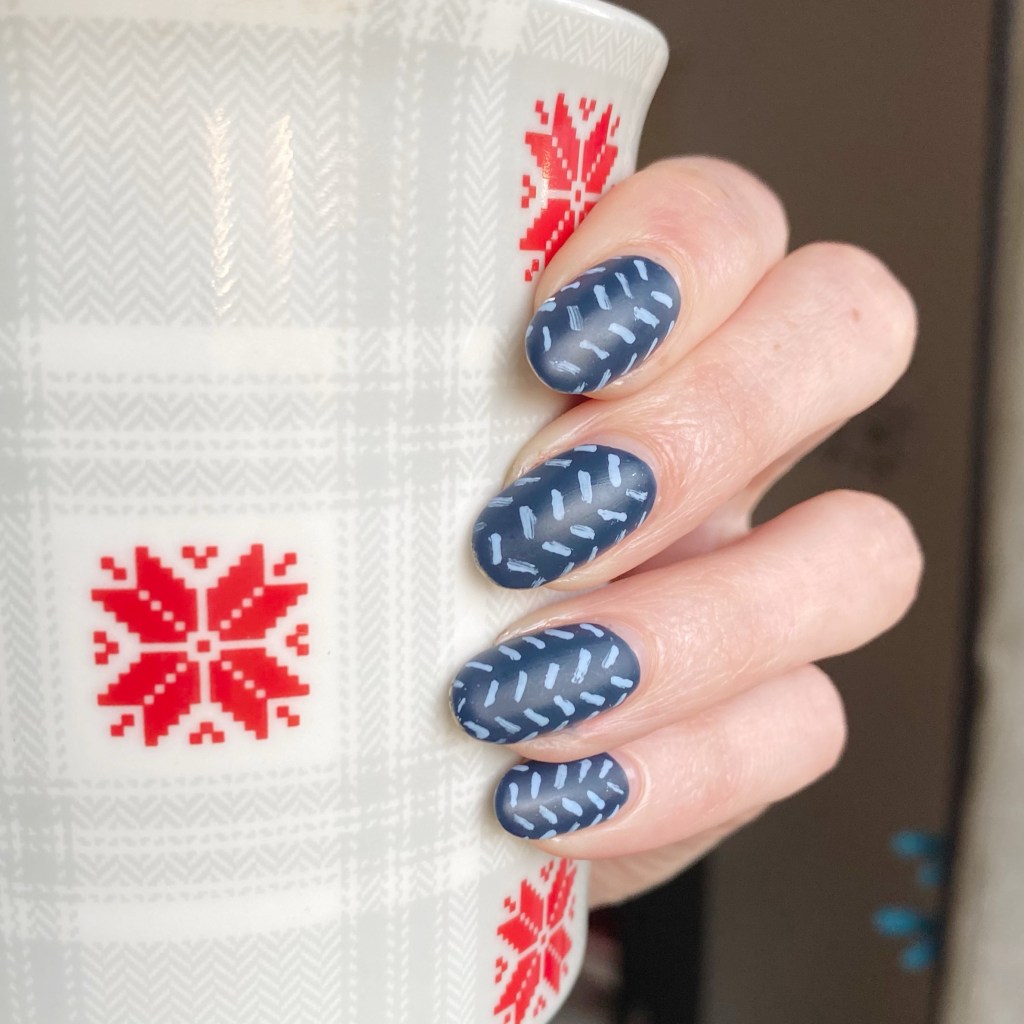
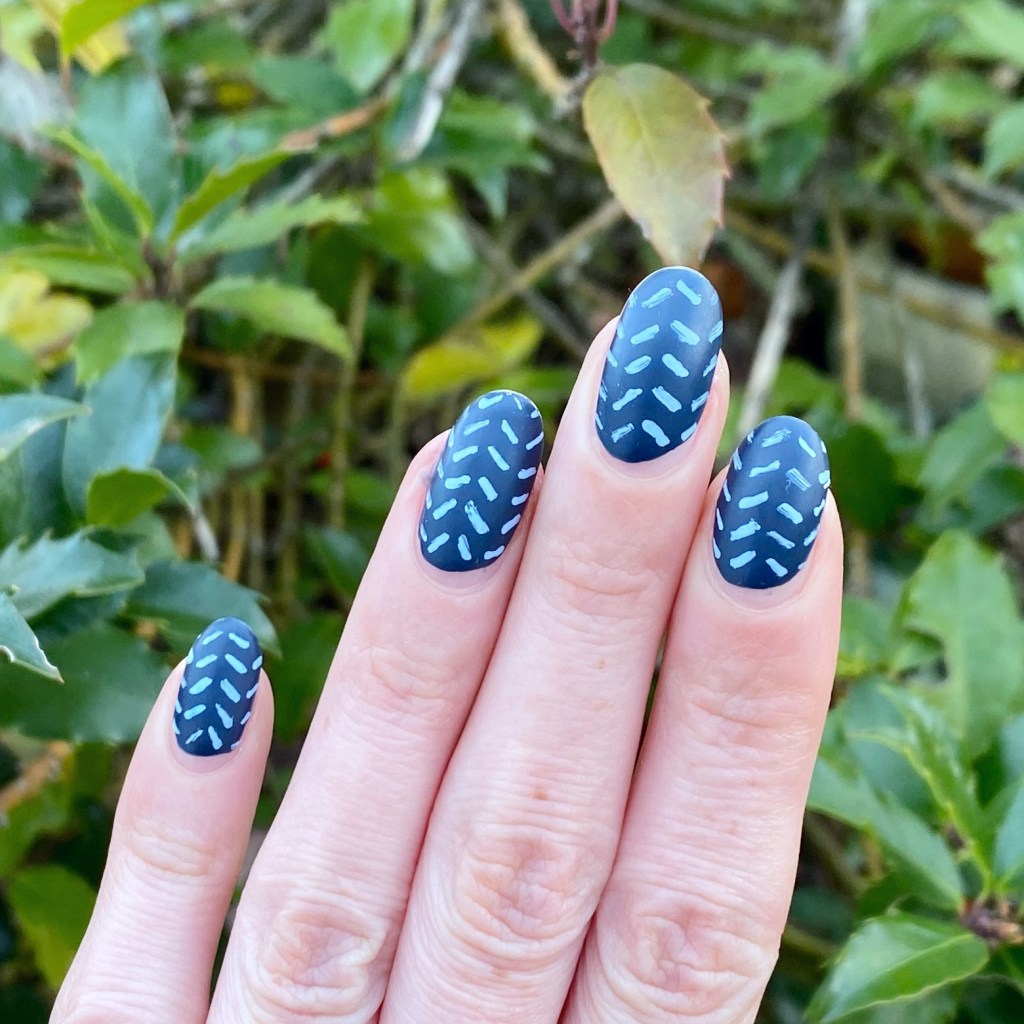
But I do appreciate all the nail art ideas this time of year! Because there are so many you can do! Today I was feeling some knit inspired nails. This is a design I’ve done before, & it’s perfect for a pre-holiday, late Autumn look.

The polishes I used for this manicure are:
- Base Coat: NailStuff Essentials Base Coat *
- Top Coat: Nail Stuff Essentials Quick Dry Top Coat *
- Matte Top Coat: Nail Stuff Essentials Matte Top Coat *
- Essie Expressie Feel The Hype*
- Essie Bikini So Teeny*
- Nailstuff.ca Mermaid Tail 7mm liner brush
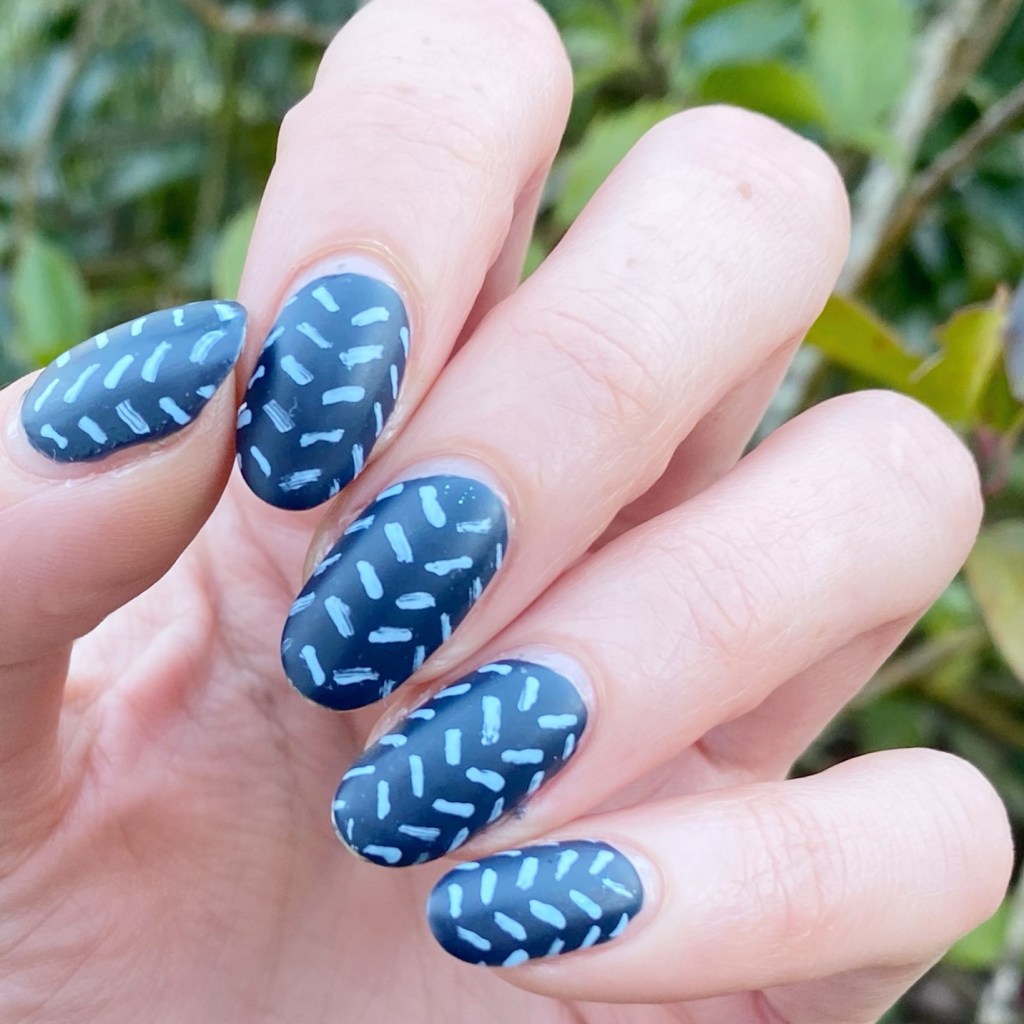
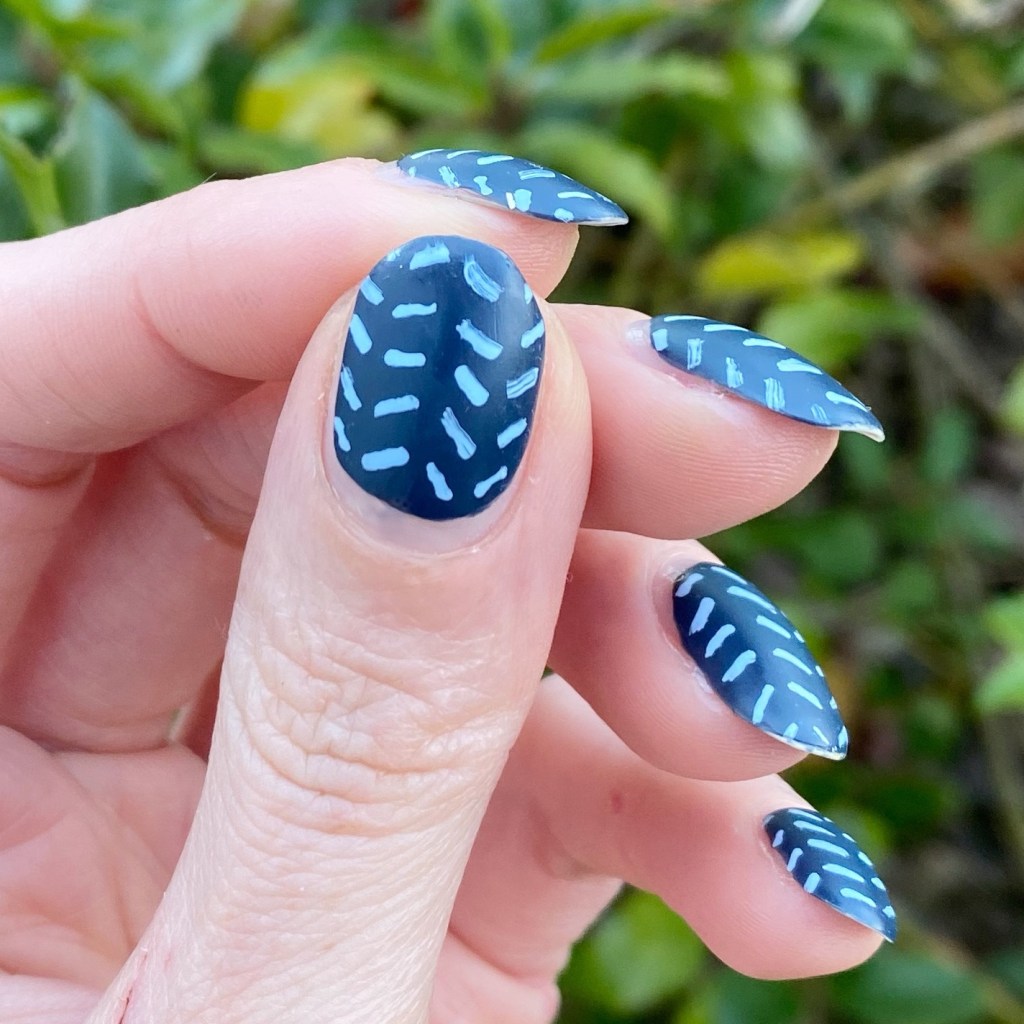
How cute is this knit effect? It reminds me of the sweaters & scarves I’ve been layering on because it’s been freezing lately — & I get cold easily anyways. This is such an easy look to do, too, & you can use any colour. In fact, I’m already brainstorming a fun Red scarf inspired look in my head.
It’s also the perfect nail art look for any nail length—short of long, it will look great on your nails!

What do you think about this knit inspired nail art look? Do you like the colours & pattern? What nail art are you loving right now? Let me know all your thoughts down in the comments below!
Happy Friday.
🖤