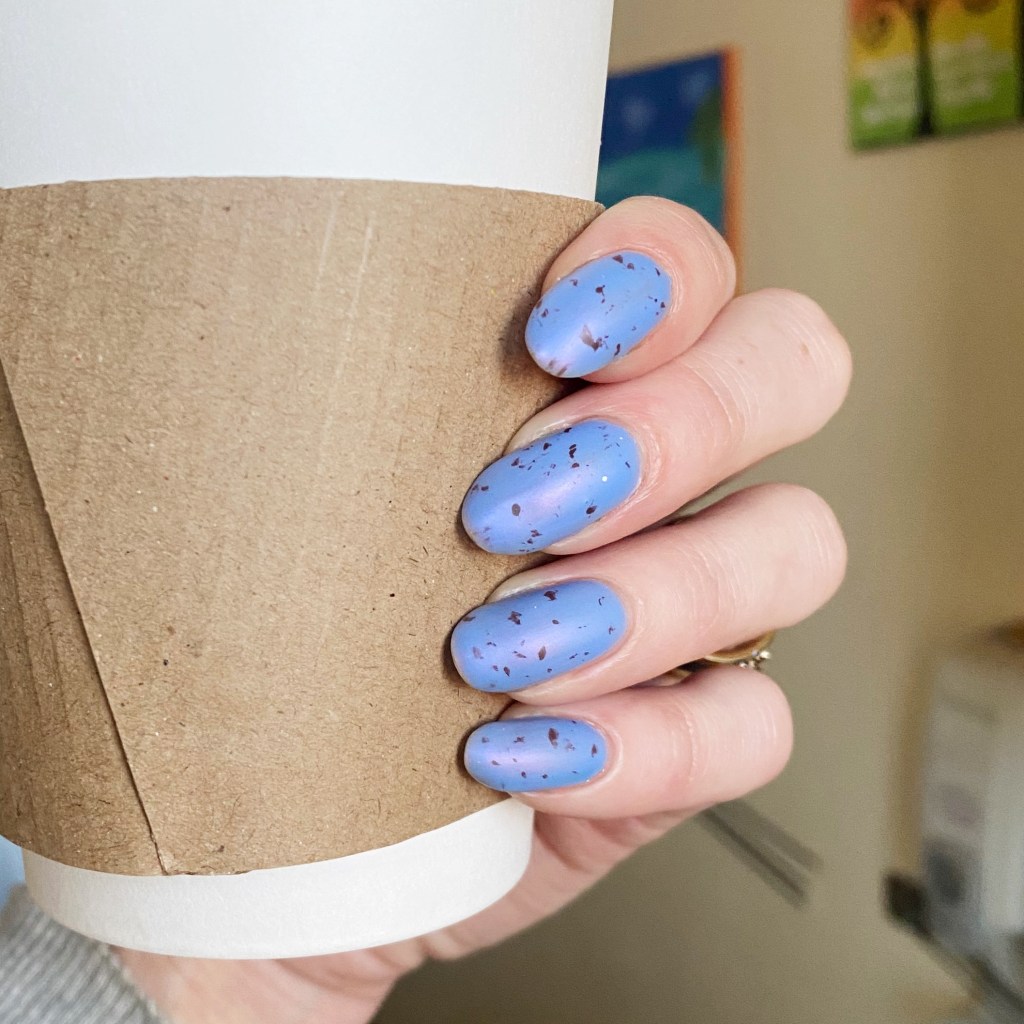
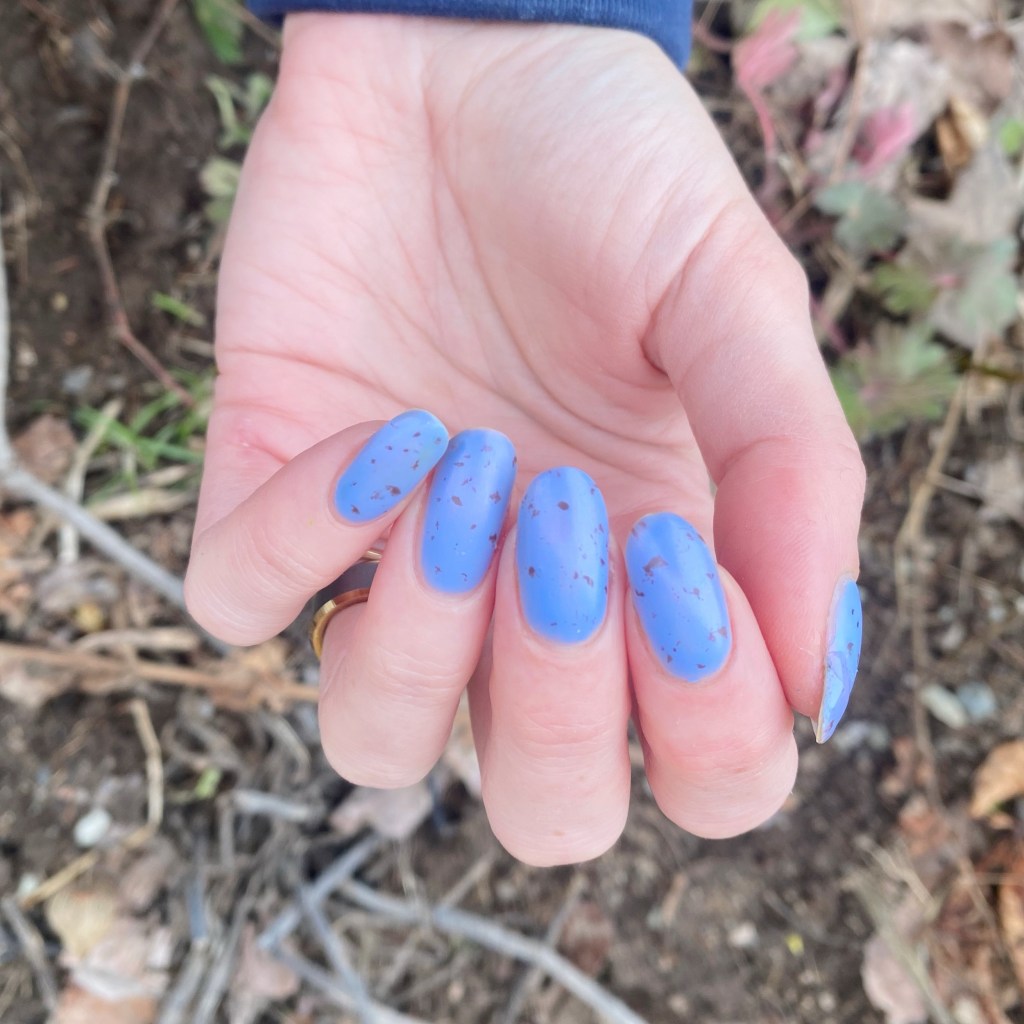
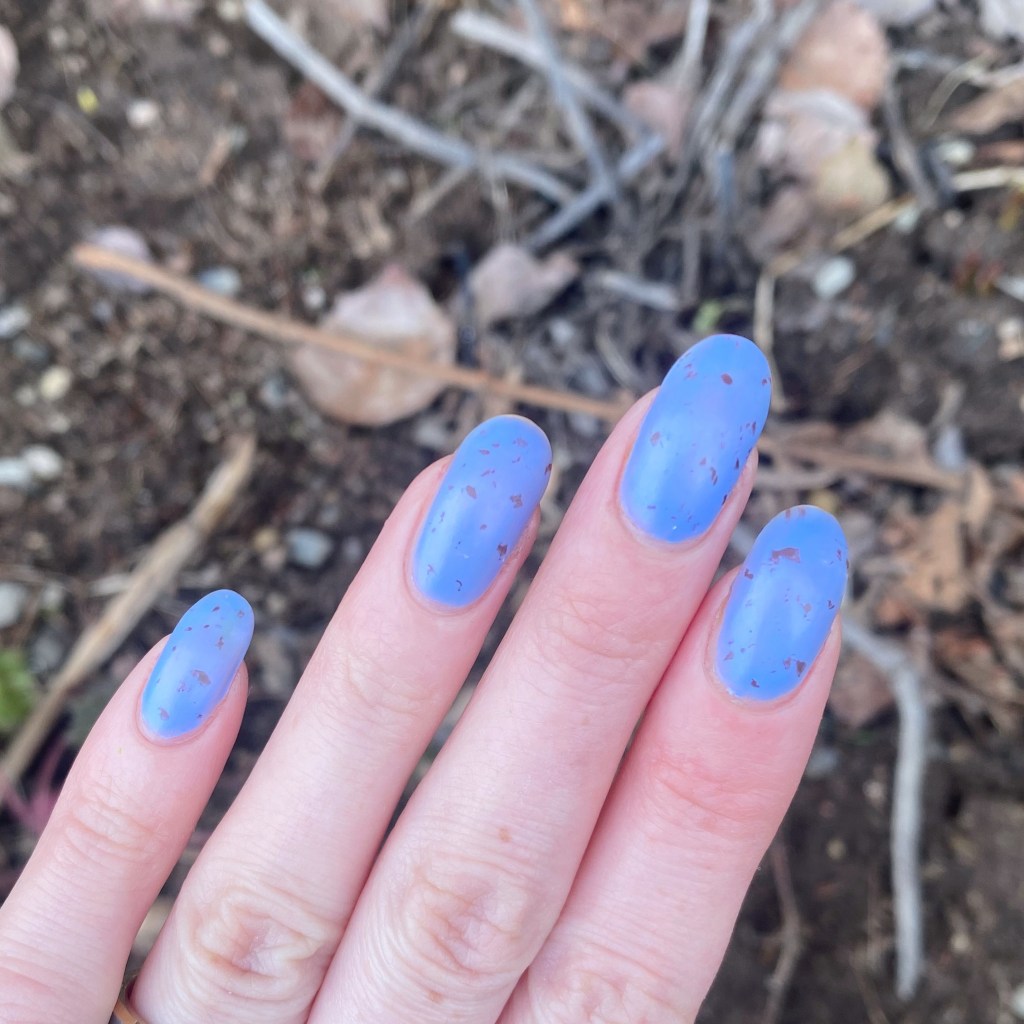
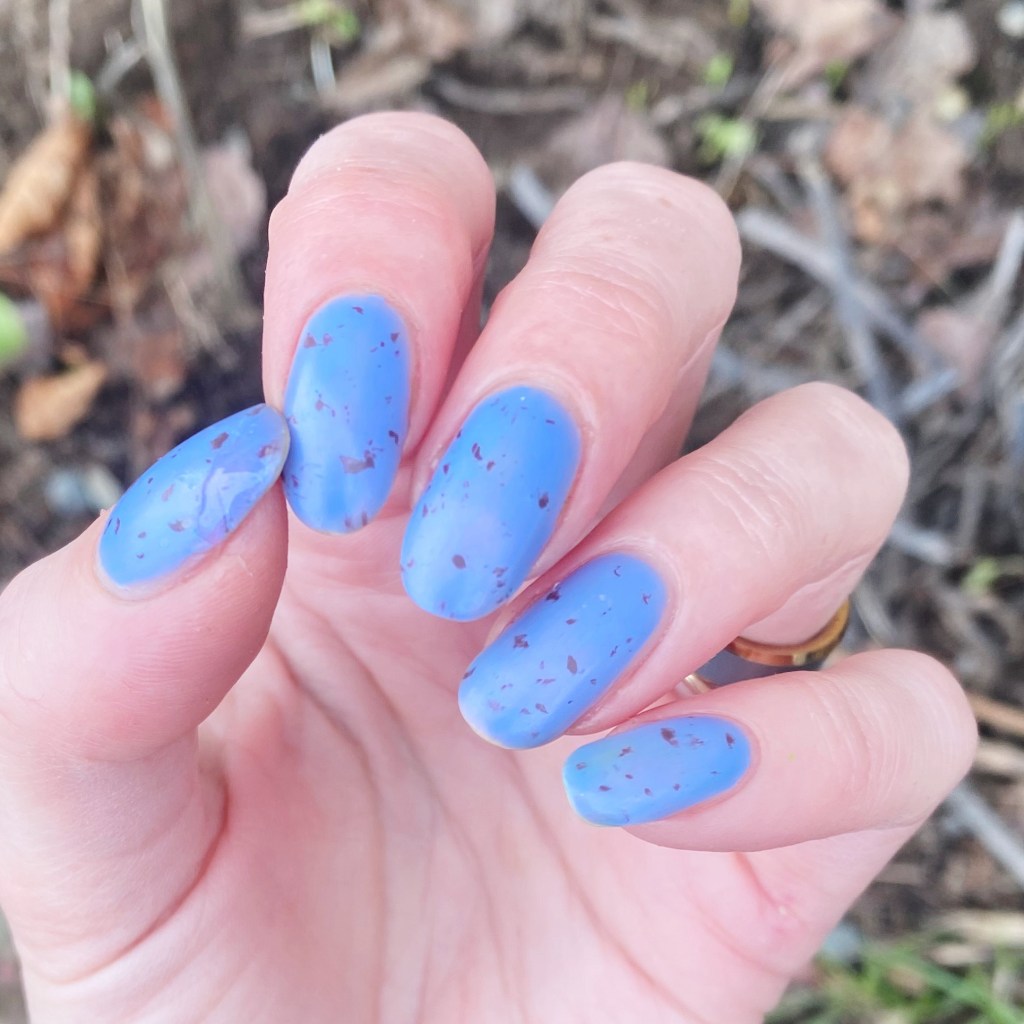
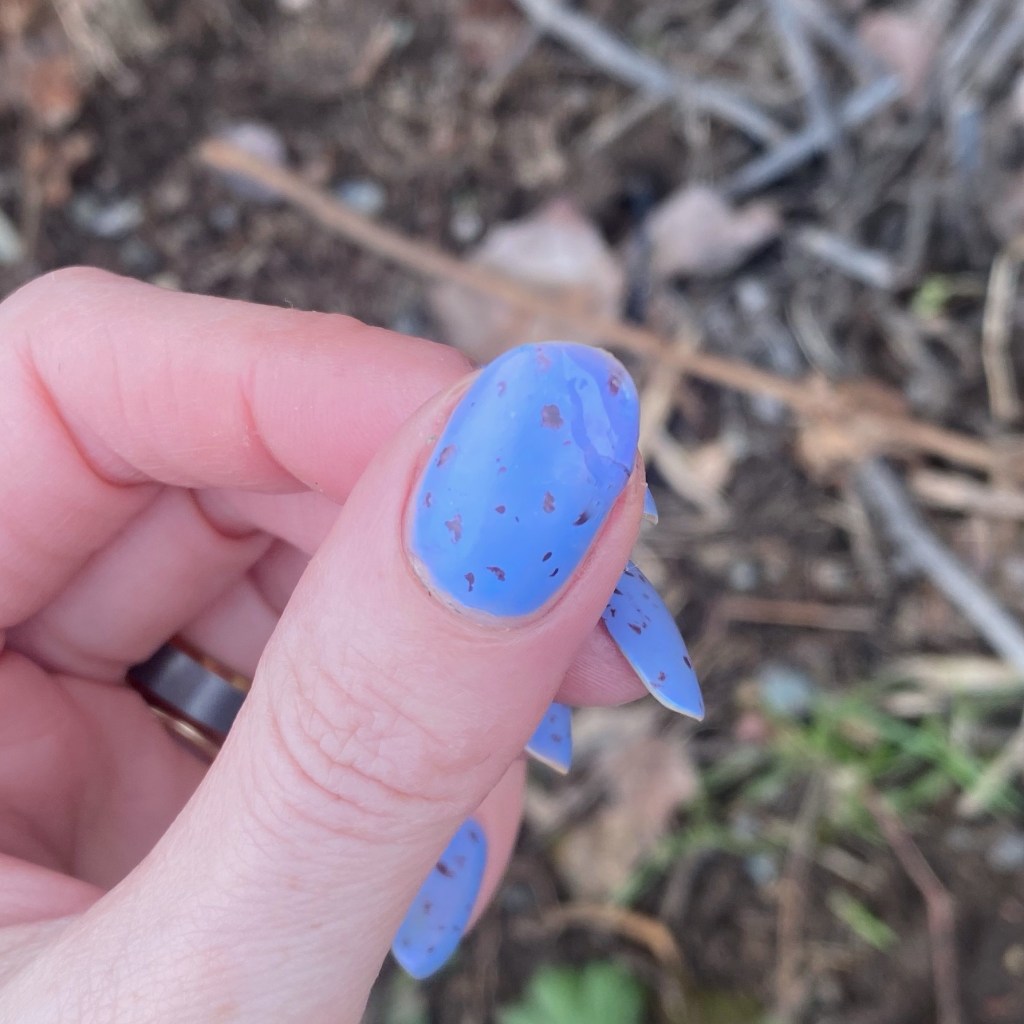
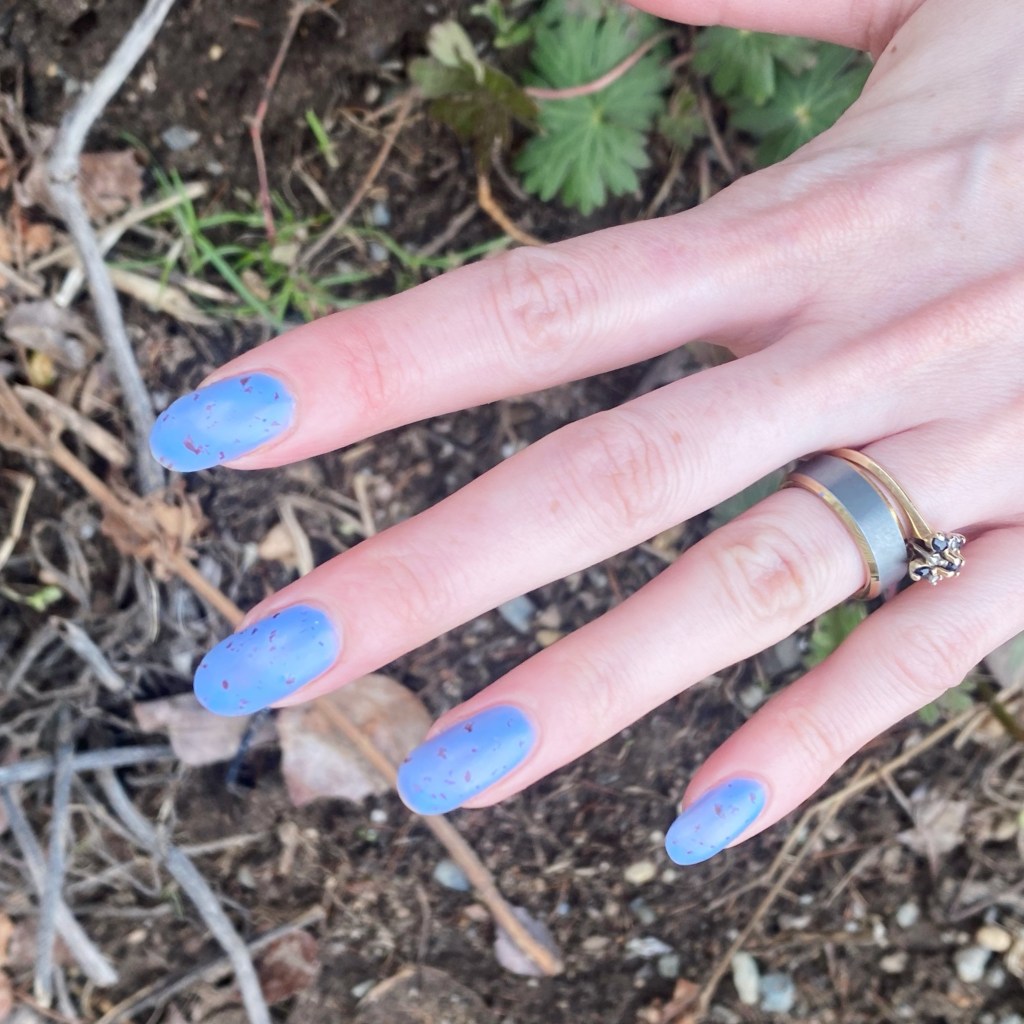
Starting off this full first week of Spring… with a snowstorm. & oh, how I wish I were kidding. But it isn’t going to stop me from rocking some Spring inspired nails! & what is more Spring like than some robin’s eggs? I recently score a killer deal on an Essie shade at my local Shoppers ($1 clearance!), & it was the perfect Spring-y blue, so I knew it would be perfect for some speckled egg nails.
The polishes I used for this manicure are:
Base Coat: Sally Hansen Maximum Grow
Top Coat: Seche Vive Gel Like Top Coat
Matte Top Coat: NailStuff Essentials Matte Top Coat
Essie You Do Blue
OPI That’s What Friends Are Thor
Small nail art brush
I won’t lie, these nails are actually super super easy to do. All you need to do is create some messy specks using a nail art brush — the messier the better. But the real trick to this look is obviously the matte top coat to give it that eggshell finish. & bam! Instant Spring inspired Robin’s egg nails.
&, obviously, if you paint you nail a selection of pale pastel shades, you could create Mini Egg inspired nails easily (as I have done in years past).
What do you think of my Robin’s Egg nails? Would you wear a simple nail art like this to channel Spring? Let me know all your thoughts in the comments below!
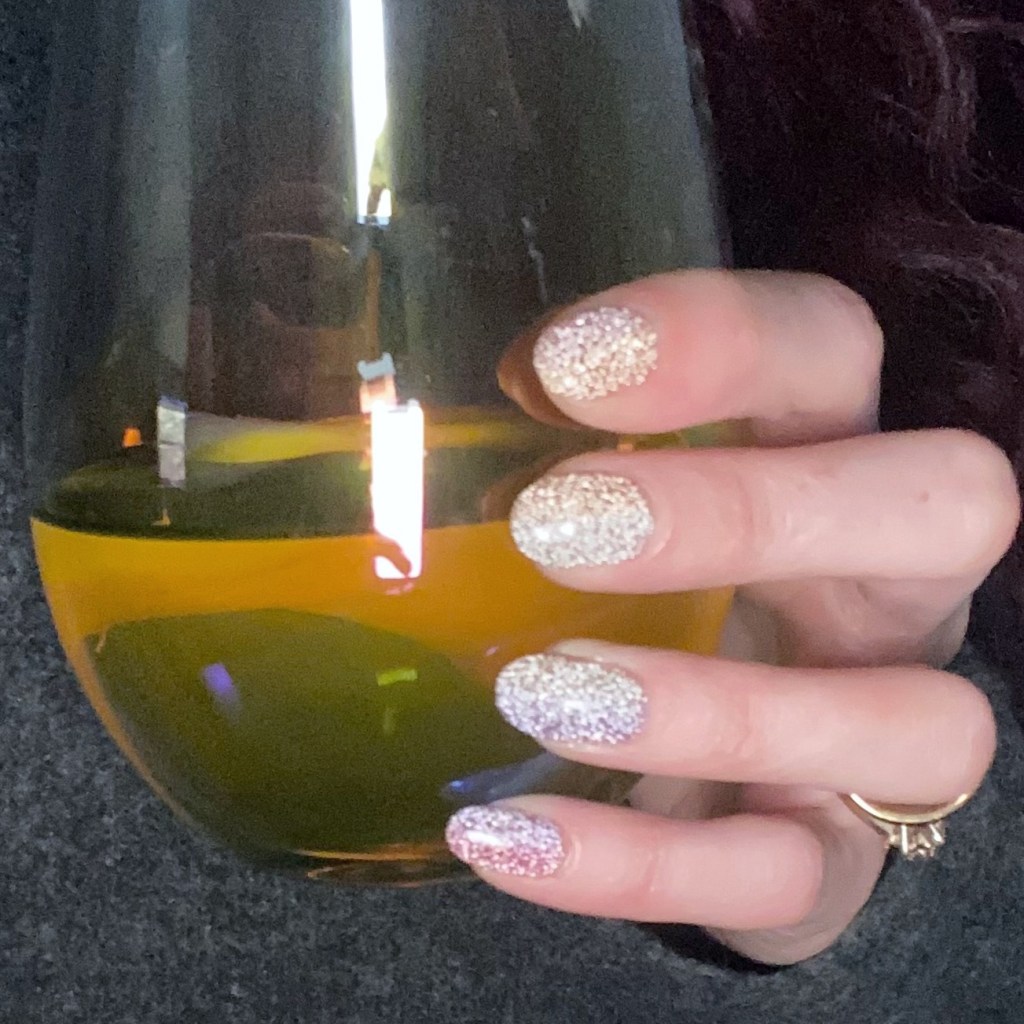
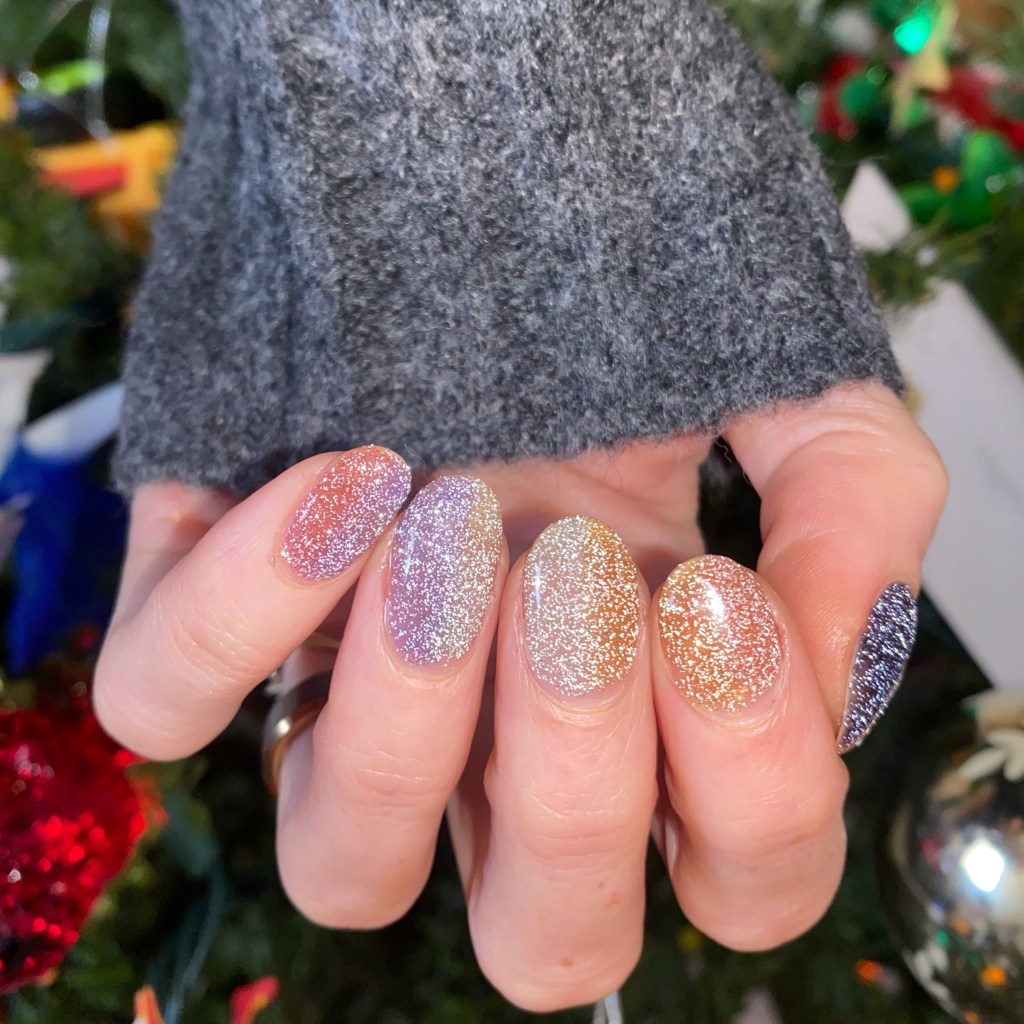
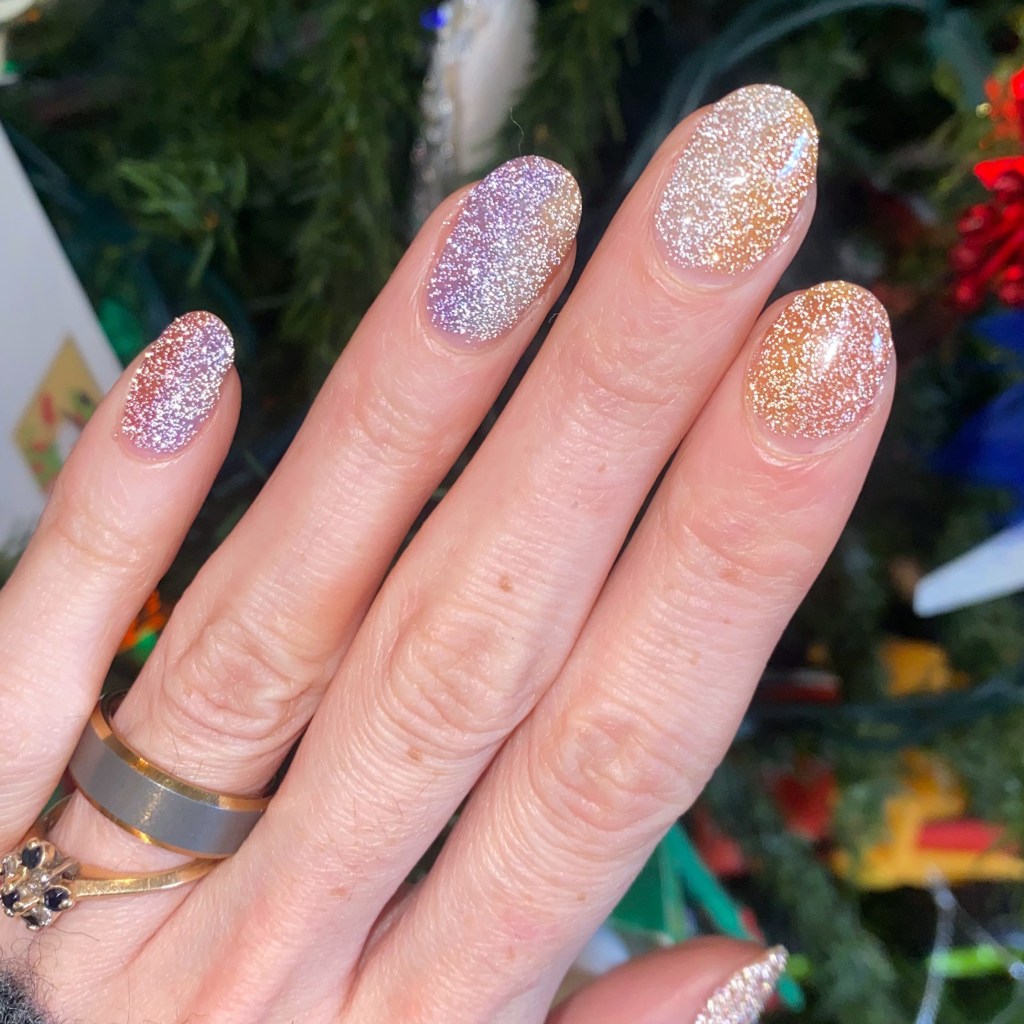
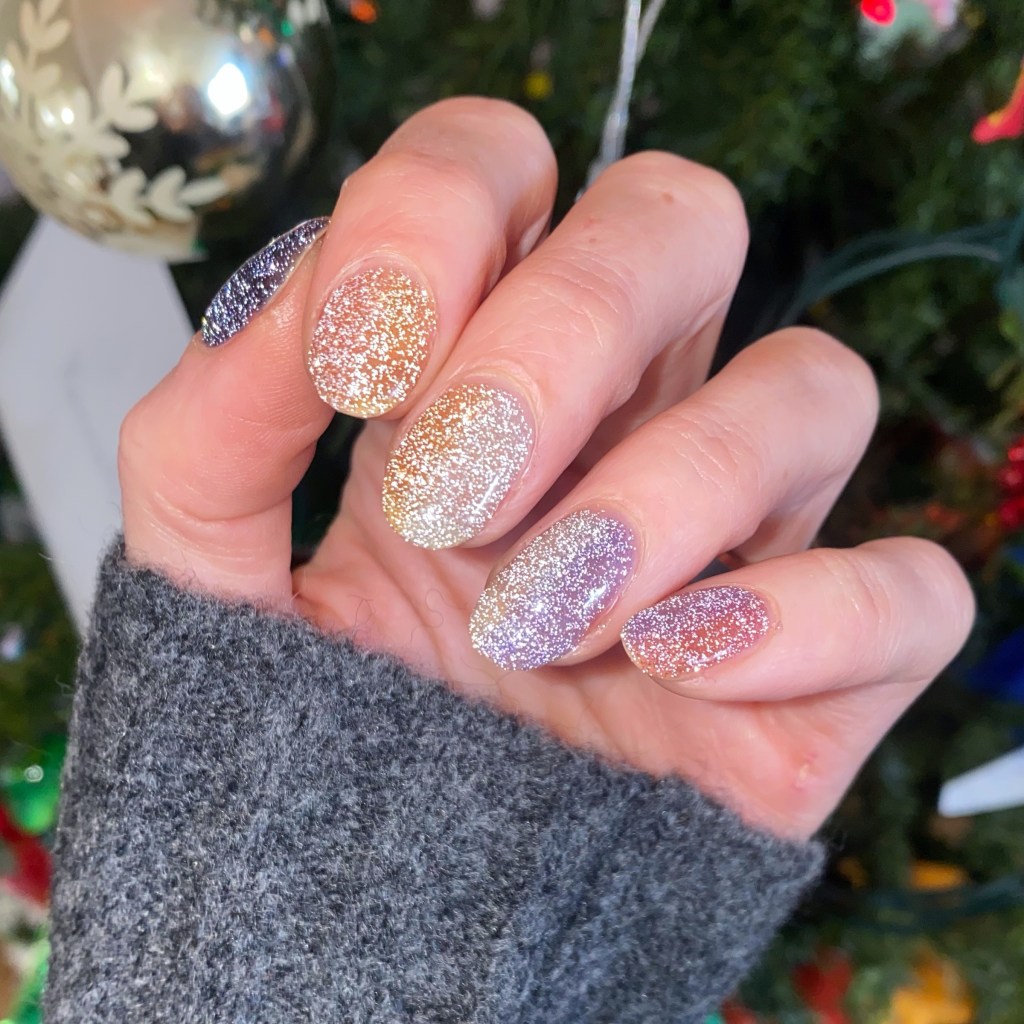
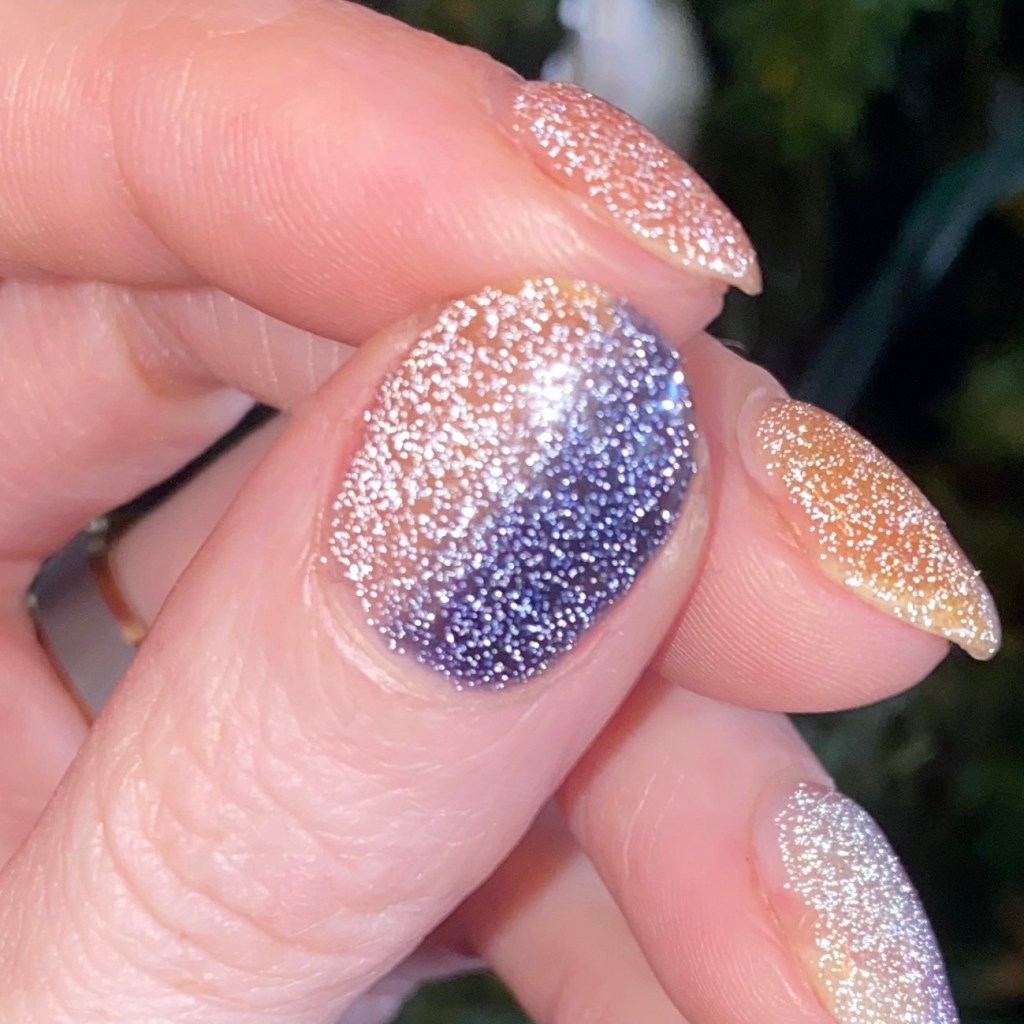
I hope everyone had a wonderful Christmas season, & holiday. It was definitely a weird one this year, but we survived & it’s a brand new year. I decided to take a bit of a break at the end of the year, BUT I did end 2025 with sparkle. Just before Christmas, I was sent some amazing nail mail from Olive & June featuring their brand new Flash Glitter Gel nail polishes — which was an amazing Christmas surprise!
So naturally I needed to wear these gorgeous shades for New Years Eve, & I decided to attempt a gradient using all these shades. I’ve not done a ton of nail art with gel polish, but I’m so happy with my sideways gradient! It looks like a rainbow going across my nails. I was definitely a little nervous going in, but I am so beyond in love with how this design turned out!
The polishes I used for this manicure are:
Base Coat: Olive & June Peel Off Base Coat
Base Coat: Olive & June Gel Base Coat
Top Coat: Olive & June Gel Top Coat
Olive & June Gel Sparkly Pink Drink (rose gold)
Olive & June Gel Pop Fizz Mani (gold)
Olive & June Gel Mani on the Dance Floor (grey silver)
Olive & June Gel Karaoke is a Good Time (purple)
Olive & June Gel Out Past Curfew (black)
Olive & June Gel Rosé Rhymes with Partay (pink)
Flat Nail Art Brush
I have to say — creating this gradient was not as hard as I thought it would be. The longest process was curing between each layer, but they came together so beautifully. & compared to other gradients, they were much harder to mess up. I used a flat nail art brush (clean up brush) to blend the two shades together, & it worked so perfectly. I’m kind of sad I wore these with a peel off base coat, because I could have easily worn these for a full week instead of just the night.
This was my first experience with flash glitter, & I get it now! The way it sparkles under flash is incredible. It makes me feel like a disco ball in the best possible way — & I think we all need to sparkle a little more this year. That’s definitely on my list of New Years resolutions for this year.
If you’re interested in trying out these Olive & June Glitter Flash Gel polishes, they have the whole set listed online (including gel lamp), or you can purchase the shades individually. They also have really cool Flash Glitter press on nails which I have not tried, but look really really cool, & would be a great option for someone who doesn’t want to (or cannot) wear gel nail polish!
What do you think about my New Years Eve nails — did I start my 2026 on the right foot finger? Let me know all your thoughts down in the comments below, & what your resolutions are for this year!
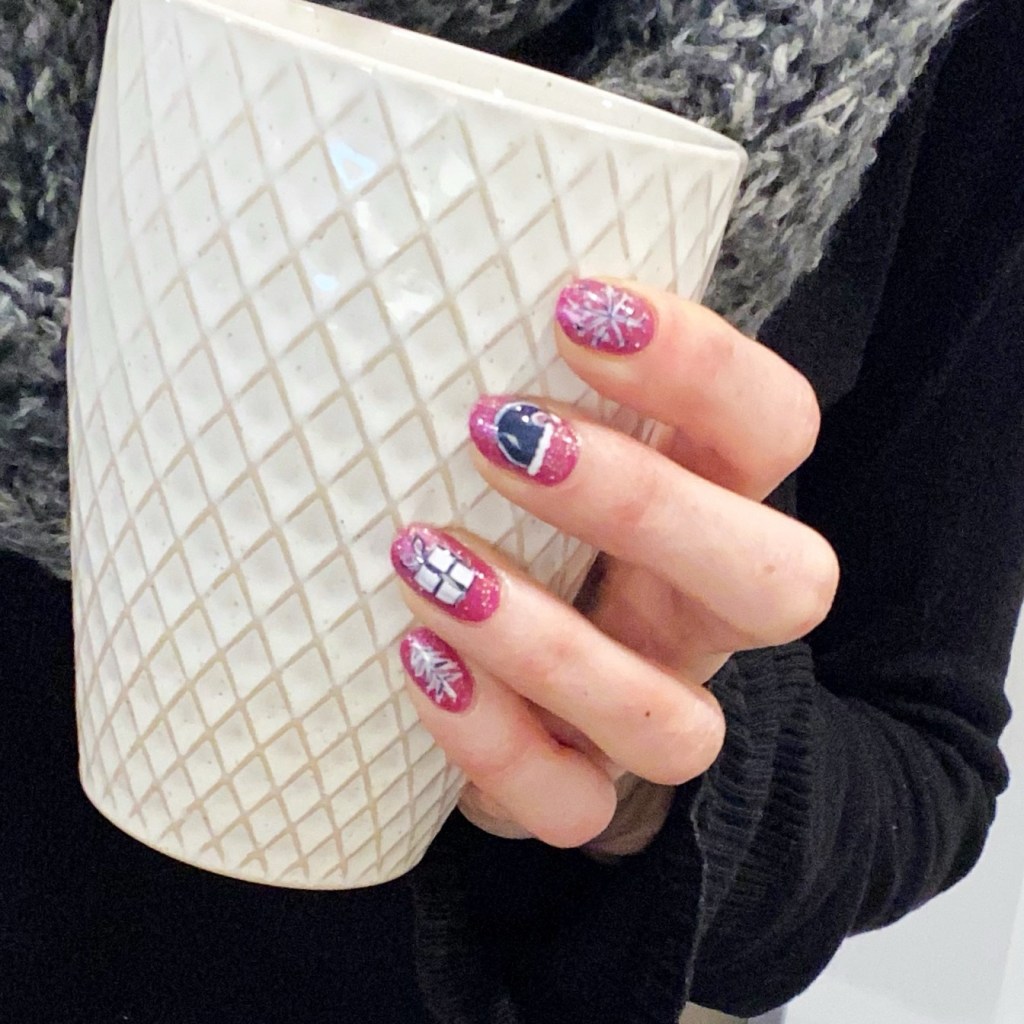
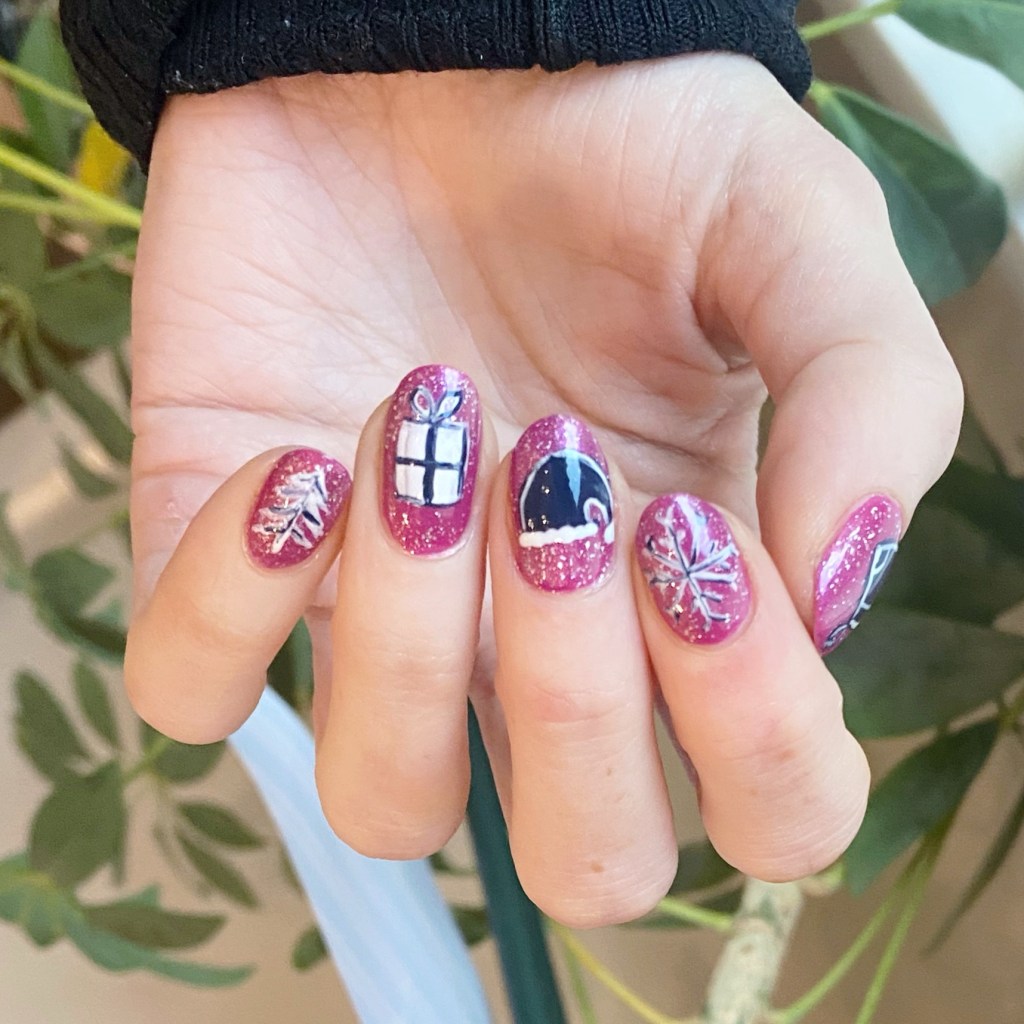
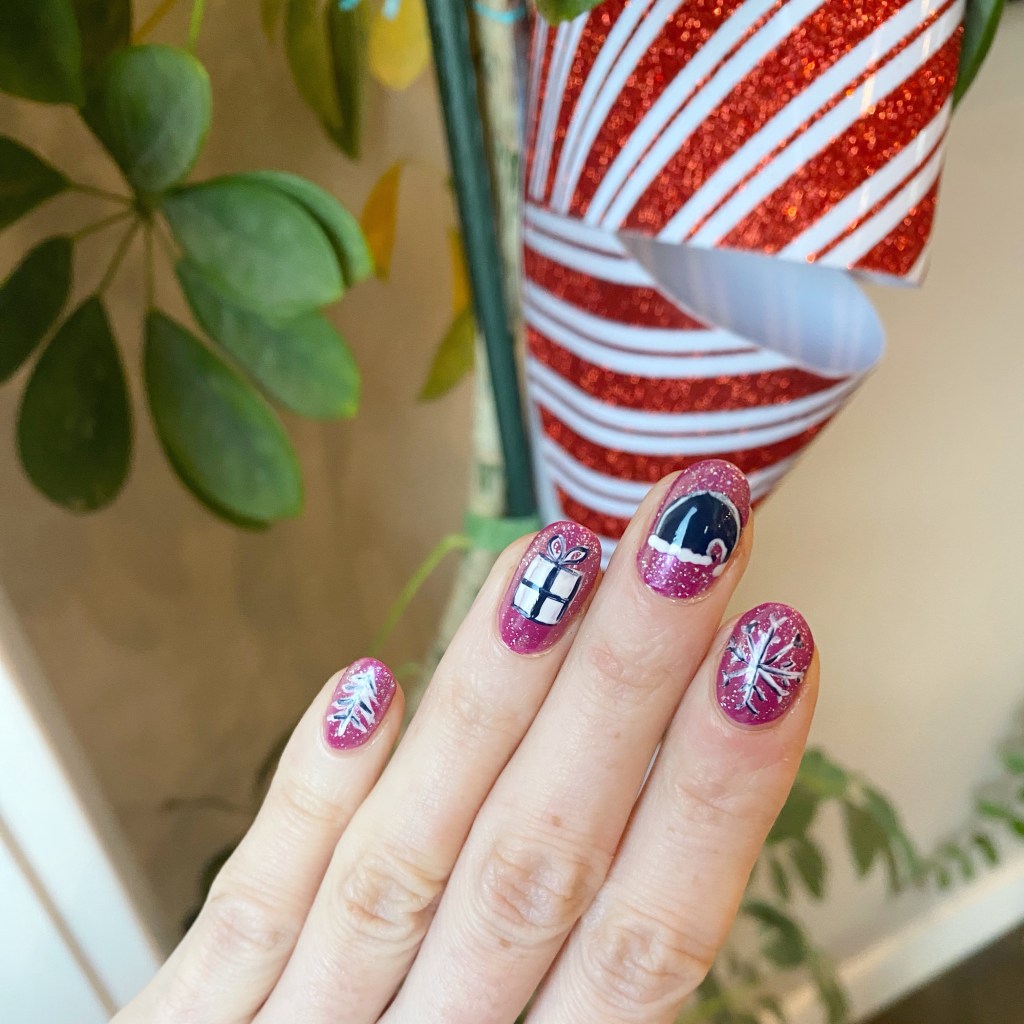
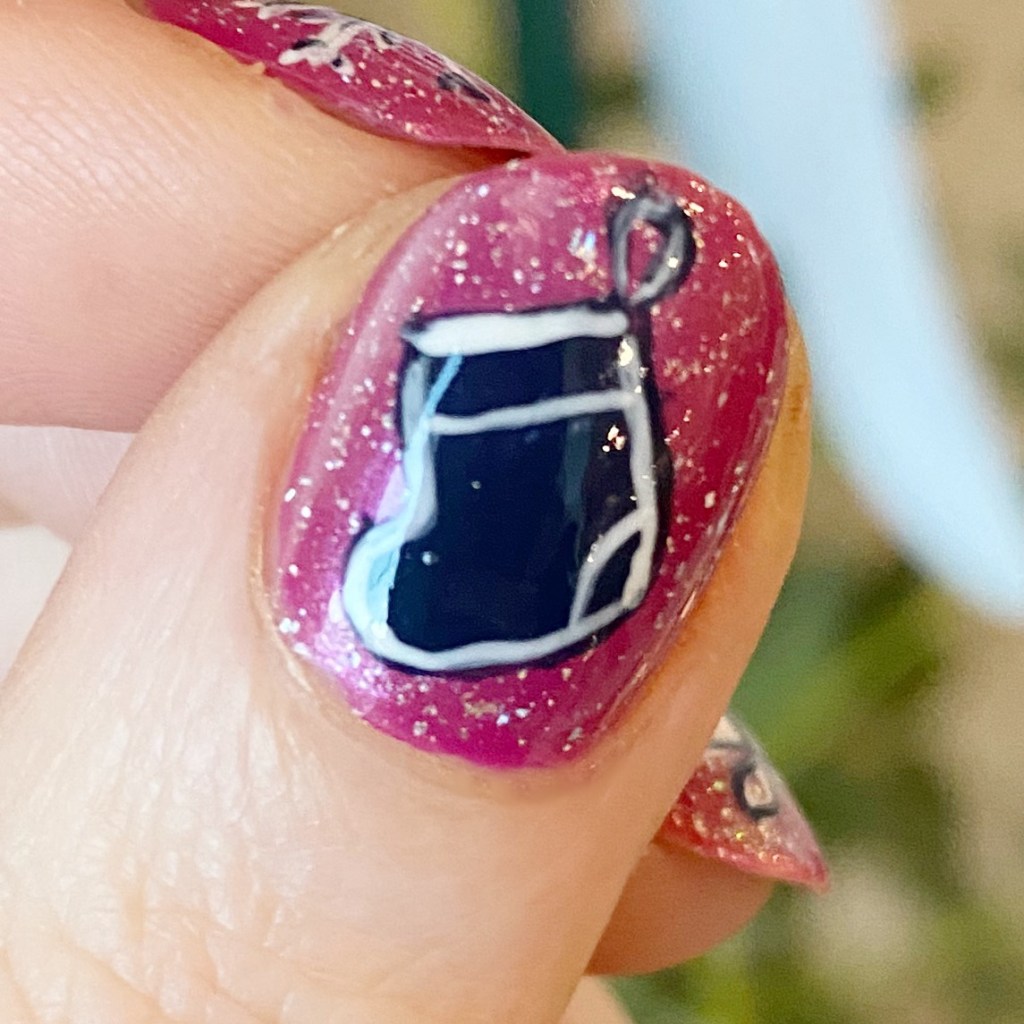
Hello beauties & happy Friday! & Happy boxing day. I hope everyone who celebrates had a wonderful, festive Christmas. This year has definitely been the least Christmas-y feeling Christmas in a long, long time — but I still wanted to make sure I had some festive nails for the occasion.
It’s been a long time since I participated in one of the Instagram Nail Art collabs hosted by @essieyall & @petitenaillover. So I really wanted to join in for one final collab for this year! & end the right right.
The polishes I used for this manicure are:
Base Coat: Sally Hansen Miracle Cure
Top Coat: Essie Speed Setter
Essie Gel Couture Wider Than I Seam
Essie Nail Art Studio Lustrous Luxury
Essie Expressie Feel The Hype
Sally Hansen Miracle Gel A Moo Point
NailStuff.ca 4mm Micro Detail Brush
How cute did my little freehand shapes turn out? I’ll wanted a fun Christmas-y look without using red & green. & I had found some (new to me) shades at Shoppers Drug Mart on wicked clearance –like $3 a bottle! — so they inspired me to create this mix & match Christmas design for the collab.
& I really love how they turned out.
Wishing everyone the happiest holiday season ever, & a safe end to 2025. This year has been such a struggle, so I look forward to the New Year, & everything that 2026 holds.
& don’t forget to click over to Instagram & check out the hashtag #christmasnailartmanicollab2025 to see all the other amazing gorgeous designs & nail artists. You might find a new artist you love!
Hello lovelies & happy Monday! & happy Holiday week. Sending lots of beautiful wishes to everyone preparing for Christmas, or celebrating Hanukkah, or whatever brings you joy this time of year. The crunch is on right now to finish up this year, so I apologize for my sporadic posting schedule.
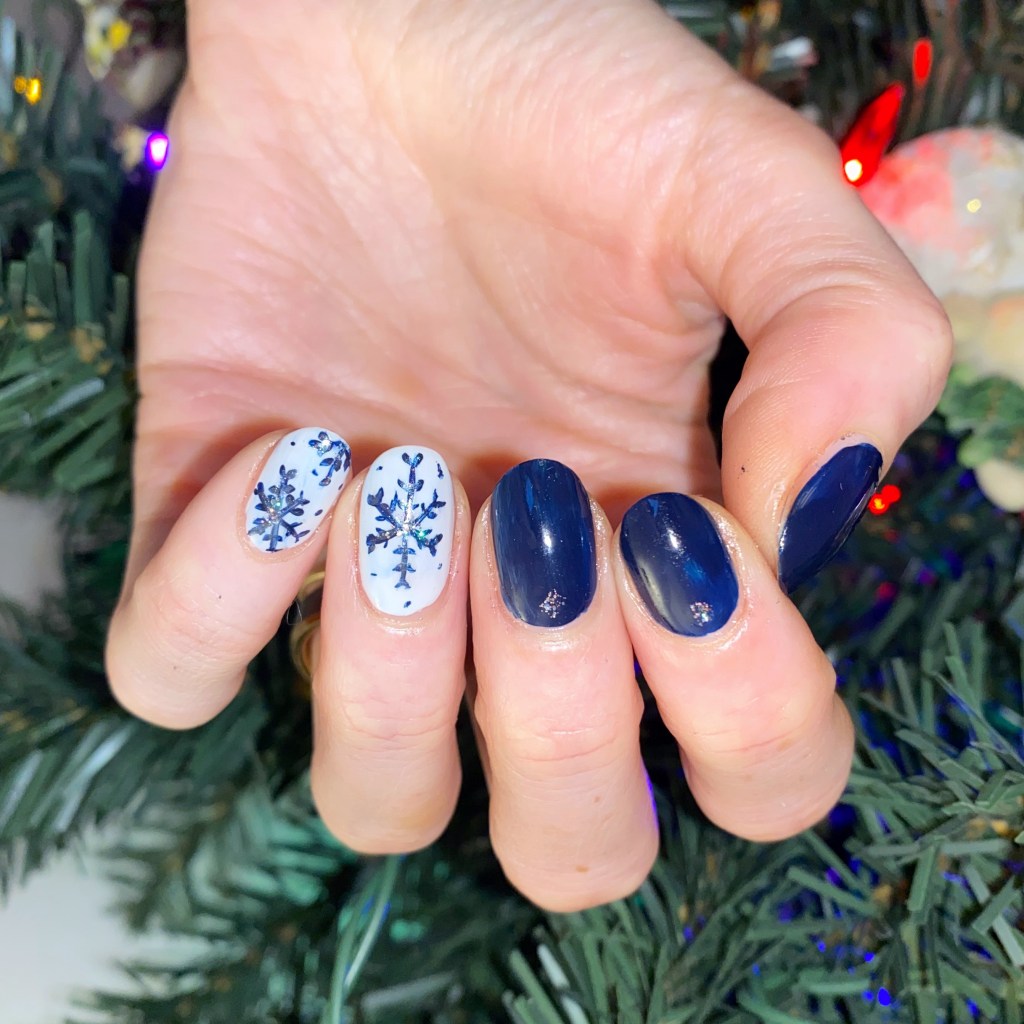
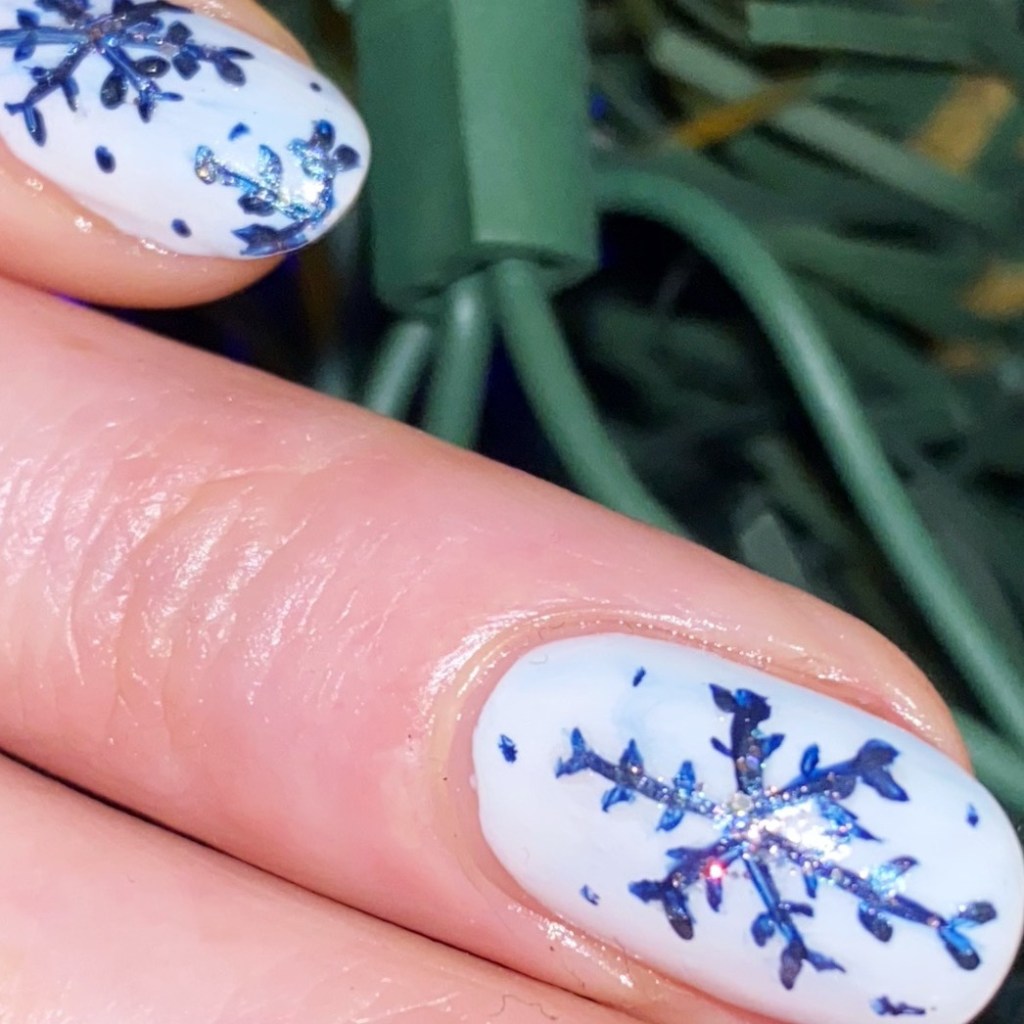
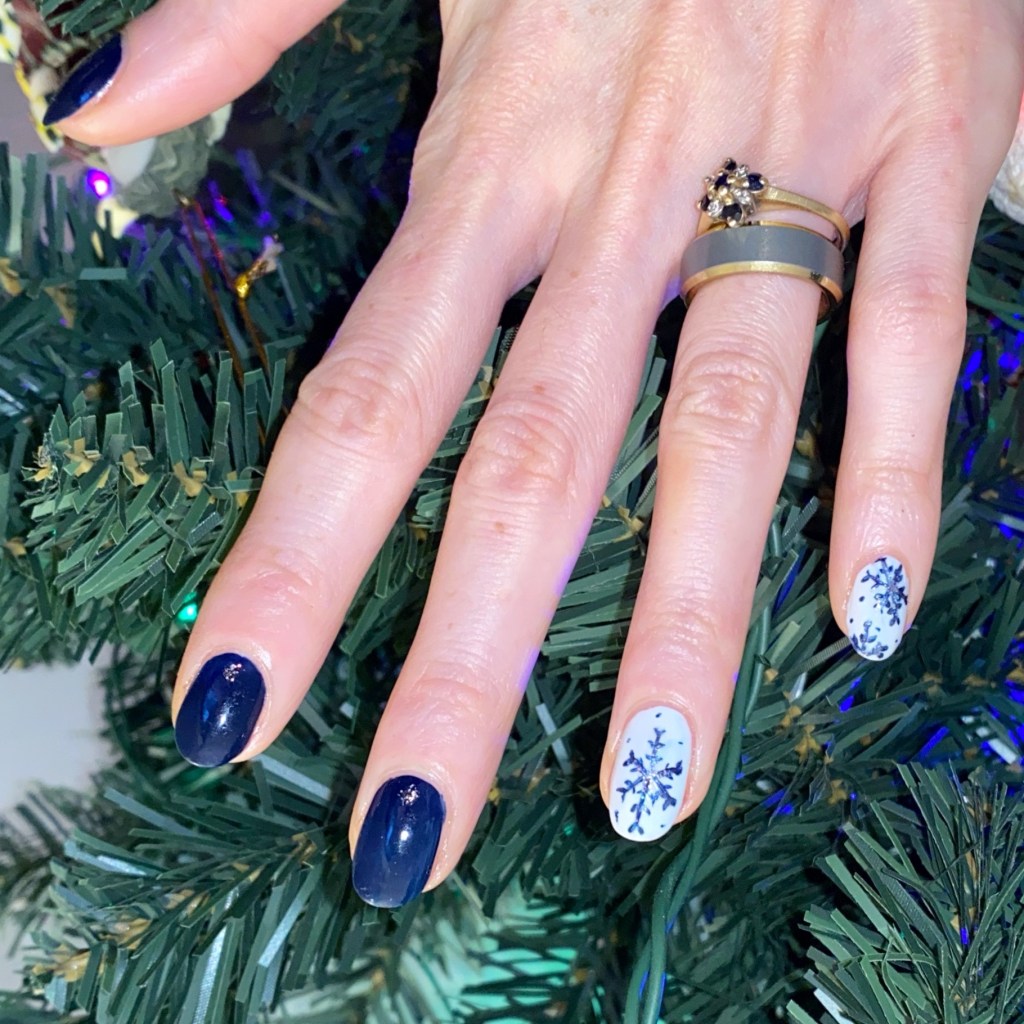
Today I’m sharing a freehand nail art Winter look I recently did. It’s not December/Christmas until I paint some freehand snowflakes, & I’m very proud of this design!
The polishes I used for this manicure are:
Base Coat: Sally Hansen Miracle Cure
Top Coat: Essie Speed Setter
Sally Hansen Complete Salon Manicure Dark Hue-mor
Sally Hansen Miracle Gel It’s a Moo Point
Sally Hansen Xtreme Wear Strobe Light
NailStuff.ca 4mm Micro Detail Brush
I always get scared to freehand something delicate like this, because in case you didn’t know — I can be kind of a perfectionist. But I’m trying to work on that, & challenge myself, & I’m really proud of my snowflakes. They’re dainty, & cute, with just the right amount of glitter.
These are just such fun winter-y Holiday nails. I love how they turned out. Also I’ve been really, really feeling blue lately which is funny, because it’s not the most Christmas heavy colour. But I think for a design like this it’s perfect. & I got lots of compliments when I wore these nails to work, which always makes my whole day when someone notices them.
What do you think about these blue snowflake nails? Do you think it’s a fun, pretty design for the holidays? Are you all ready for the holidays? Let me know what you think down in the comments below.
& good luck to all my fellow last minute shoppers out there! I’ll be right out in the crowds finishing up my shopping, just like you.
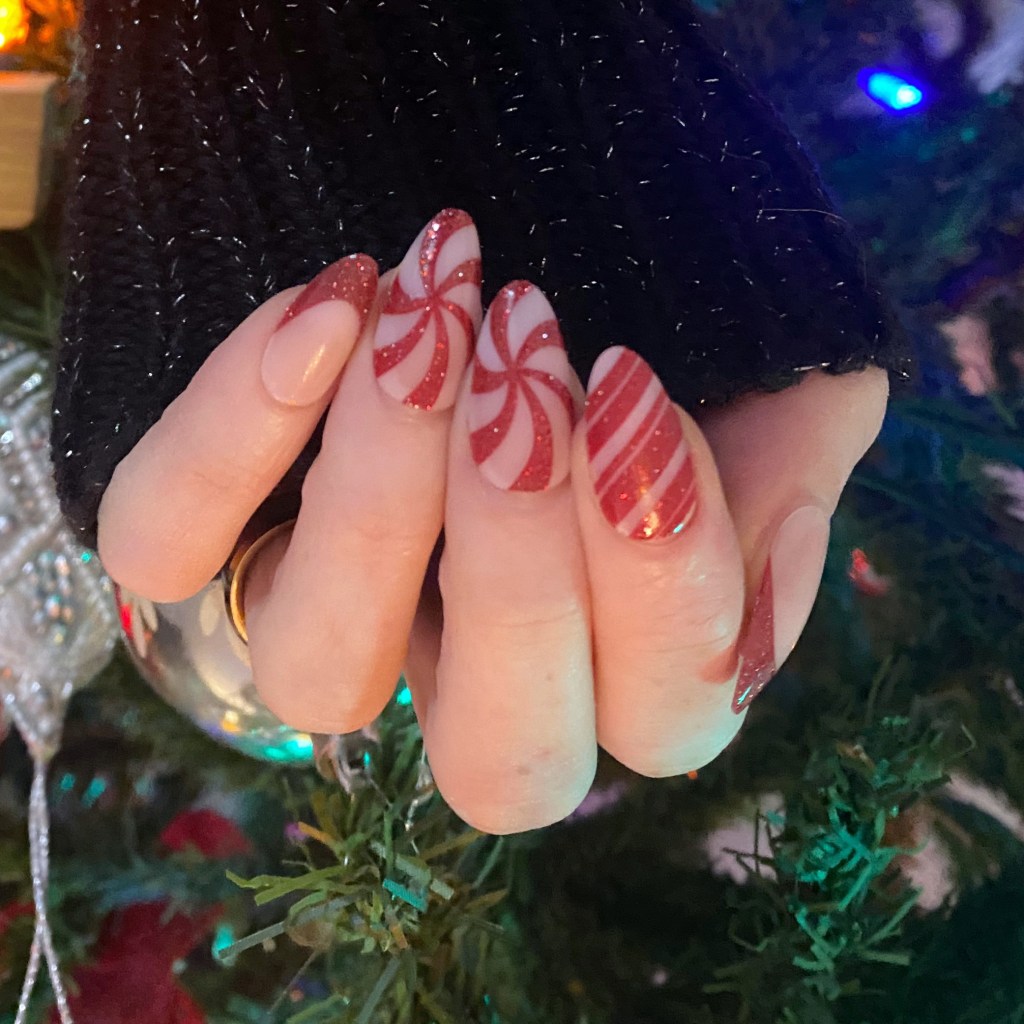
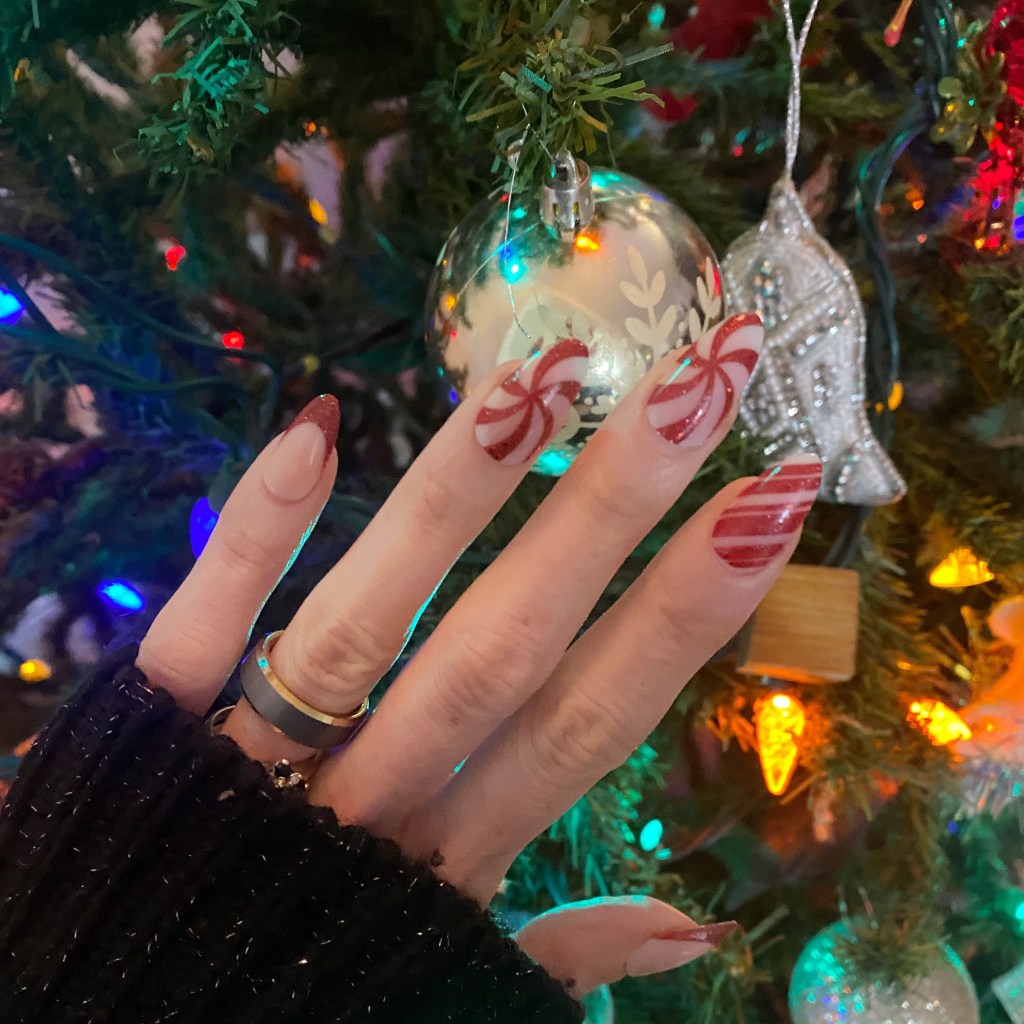
Kiss once again spoiled me, & recently sent me a box of Christmas cheer in the shape of their Press On Nails & False lashes! The perfect thing to help me get Holiday ready quickly.
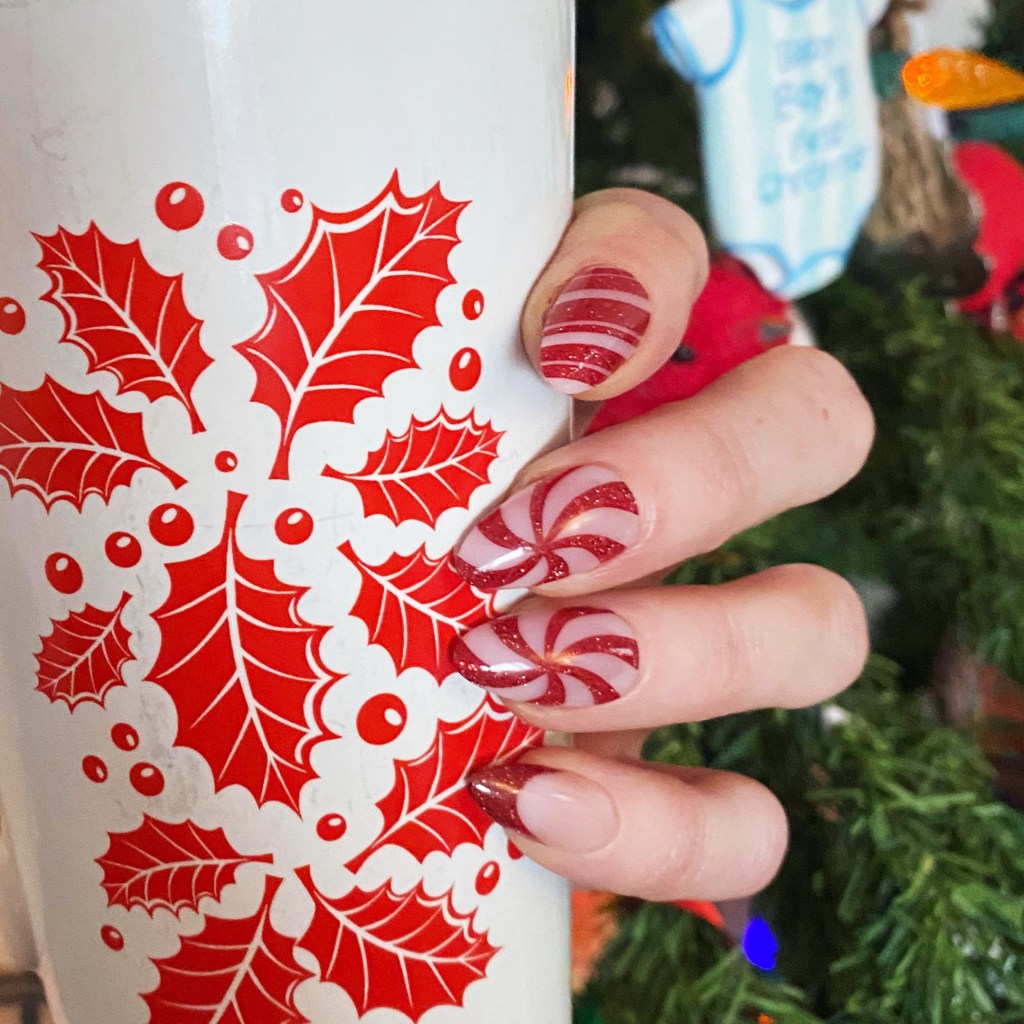
Sunday night I had a get-together with my former Candy Store coworkers, so I thought a set of nails would be perfect for the occasion — & who can say no to candy cane inspired nails!
These nails were fairly easy to apply. The trick is to make sure you pick out the size/style you need for each nail prior to starting your application, & laying them out in order. Then, start from your pinky nails & work your way to your thumb. I find this especially important to do when you’re doing nails with any significant length — like these ones!
Now for these nails I was only planing on wearing them for the night, so instead of using the included glue, I chose to use sticky tabs to apply them which I find a better option for shorter term wear. Each pack does come with the Kiss Nail Glue, which from my previous experience does last really well & holds up against every day use.
What do you think about these Kiss Voguish Fantasy nails? Would you rock press on nails like this for a super quick & easy party look? Let me know all your thoughts in the comments below!