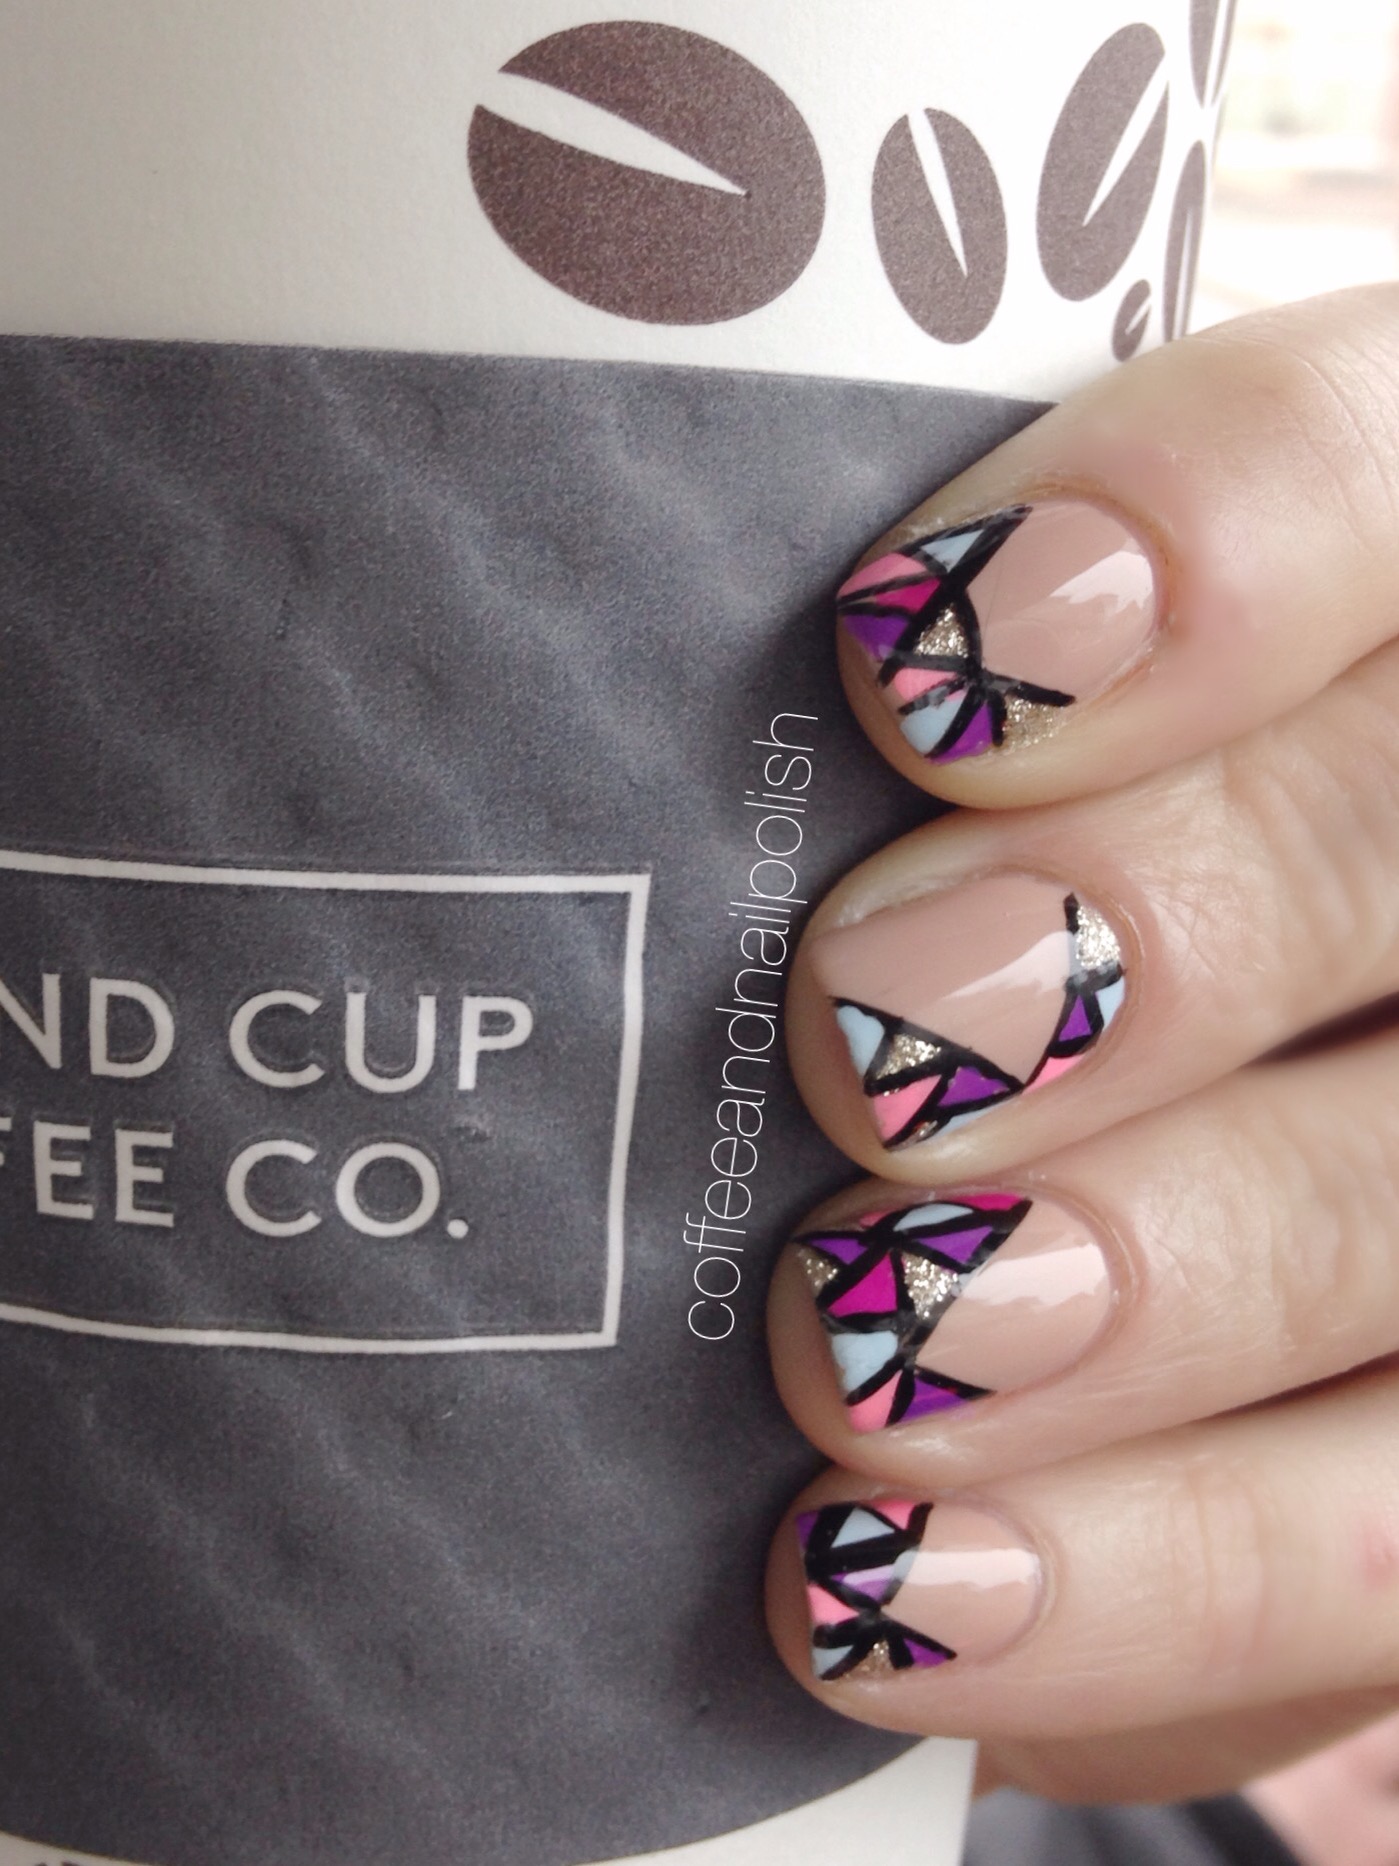
again with the unplanned hiatus! I’ve been busy busy busy with work with no time for much else! However, I can never go polish free so I thought I would share a few swatches of the polishes/polish combinations I’ve been wearing the last couple weeks.

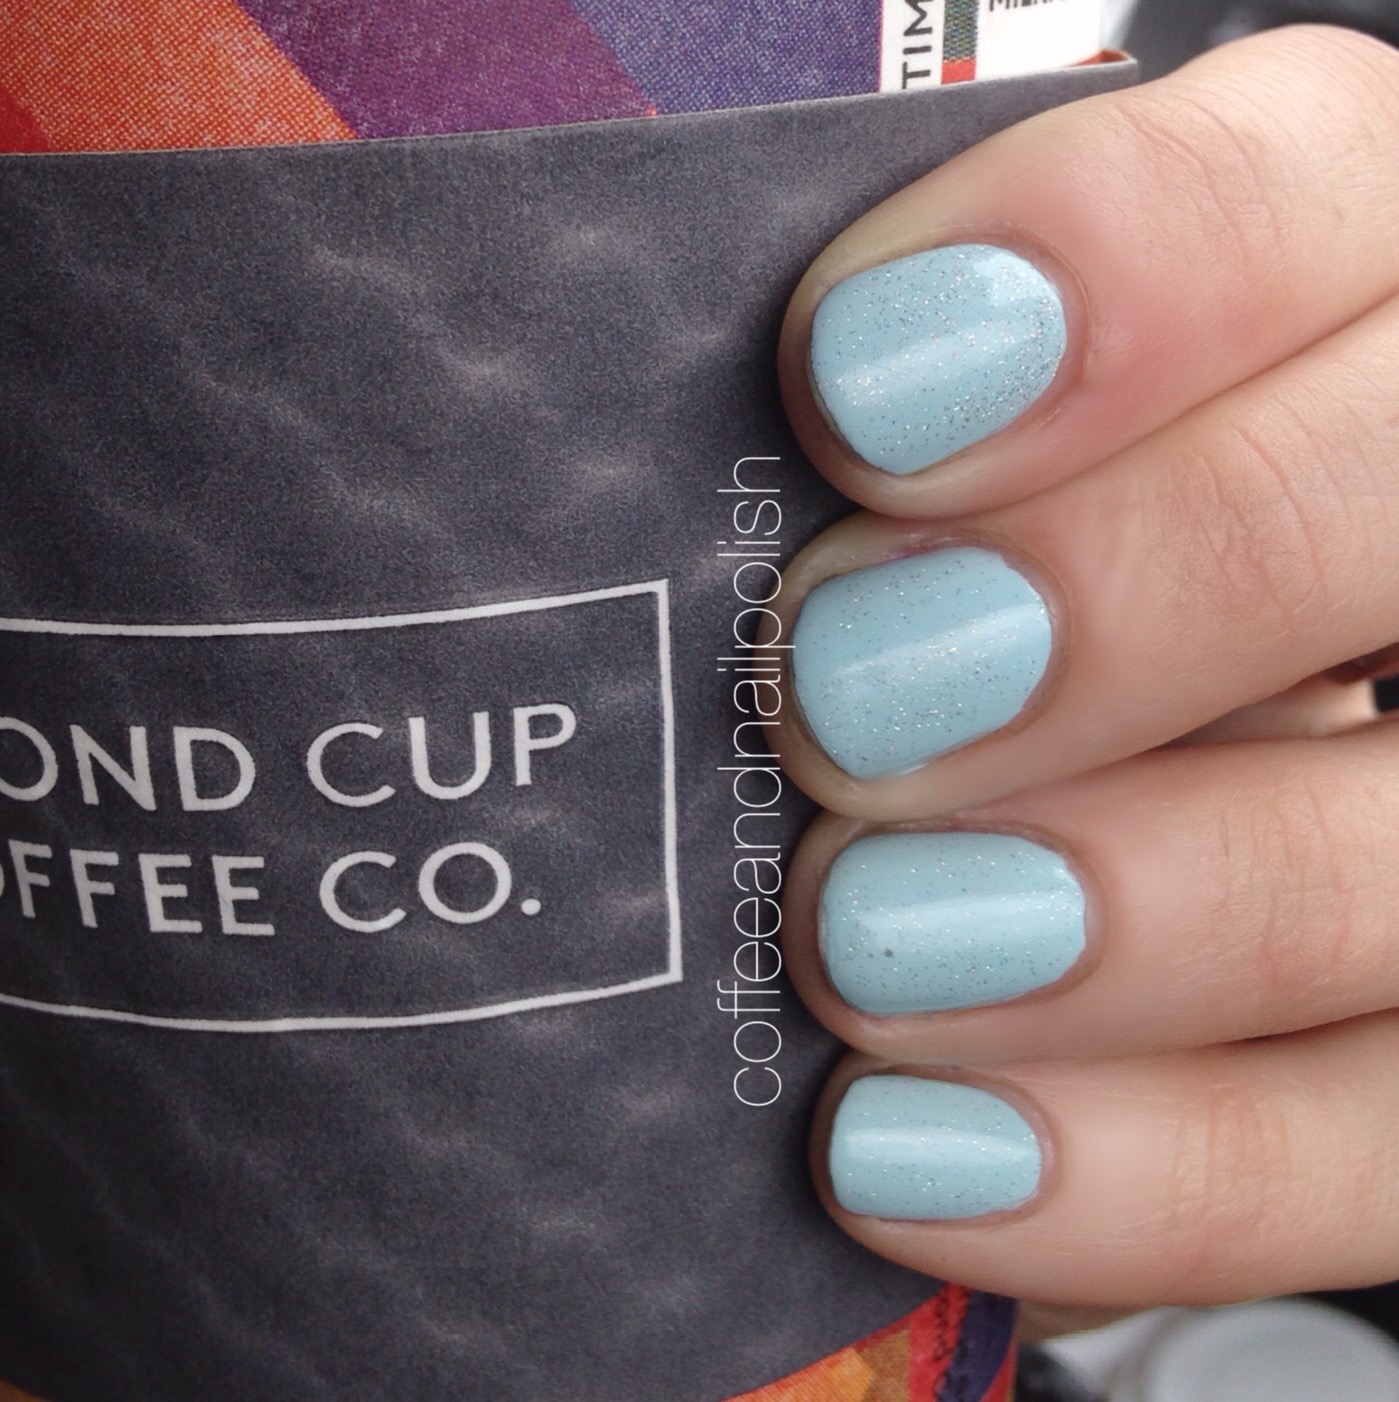
Hard Candy Sky (topped with China Glaze Fairy Dust) — I picked up a few of the Hard Candy 20th anniversary polishes at my local Walmart last month and obviously this one had to be in the bunch! Love love love! This polish makes me think of Buffy the Vampire Slayer and her pretty pastel nails which is exactly why I feel in love with polish in the first place! Sadly my Fairy Dust didnt want to show up for the camera but looked pretty in person as always.

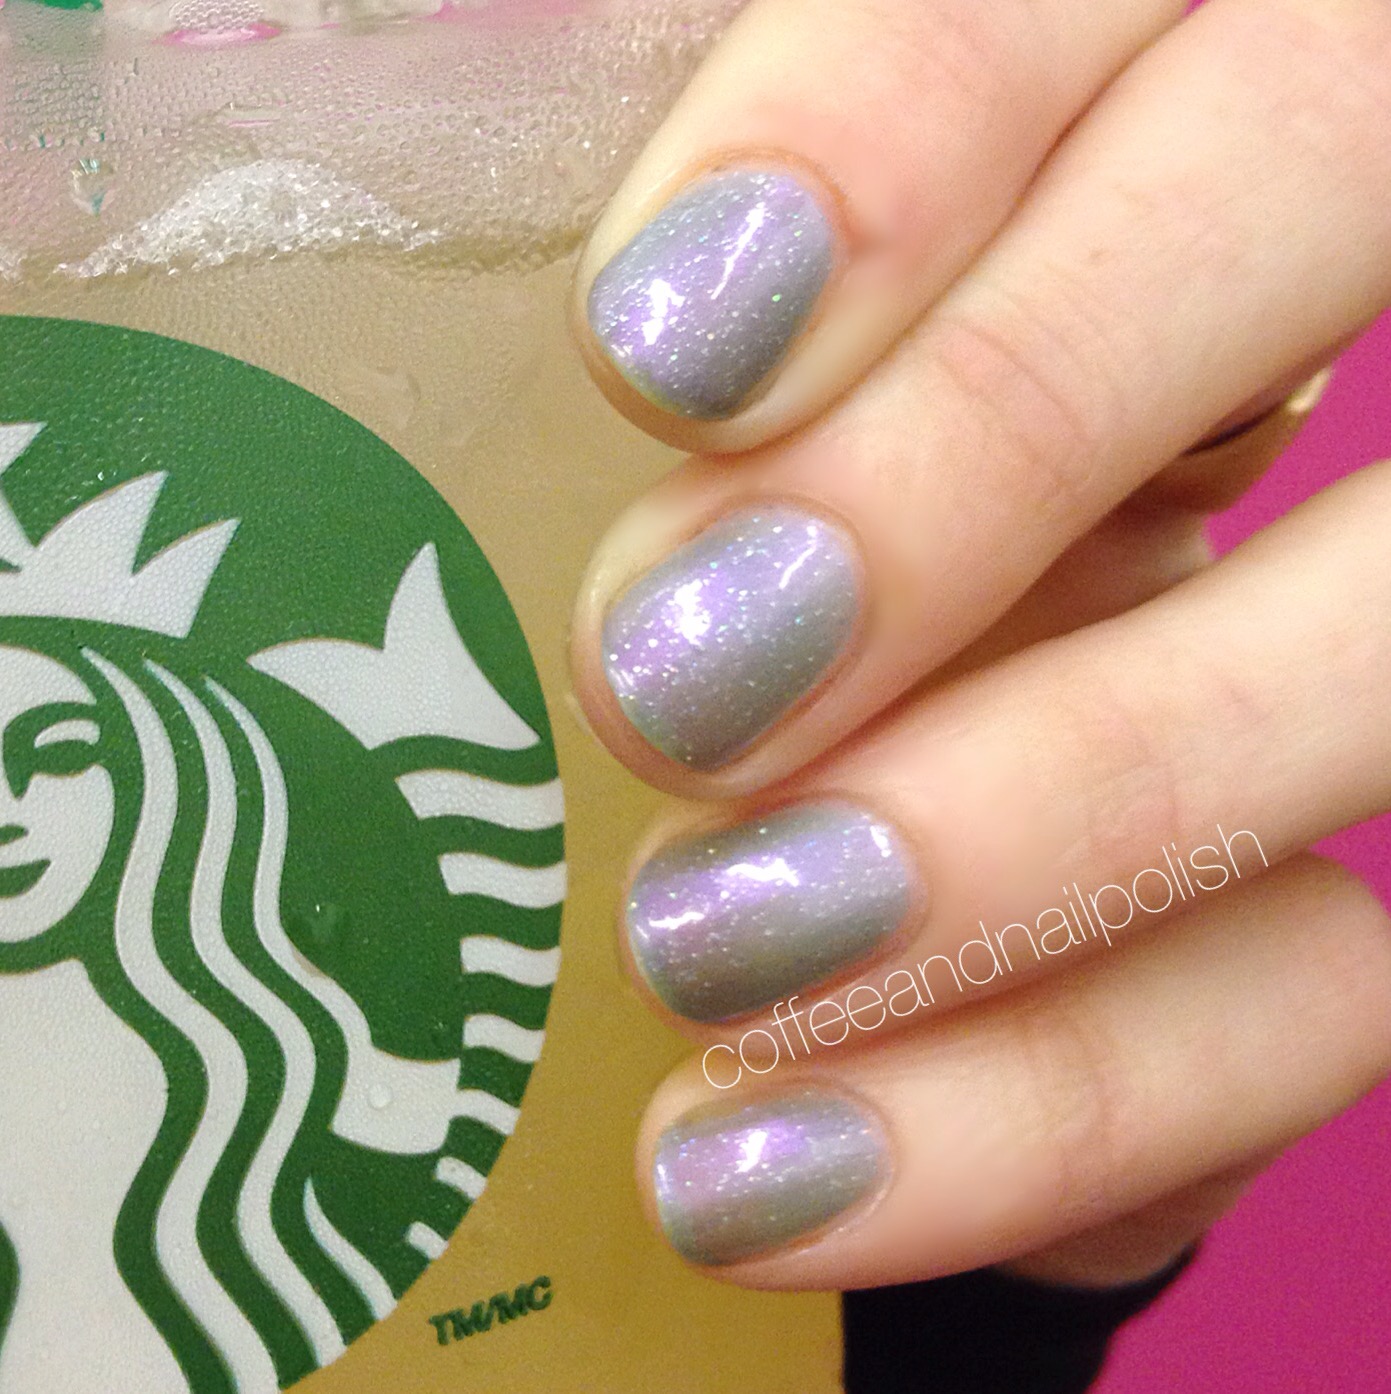
CND Vinylux Dazzling Dance—Duochrome! Purple! Holo glitter! 💜 I picked up this gorgeous polish at my local Winners for $3! I’d been watching it for months, and finally realized it was waiting for me to take it home. This was 4ish coats with still visible nail line so next time I’ll add some undies. But even still… 😍
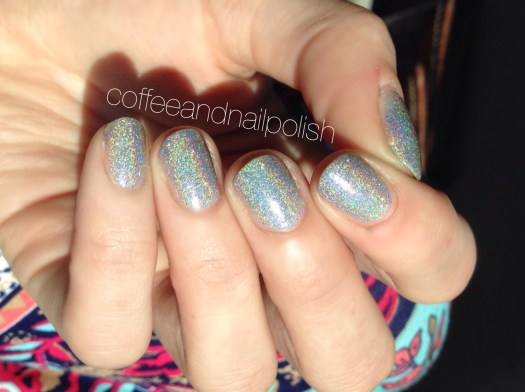
ORLY Mirrorball — I’m kind of on a holo kick lately and Mirrorball is perfection. Just look… Words are not even needed. 🙀 (you will definitely be seeing more of this beauty later 😉)

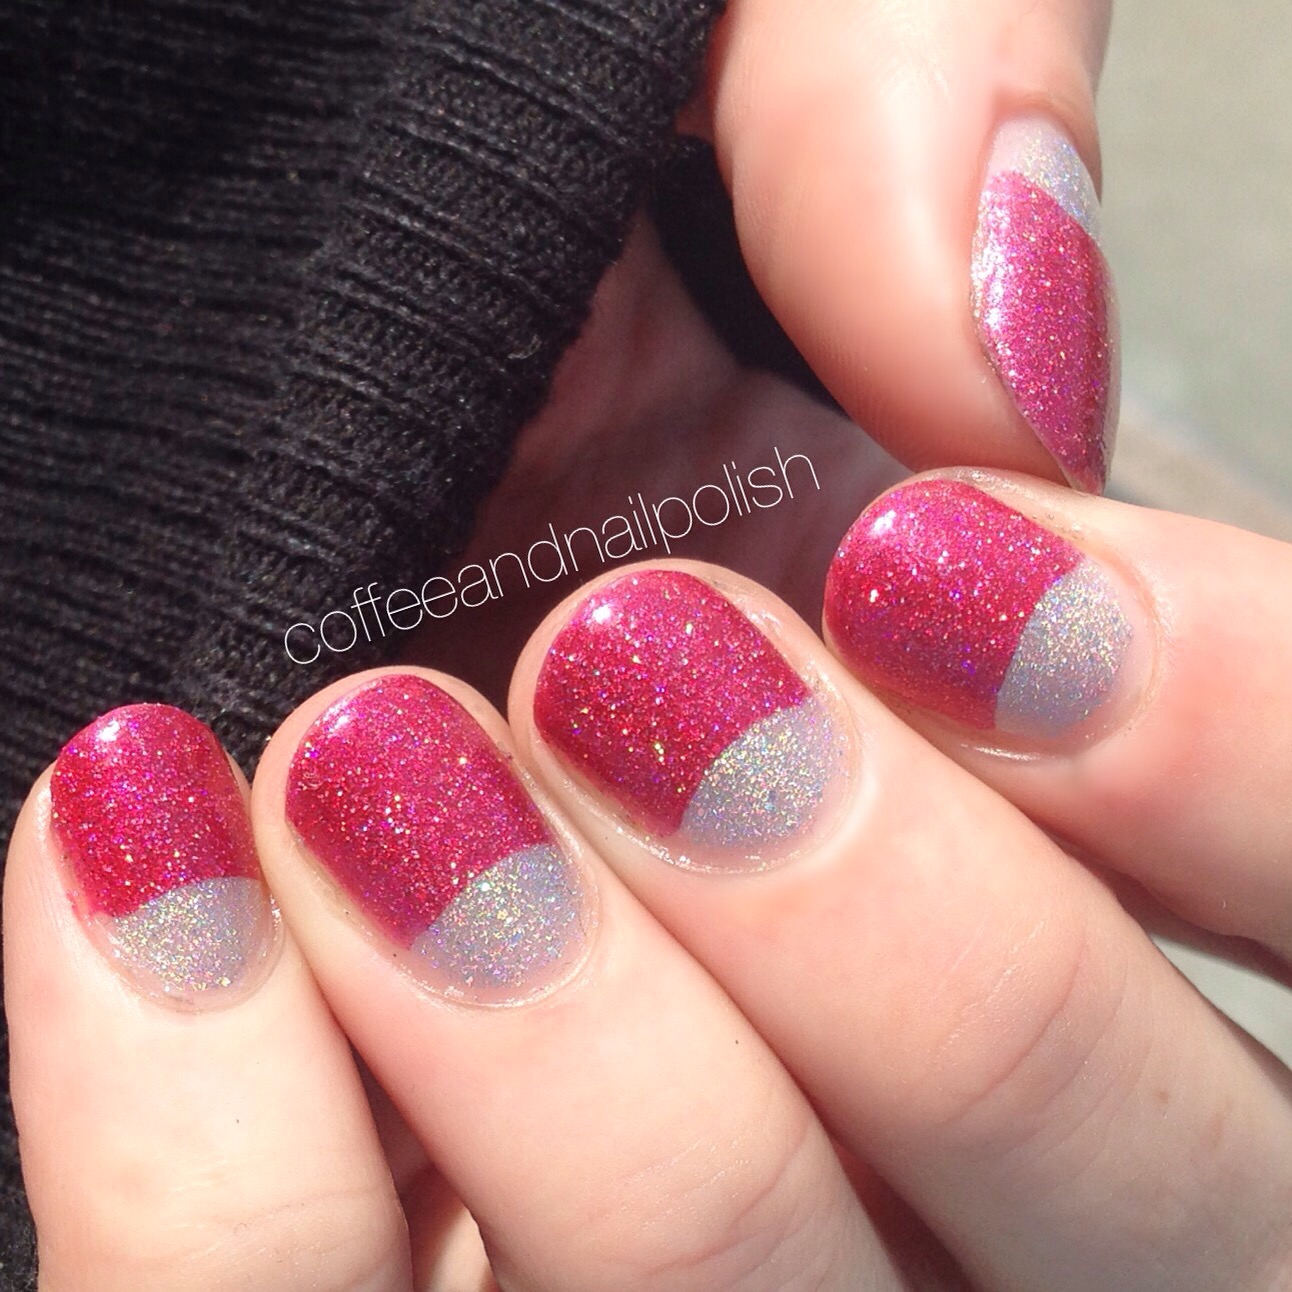
ACO by Ardene 80s Prom Dress — (layered over China Glaze Seas the Day) bright fushia pink with camera shy micro glitters. Definitely a perfect Summer colour! Again it’s pretty sheer on its own so undies were a must. I’m curious to try it out with a darker shade.
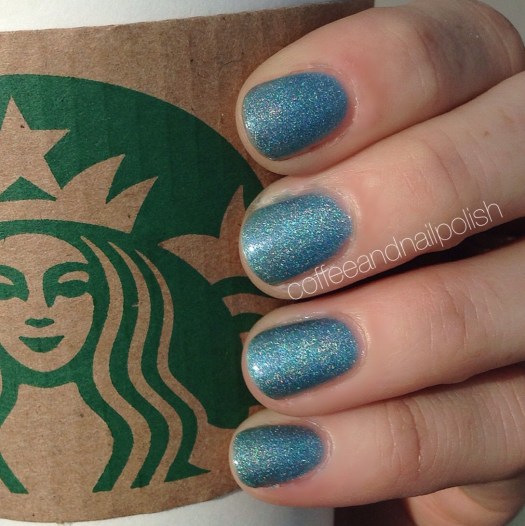
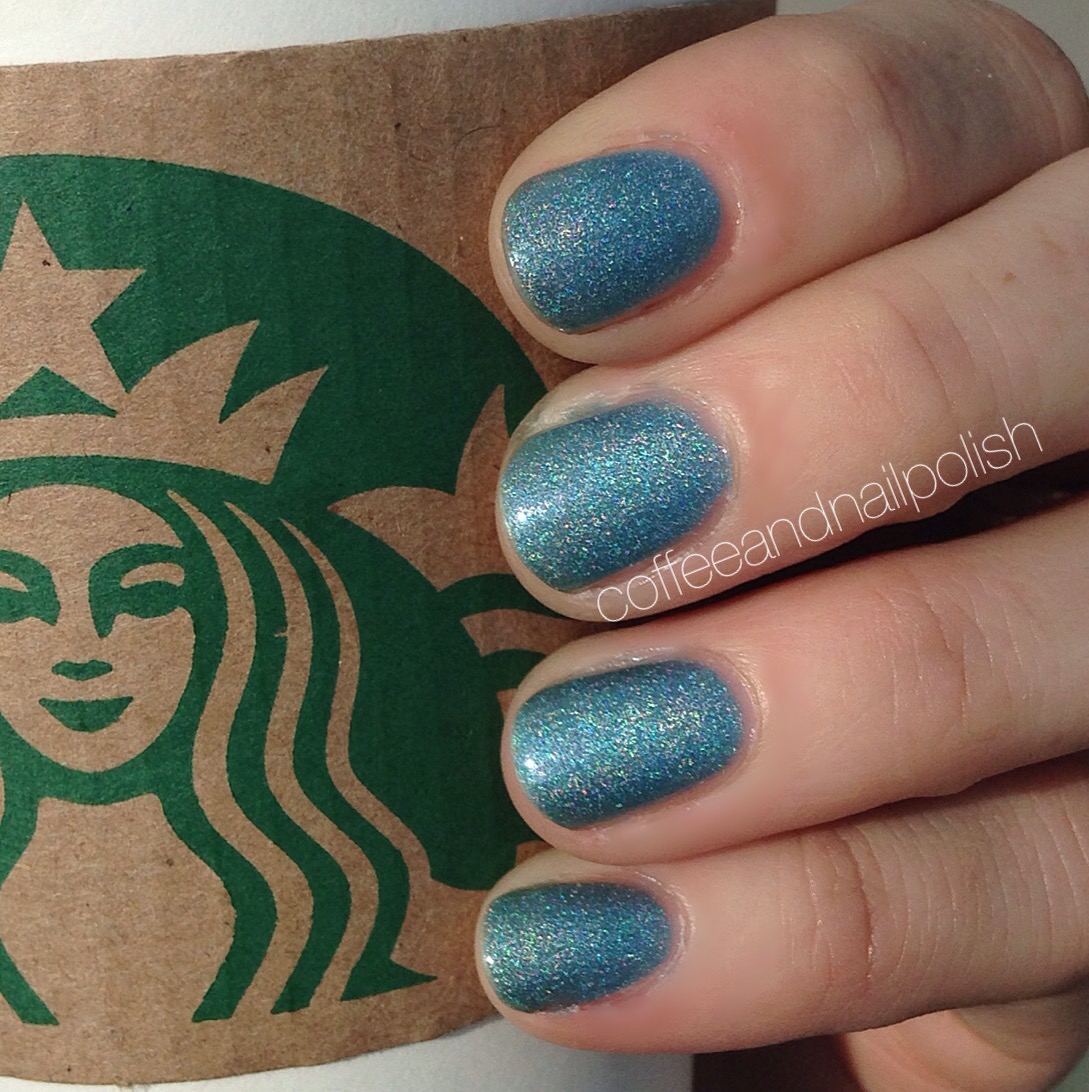
Nubar Absolute — Blue holo. Seriously I’m holo obsessed right now and need them alllllllll. I tried my best to capture the holo in the sun, but don’t worry in person it cannot be missed! I also realize that I’m going to have to spurlge and pick up a few more Nubar holos because damn they’re so pretty!
ACO by Ardene Crystal Fog layered over Hard Candy Zombie. Zombie is another 20th anniversary release from Hard Candy that the Mr. picked out for me, probably because we’re obsessed with iZombie lately! It’s a gorgeous purple on its own, but add a coat of Crystal Fog by ACO by Ardene and it turns into the most amazing duochrome. I don’t usually wear dark polishes in the Summer but this is definitely going to be an exception!

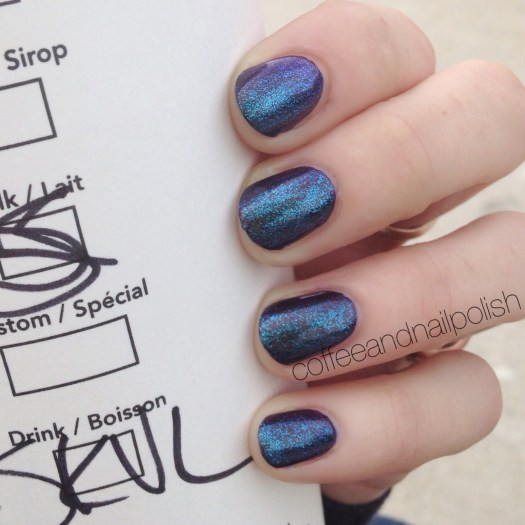
Joe Fresh Quartz — it was not easy to capture the shift of this polish on camera…. Just kidding! the above shot says everything you need to know. I literally spent all day staring at my fingers moving them around. Shifty gorgeous duochrome PERFECTION! I have a few Joe Fresh polishes in my stash but this is definitely my new favourite. It’s just so perfect.
So what polishes caught your eye the most? Are you team duochrome or team holo? Also what’s your favourite polish to wear when you just don’t have time for nail art? Let me know in the comments below! 💜💜💜