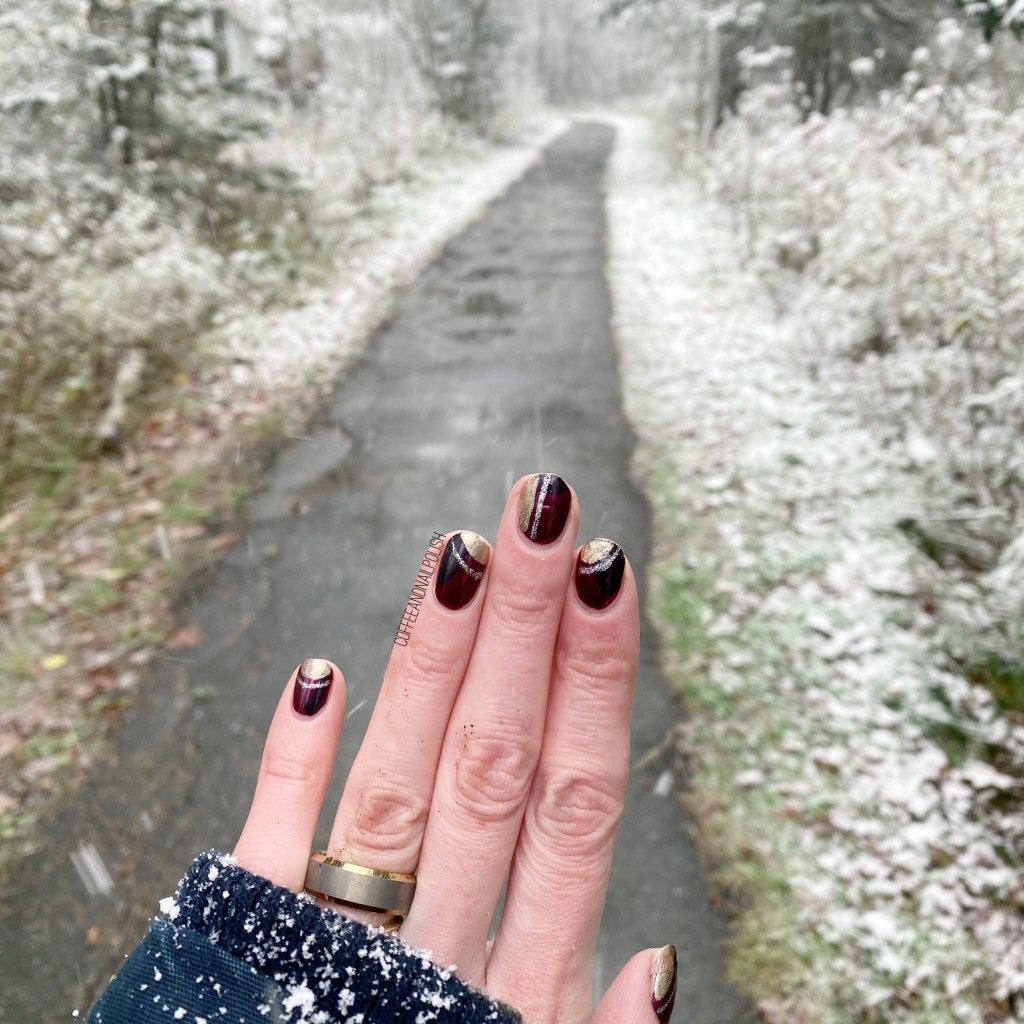
Hello lovelies & happy Wednesday. It’s definitely a very, very chilly Wednesday here on the East Coast, & I don’t think I’m quite ready for it! I’m naturally a person who is always cold, so when the weather shifts, there is not enough layers or tea in the world to keep me warm!
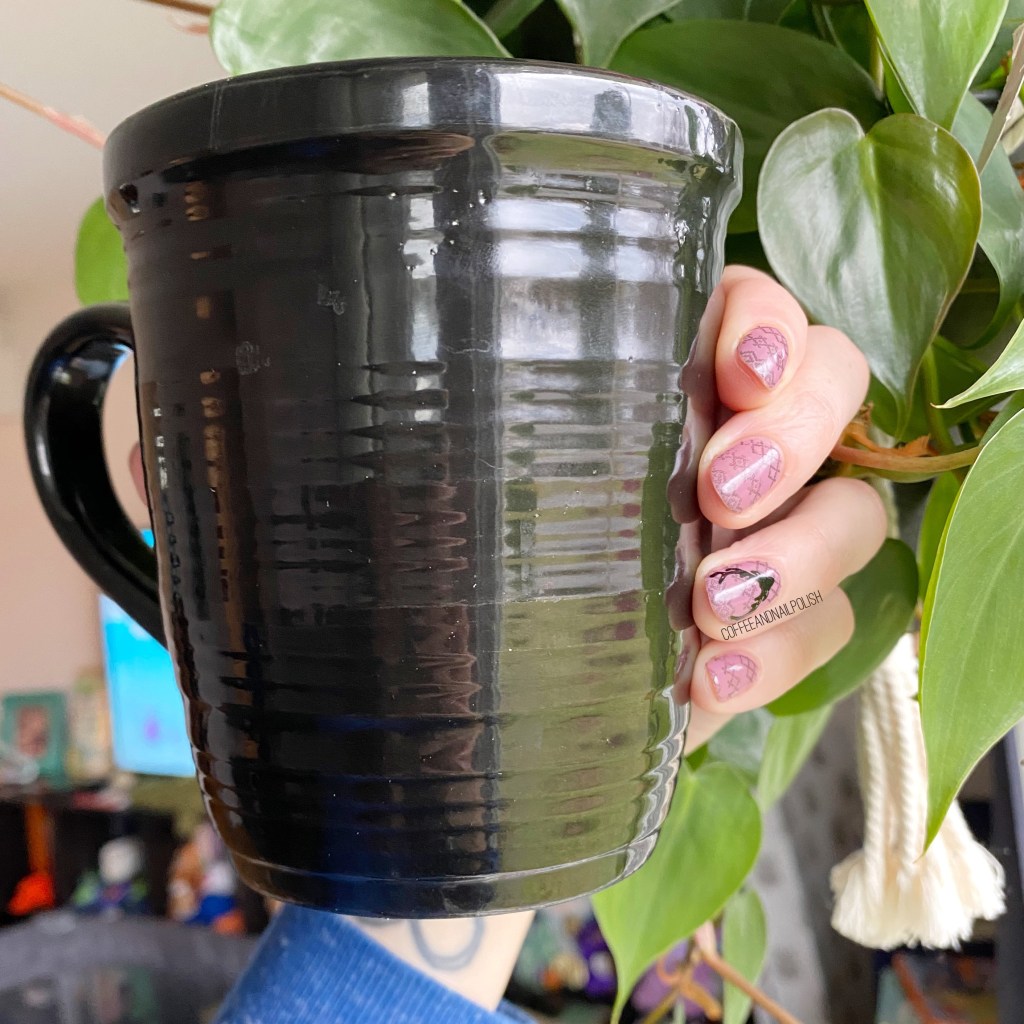
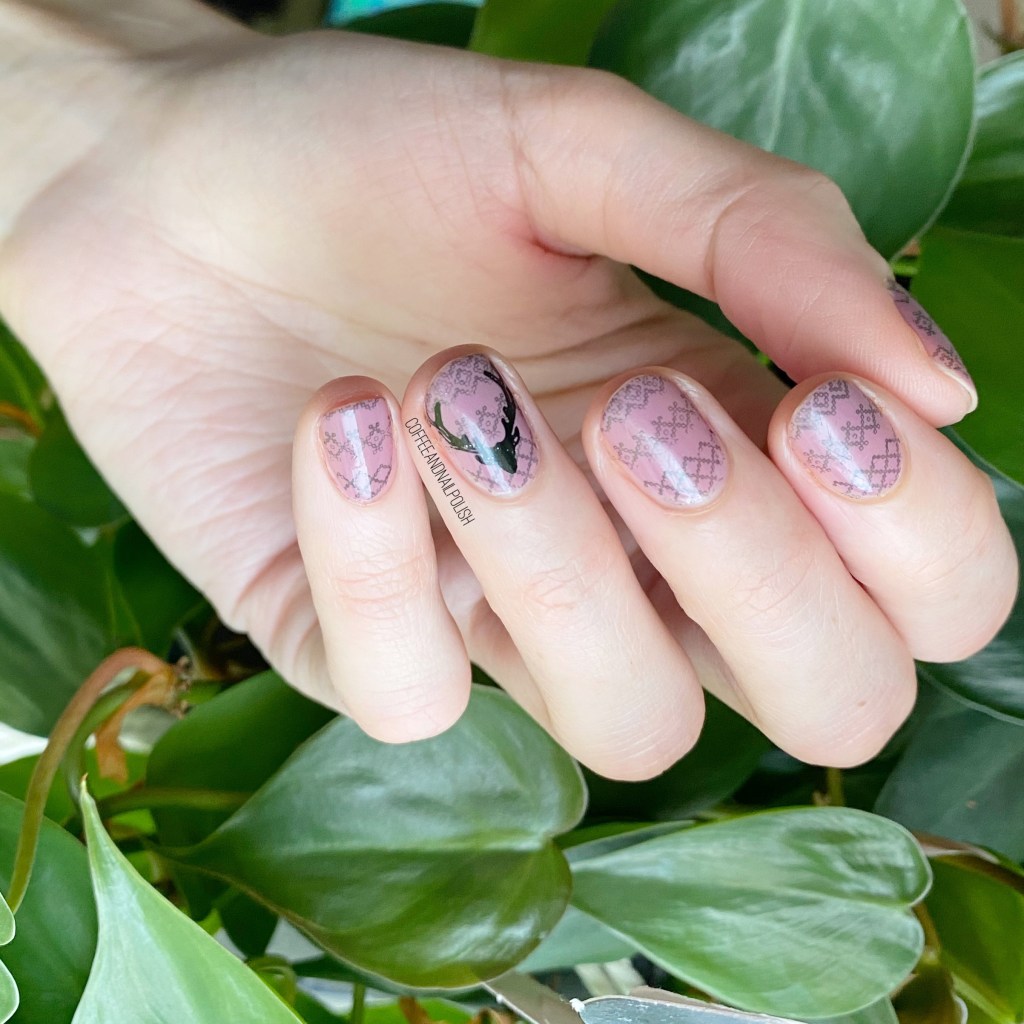
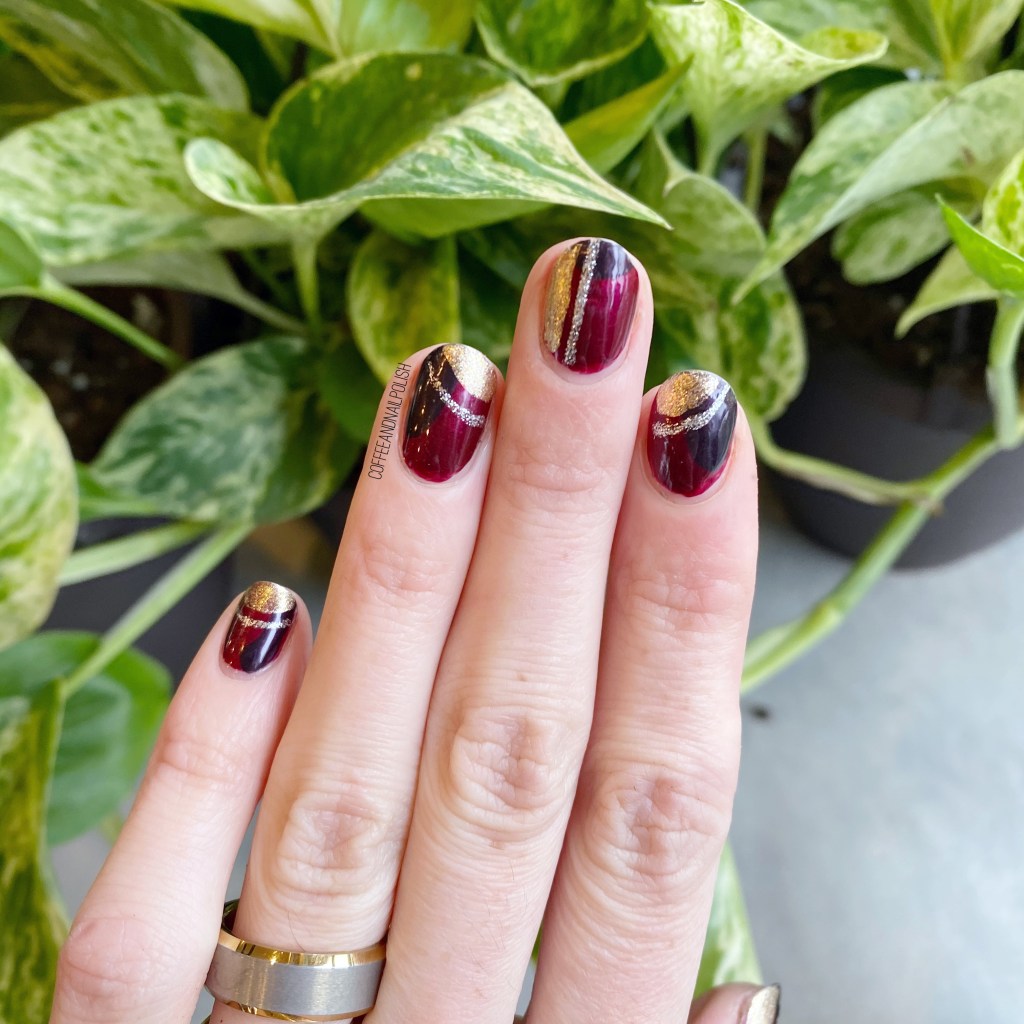
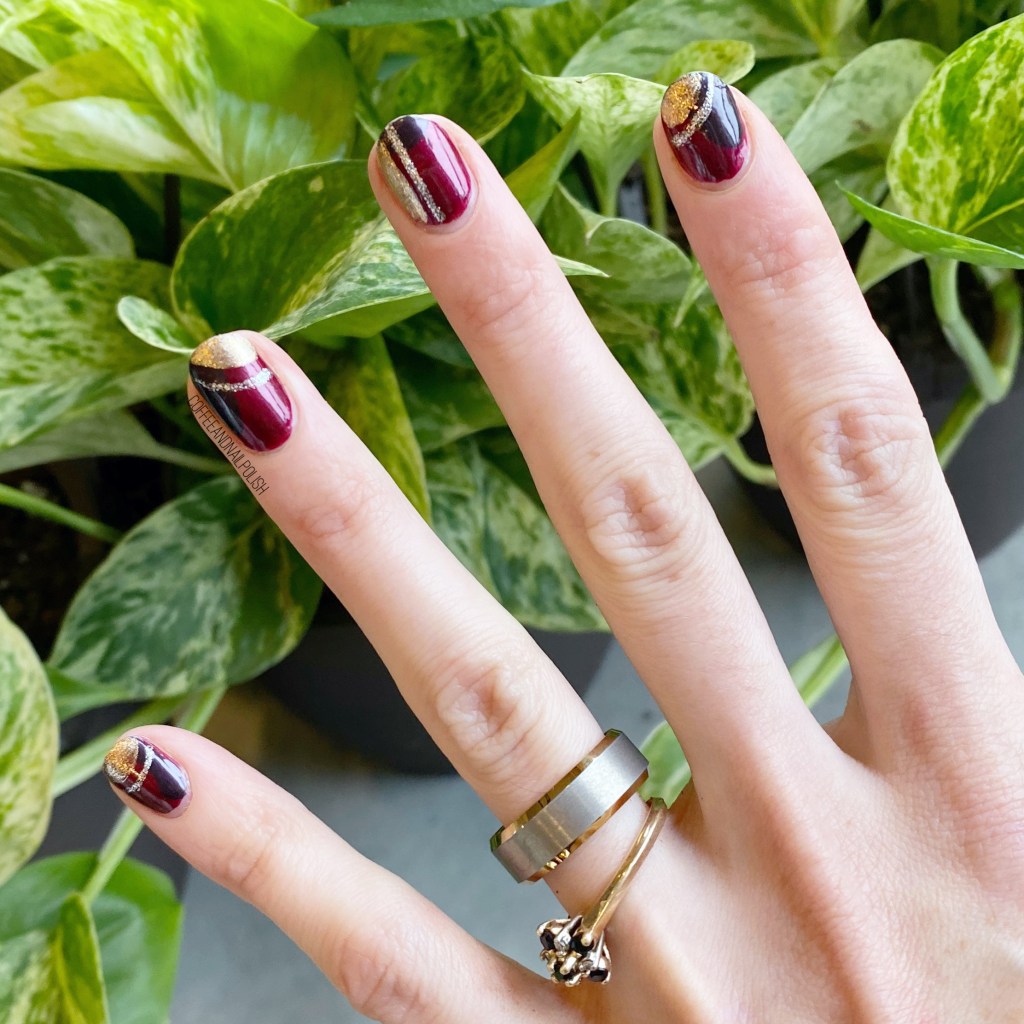
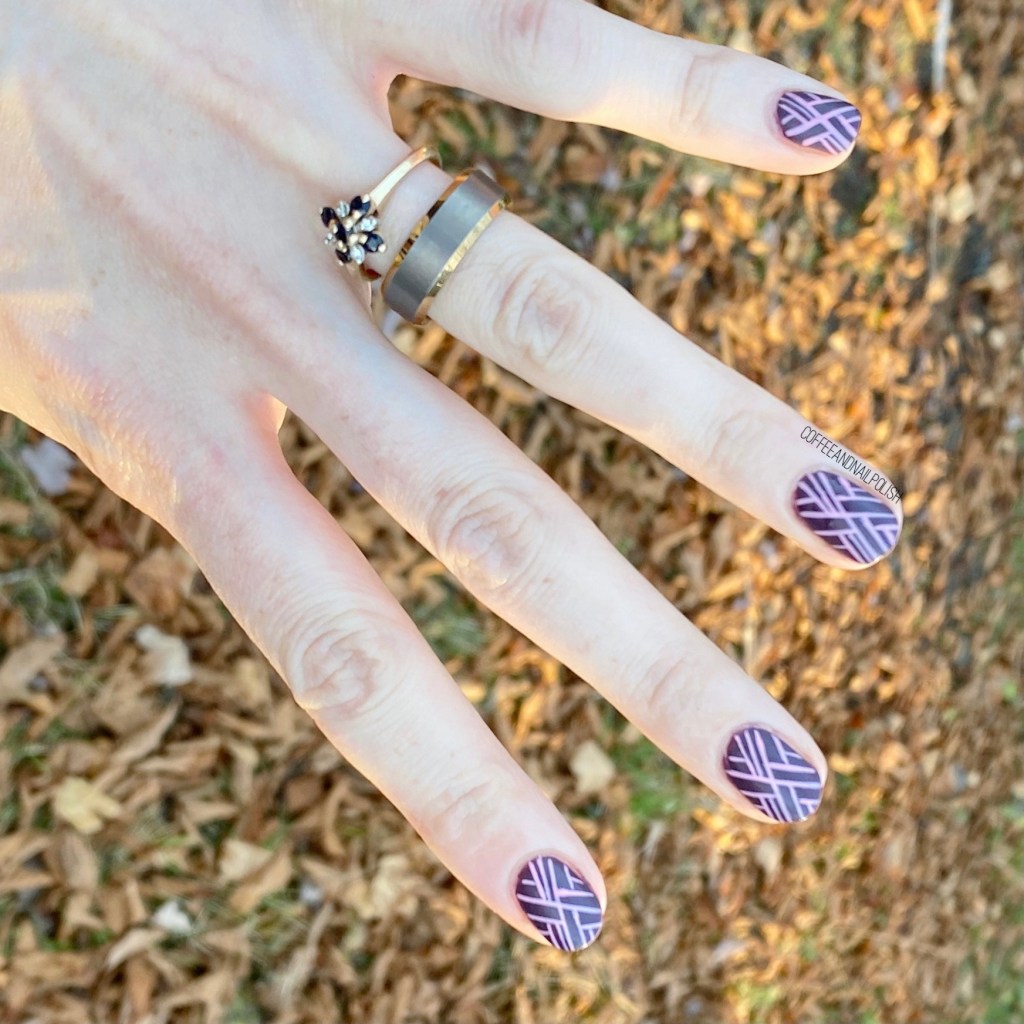
But even if I’m cold, I still have cute nails to show off! I picked up a couple nail art stripers on clearance at Lawton’s a while ago, but hadn’t really played with them, so I decided to play around with some line work. I originally intended to do a kind of x-pattern look, which so of shifted as I was doing it. I’m not sure what to call this kind of pattern, but I absolutely love it. & it’s a look that even looks good on nubby nails like mine!
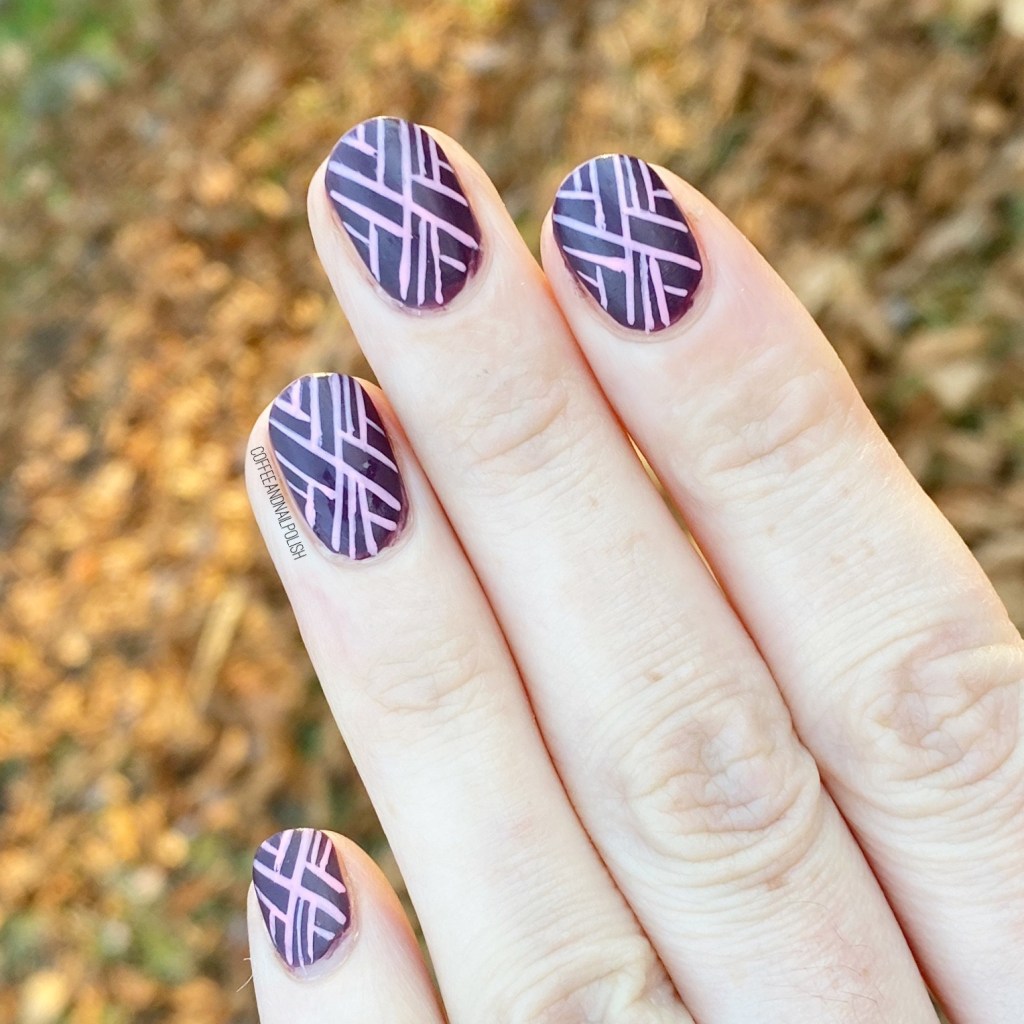

For this manicure, the polishes I used were:
- Base Coat: Sally Hansen Hard As Nails
- Top Coat: Essie Gel Setter
- Matte Top Coat: Sally Hansen Miracle Gel Matte Top Coat
- Sally Hansen Complete Salon Manicure Clean Slate
- Color Club Art Club Pink Pastel
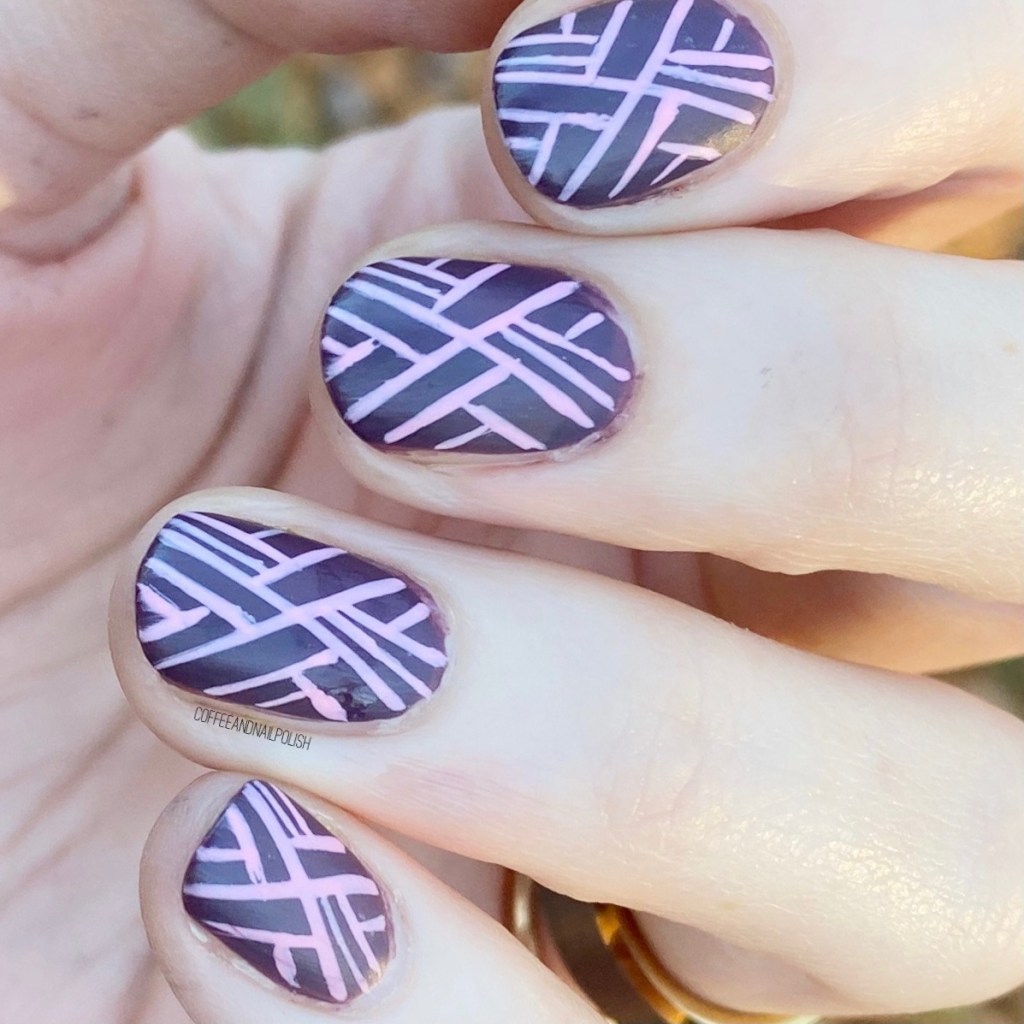

Oh man, I think this pattern turned out so neat! It actually wasn’t super difficult to do either; I started with painting an X on my nails, then when it each triangle section to repeat the same pattern over & over so you would get this interlocking/woven effect. It sounds complicated, but it really wasn’t. Just required a bit of a steady hand, & a little concentration, but the end result is totally worth it!
Also yes I’m totally obsessed with using my matte top coat again. I saw that Sally Hansen has a new Miracle Gel matte top coat, so I’m going to see if I can pick some up the next time I’m out. I also think I’m due for another “battle of the matte top coats”, so maybe I’ll have to add it to the mix!
What do you think about this look? Is this something you could see yourself rocking?
Also now that we’re hitting mid-November I was thinking of starting to post the occasional Winter/maybe Christmas look? Do you want to see that, or do you think it’s too soon?
Let me know down in the comments below!