Purple on Purple Chevron Moons

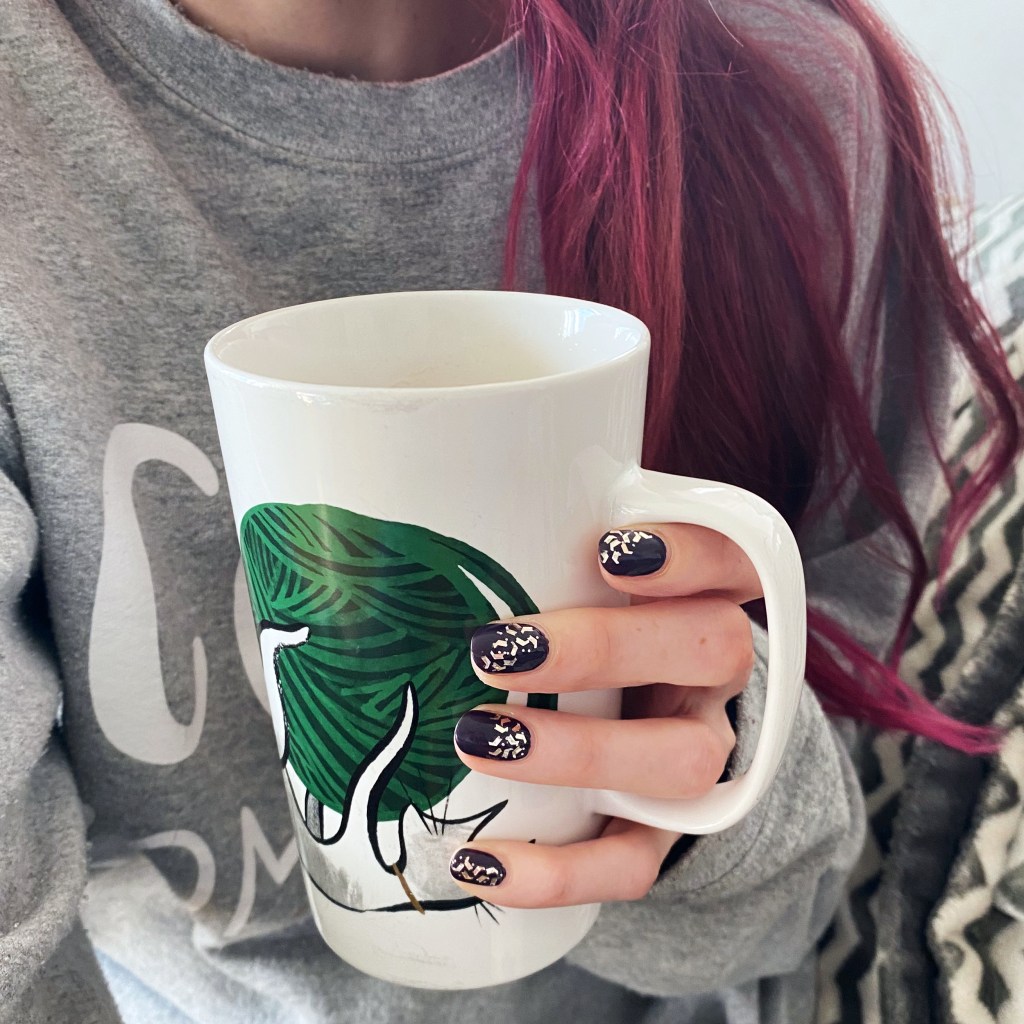
Hello lovelies & happy Wednesday! To be honest, I’m still in that post-holiday haze & still not quite sure what day it is. But, the calendar says it’s Wednesday, so we’ll go with that.

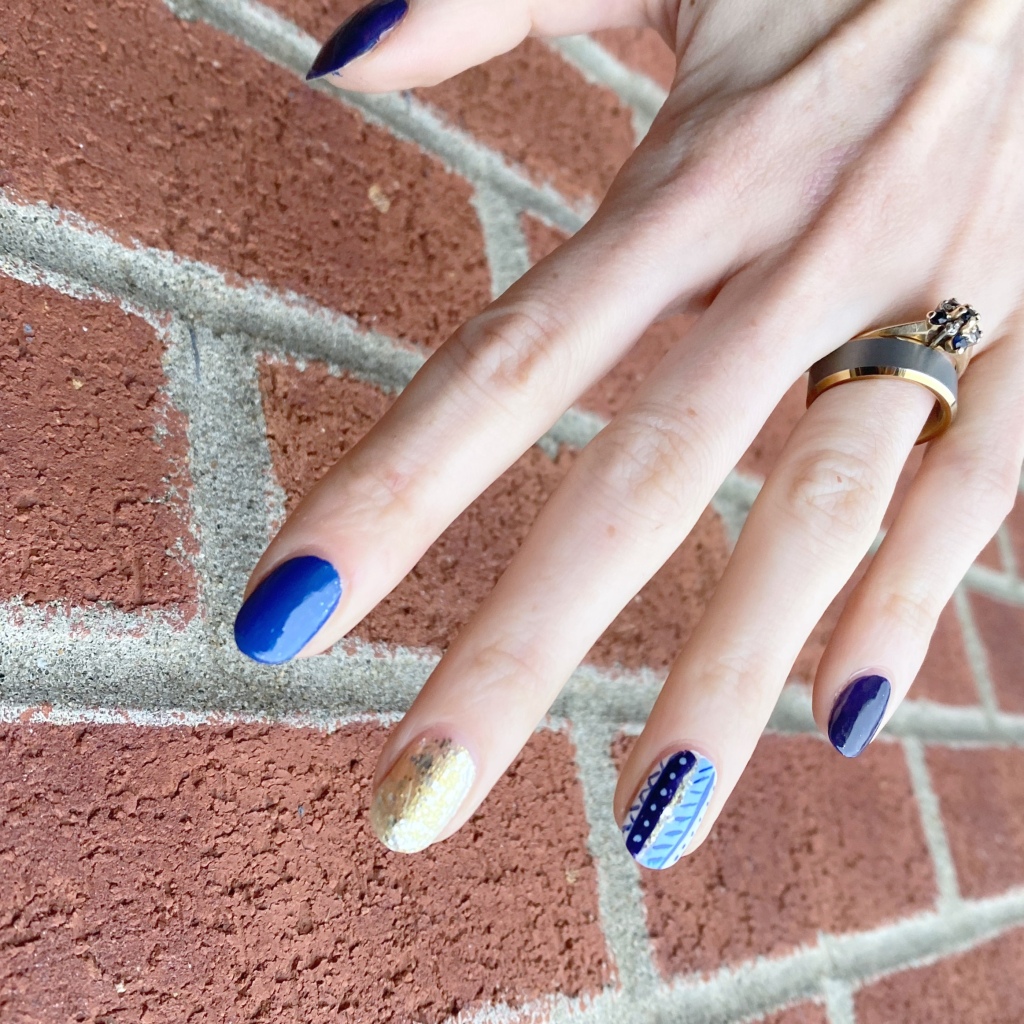
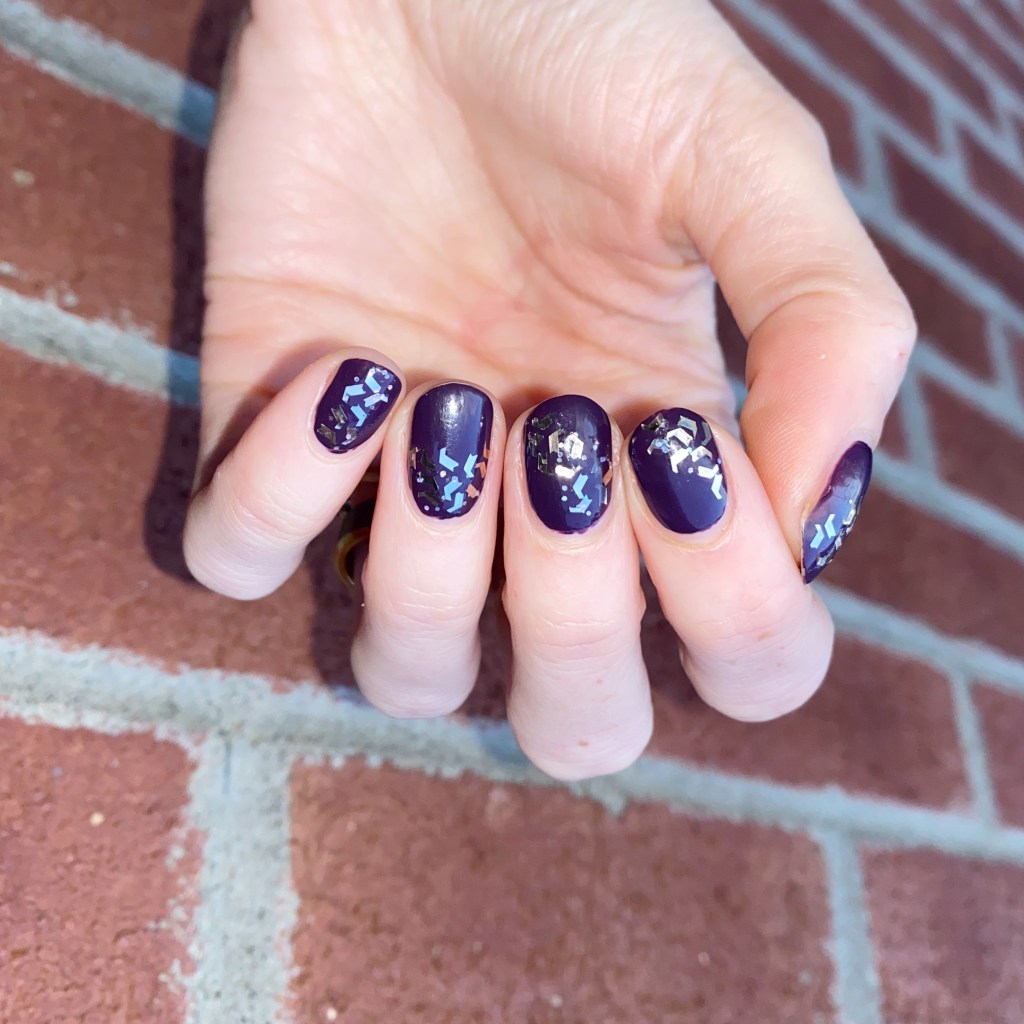
Today I’m sharing my first real manicure of the new year. January is such a blah time, I find, so I’m never quite sure what to do on my nails before Valentine’s Day. However, you can never go wrong with some chevron moons, so that’s what I decided on.

The polishes I used for this manicure are: 

  • Base Coat: China Glaze Calcium Gel Fortifer
  • Top Coat: Essie Speed Setter
  • Essie Expressie IRL
  • Essie No Ex-pectations
  • Essie Frock n Roll
  • Chevron vinyls (these ones are from Beyond the Nail)
  • Mermaid Tail 7mm liner brush

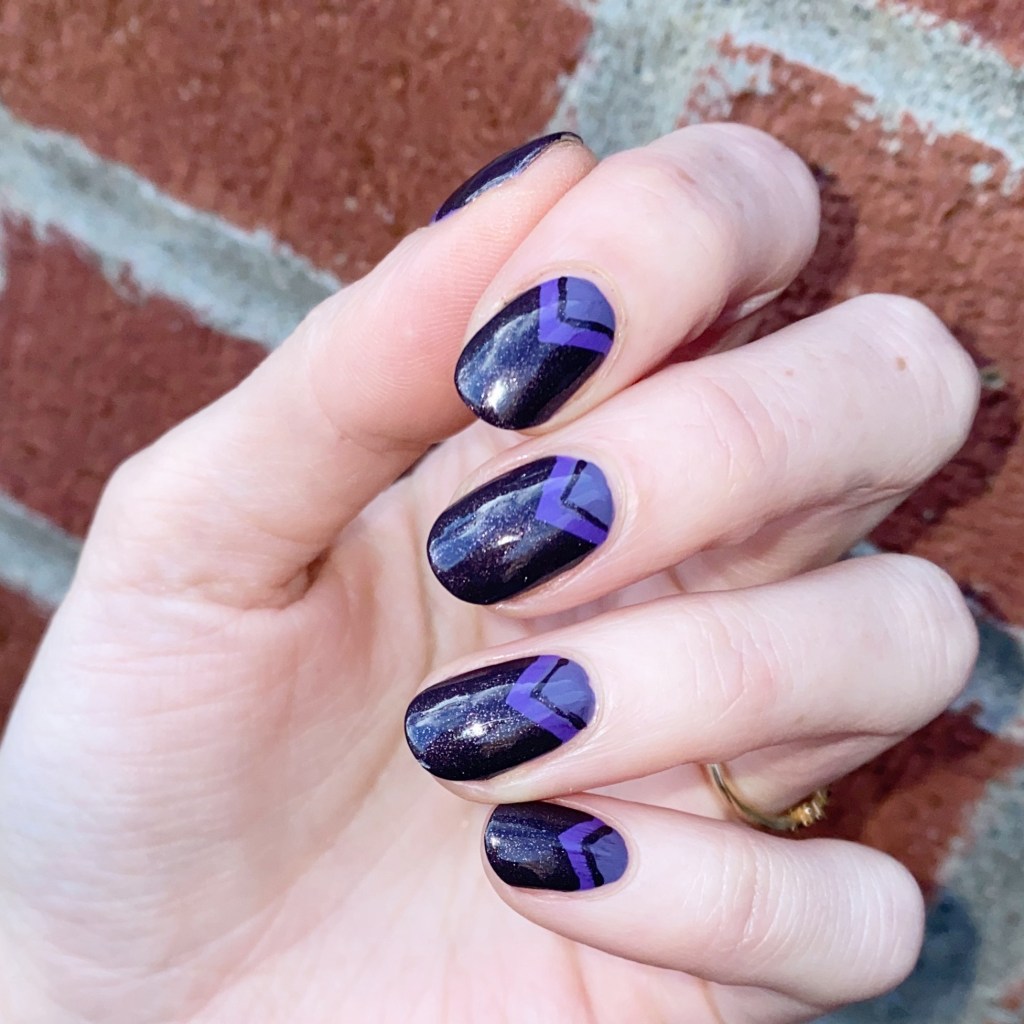
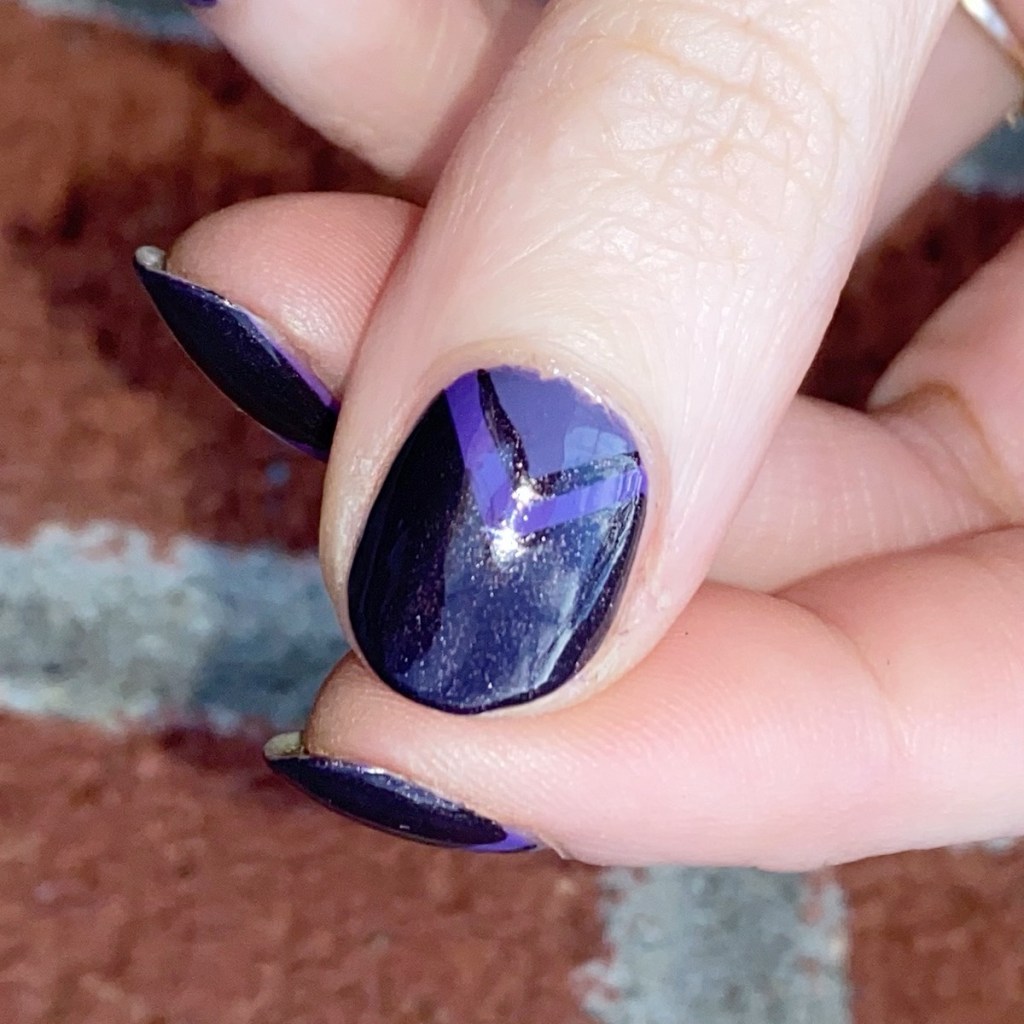
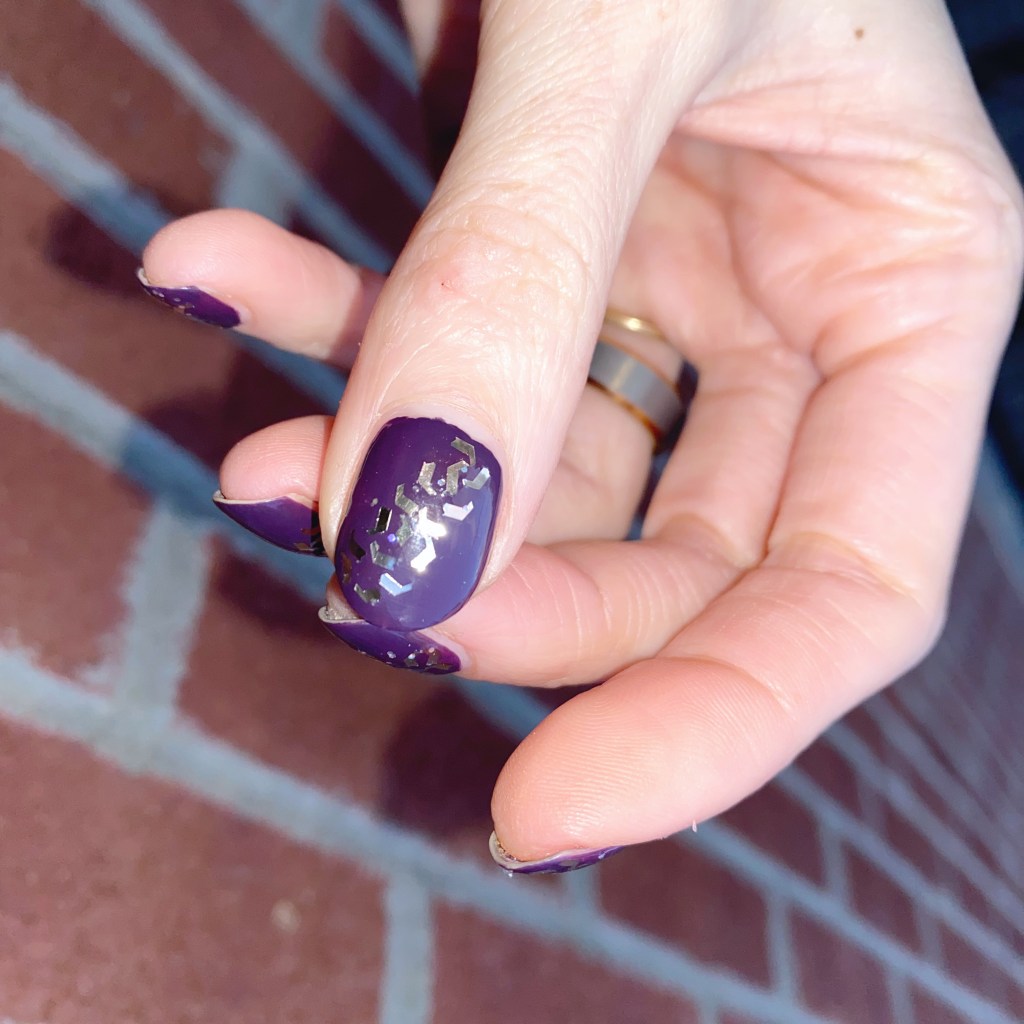
It’s been a while since I wore a chevron moon look, & I particularly like this one because of the layers of different purples. I used nail vinyls for my initial chevrons, then went it with my mermaid tail brush, & added some of Frock N Roll for a little contrast.

My only regret is I feel like I should have topped the design with matte top coat, but ran out of time. Matte top coat just makes everything better.

What do you think about this chevron moon nail art look? What nail art looks are you obsessed with right now? Let me know all your thoughts down in the comments below!

🖤

GLAM NAILS CHALLENGE DECEMBER — New Year Celebration

Good morning & happy New Year! 🍾🎆 It’s officially 2024 & I hope everyone had a safe New Years Eve. I’m very excited for things to come, but before we focus on a brand new year, I still have one more manicure from Glam Nails Challenge December to share!

The last prompt is New Year Celebration.

The polishes I used for this manicure are: 

  • Base Coat: China Glaze Calcium Gel Fortifer
  • Top Coat: Essie Speed Setter
  • Essie Make Spirits Bright
  • Ardene Style Icon
  • Sally Hansen InstaDri Ghouls Night Out
  • Sally Hansen Miracle Gel Goldie Rocks
  • Sally Hansen Complete Salon Manicure Let’s Snow
  • Mermaid Tail 7mm liner brush
  • NailStuff.ca Dotting Tool Trio

I really wanted to do a fun year inspired design, especially because 10 years ago I did a similar design for New Year’s Eve. Plus, I’m really hopeful for 2024. Last year had some rough moments for me personally, so I’m hoping that 2024 holds better things.

Obviously, I needed a lot of sparkle. & I added a little dotticure on my thumb to look like confetti.

What do you think of my New Year’s Eve design? Did you wear something sparkly to ring in 2024? ✨🍾

Let me know in the comments below!

Candy Cane Stripes 🎄🎅

Happy December 1st! Can you believe we’re officially in the last month of 2023? That’s kind of insane. & it’s time to go hard on all the Christmas designs I can paint!

Today’s look is simple but festive. I wanted to create some candy cane inspired nails, as I haven’t done any in a while.

The polishes I used for this manicure are: 

  • Base Coat: Sally Hansen Miracle Gel Colour Grip Primer Base Coat 
  • Top Coat: Seche Vive
  • Essie Blanc
  • Quo Beauty Green With Envy
  • Quo Beauty Velveteen
  • ACO by Ardene Dancing Queen
  • 16mm Striper (from NailStuff.ca)

Do you love candy canes? I really like those fun flavour ones (like Nerds, Warheads or Trolli) but less keen on the classic peppermint flavour ones. Maybe I ate too many as a kid? My nails are definitely calling back to those classic candy canes though.

You could definitely use striping tape or vinyls to achieve this look, but for some reason I prefer using my striper brush. With a look like this, I feel like you don’t need to have as clean lines (since candy canes don’t always have the smoothest lines). But these ones definitely turned out better than I could have hoped!

What do you think of these candy cane stripe nails? Are you ready for December & all the holiday nail art content to come? Let me know down in the comments below!

Winter Sweater Accent Nail

Hello lovelies & happy Monday! It’s a brand new week already, & December is looming. While I’m brainstorming all the nail art I’m planning for December, I thought I would throw things back with a simple accent nail that reminds me of my early nail blogging days (circa 2015).

I used to be obsessed with these freehand sweater/aztec inspired accent nails, so I thought it would be fun to do one — especially as I was struggling with nail art inspiration the other night.

The polishes I used for this manicure are: 

  • Base Coat: Sally Hansen Miracle Gel Colour Grip Primer Base Coat 
  • Top Coat: Seche Vive
  • Essie No More Film
  • Essie All The Wave
  • Essie Hors d’Oeuvres
  • Essie Blanc
  • Essie Bikini So Teeny
  • NailStuff.ca Mermaid Tail Nail Brush Trio (11mm liner brush, 7mm liner brush)

I feel like these are giving off fun sweater vibes, & I like the combination of blues together. I was just going to do a simple skittle look with the different blues, but I decided I wanted it to be more exciting than that!

The end result turned out so fun! I haven’t had as much time for freehand nail art lately, so I really need to start playing around more often. I miss my freehand nails, so I’m definitely going to make more of an effort. Maybe I’ll redo this design in December with a Christmas-y colour scheme, & call them Ugly Christmas Sweater nails.

What do you think of today’s nail art look? Are you a fan of these simpler accent nail designs? Let me know all your thoughts down in the comments below!

🖤 Happy Monday!

Broken Mirror Glitter Placement

Hello lovelies & happy Wednesday! It’s already midweek, isn’t that crazy? I feel like it’s going to be New Year’s Eve before we even realize.

Today’s look is a favourite of mine, that I’ve repeated a few times over the years, but never gets old to me. I love a good shattered glass glitter look, & so naturally when I painted my nails with this beautiful dark purple, I knew I wanted to add something glitter placement. I decided to grab a glitter I haven’t used in forever, & I’m glad I did because they turned out perfect!

The polishes I used for this manicure are: 

  • Base Coat: Sally Hansen Miracle Gel Colour Grip Primer Base Coat 
  • Top Coat: Seche Vive
  • Essie Kimono Over
  • OPI Infrared-y to Glow
  • Medium sized dotting tool (NailStuff.ca Dotting Tool Trio)

I tried to capture the little holo glitters that accompany Infared-y To Party, but for whatever reason my phone & my nails were not cooperating to really show it off. I thought this glitter was a nice alternative to the usual gold glitters I create this look with, & gives off more of a shattered mirror design because the glitters are silver.

I definitely do miss my bottle of Color Club Diamond Drops as it was perfect for this kind of design thanks to the holographic shards of glitter. I anyone knows a similar glitter topper, let me know, because I really need to expand my glitter collection for these kinds of looks!

What do you think of this broken glass/mirror design? Have you ever tried one of these designs before? If not, I definitely recommend giving it a try! It’s a bit time consuming, obviously, but other than that it’s super easy to do & is such a fun effect! I guarantee you’ll get lots of comments & compliments on your nails too!

Happy Wednesday ♥︎