GlamnailschallengeOct—Skull

673395C9-DDCC-4272-BC89-930C1C5D6DAA

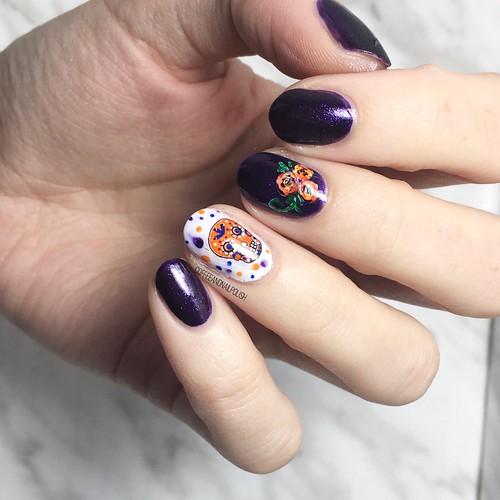
Good morning lovelies & Happy Monday! Can you believe this month is almost over? The countdown to Halloween is officially on & I’m both excited to celebrate, & sad for my favourite month to be over! But since we have a few more Halloween looks to go, I’m going to keep the excitement rolling with our second last #glamnailschallengeOct prompt which is Skull. A similar idea to skeleton, so I wanted to try & do something way different from my skeleton design.

& it was the perfect opportunity to use some nail tattoos by Maybelline that I recently purchased on extreme clearance at my local pharmacy (& favourite place for nail polish deals!) These nail tattoos were pretty cool, & I couldn’t think of a better opportunity to use them.

0840CA9C-45C1-46F2-BA50-014DB280969C

24BFF24E-3B11-48E5-A03E-2CCF4DECE8F9

For this manicure, the polishes I used were:

  • Base Coat: Sally Hansen Green Tea Bamboo Strengthener
  • Base Coat: Duri Rejuvocate
  • Top coat: YSL Beauty Quick Dry Top Coat
  • Sally Hansen Color Therapy Slicks & Stones
  • Acrylic Paint
  • NailStuff.ca 7mm detail brush
  • NailStuff.ca dotting tool trio

.

324E0048-EC0F-41F3-9186-ACB3BFD4DD4C

860C1A90-01C7-4DF1-B761-ED9E5D9BA7B8

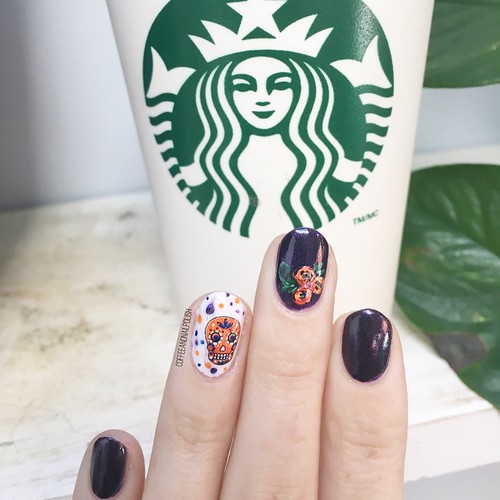
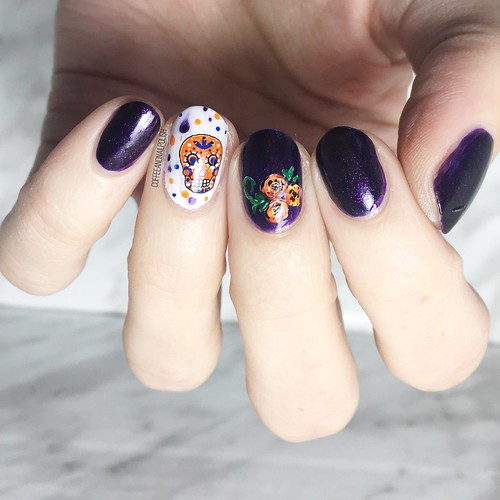
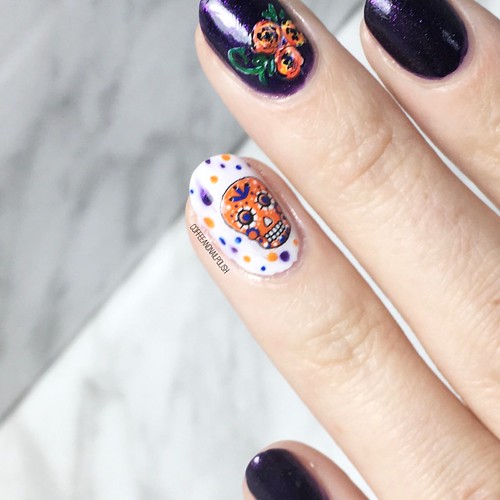
How much fun! This was also my first time in a long time wearing Sally Hansen Slicks & Stones which is just such a pretty shade for Autumn. It also goes really well with the orange & blues of my skull tattoo. It turned out more celebratory than scary, which is fun for this time of year as well. I’m digging it! & I added roses to add to the sugar skull feel.

F27C0626-8B02-4581-9E45-04551F158FC9

6835FFC3-A62F-4DAF-810C-23E36AEC59CF

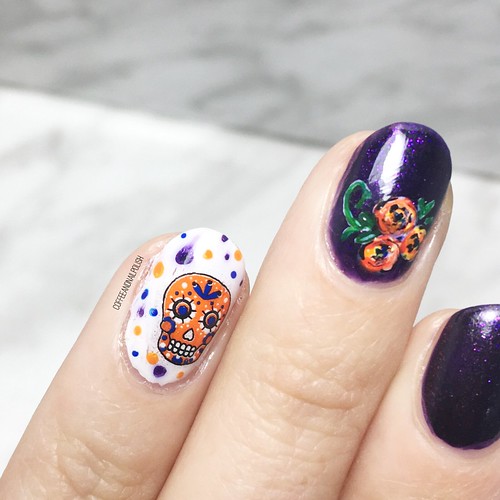
Close up look at that nail tattoo. This makes me excited to use a few more of the designs that came in the packs I got. Definitely fun for fancy nails when you’re on a time limit… I definitely couldn’t draw that skull design in the 60 seconds it took me to apply that tattoo & add my top coat.

09659B8E-B7AF-4D82-8382-CF32A306D232

What do you think about these sugar skull nails?  Remember you can check out the other  #glamnailschallengeOct looks on Instagram. There is just one more prompt to go!

GlamnailschallengeOct—Eyeballs

45E86584-C2A4-43FF-9846-30586D4F3276

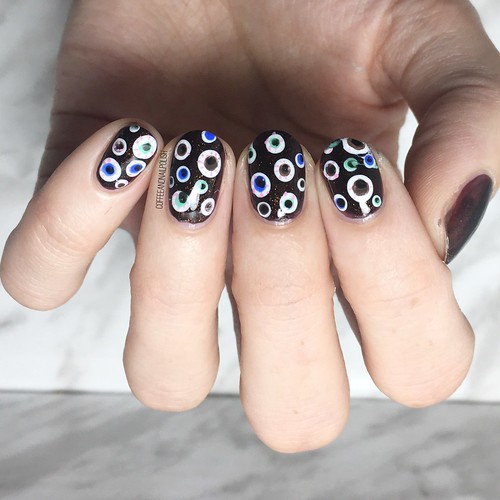
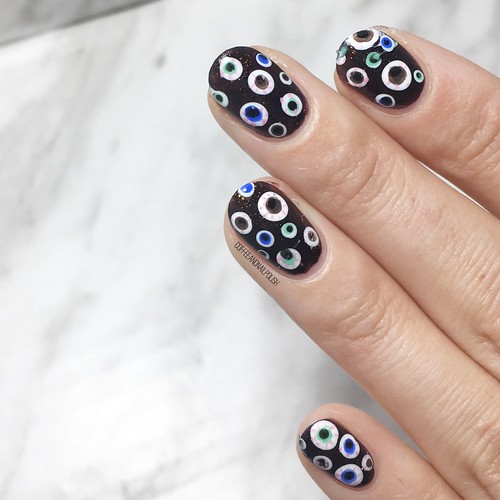
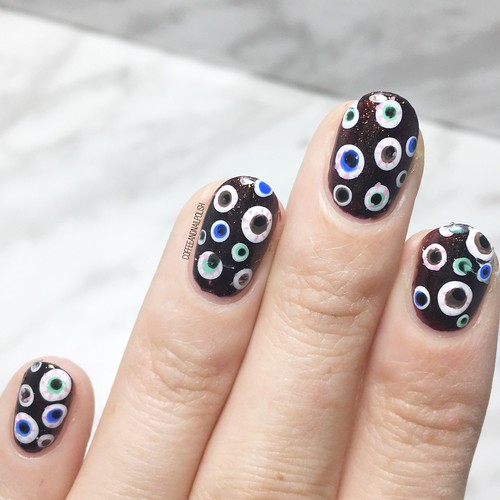
Hello lovelies! It’s time for another prompt for #glamnailschallengeOct: Eyeballs! This look was actually inspired by an old design by Chalkboard Nails, that I found via Pinterest. I thought her look was equal parts cool & creepy, so it would be the perfect look for today’s prompt. 👁

0302440D-DA17-4825-A591-602A797D3EA3

92801428-0BDA-40CE-95DC-31F220E5C65D

For this manicure, the polishes I used were:

  • Base Coat: Sally Hansen Green Tea Bamboo Strengthener
  • Base Coat: Duri Rejuvocate
  • Top Coat: YSL Beauty Quick Dry Top Coat
  • Sinful Colors Leather Loose
  • Sally Hansen MG Get Mod
  • Sally Hansen Xtreme Wear Pacific Blue
  • Essie First Timer
  • OPI How Great Is Your Dane?
  • Sally Hansen Insta-Dri. Jelly Belly Bubble Gum
  • NailStuff.ca dotting tool trio
  • NailStuff.ca 7mm detail brush

.

9F293366-C481-40AF-AAC1-7BC6FA2AD15F

29EA31EF-D27A-4A56-BC48-2887E0E034FA

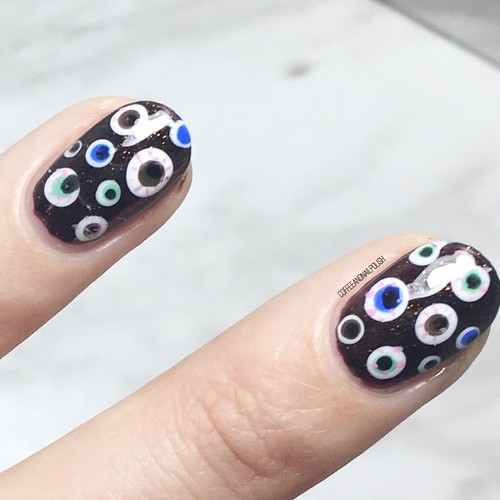
This look was a little time consuming but still a super easy look to achieve. I went through a few different ideas on what I wanted my eyeball design to look like, & this one seemed the most fun (& creepy!) I also was super pumped to pull out Sinful Colors Leather Loose again, because it is such a fantastic Fall shade that I had kind of forgotten about a little bit. That brown with the shimmer–oh boy is it beautiful! & my eyeballs really popped against it.

CDD62548-C564-41DB-9165-33C0F45D1762

4130E624-CECB-4A97-84DC-3171E8BCB04E

Totally creepy, am I right? I probably could have done a few more eyeballs on my design, but I was painting against the clock & wanted to make sure I got this look done!

521B4523-B15B-4551-8D8E-881E74801BD4

What do you think of this look for today’s prompt? Would you wear this creepy eyeball look? Can you believe we only have TWO more prompts left before the end of #glamnailschallengeOct?

 Keep following along with #glamnailschallengeOct on Instagram & don’t forget to check out all the other awesome (& creepy!) eyeball looks!

Halloween Patchwork Nails (recreated from @thelittlecanvas!)

8A565967-9C12-442C-8608-6102A0C3AF0E

Hello lovelies & happy Tuesday! Today I have some more Halloween nails to share with you, this time a recreation of a design by Alaina aka @thelittlecanvas! If you follow her, you might have seen she recently recreated my ghost design, as well as my candy corn dotticure , so I really wanted to recreate one of her past Halloween nail art designs! & I found the perfect look in this patchwork design from 2 years ago!

FEE657FF-3511-4CDE-80F9-FC22CE286DD3

468F4136-06BD-423B-99F6-E203CBFAC9DA

For this manicure, the polishes I used were:

  • Base Coat: Sally Hansen Green Tea & Bamboo Strengthener
  • Base Coat: Duri Rejuvocate
  • Top Coat: YSL Beauty Quick Dry Top Coat
  • Sally Hansen Miracle Gel Get Mod
  • China Glaze Be More Pacific
  • Essie Flowerista
  • Sally Hansen CSM Fiery Island
  • Black Acrylic Paint
  • NailStuff.ca 11mm Liner Brush

.

10AEB632-DFC5-4AA0-9EEA-048E1241E328

8C1C0877-2A94-430A-852C-C4C81D5E52DD

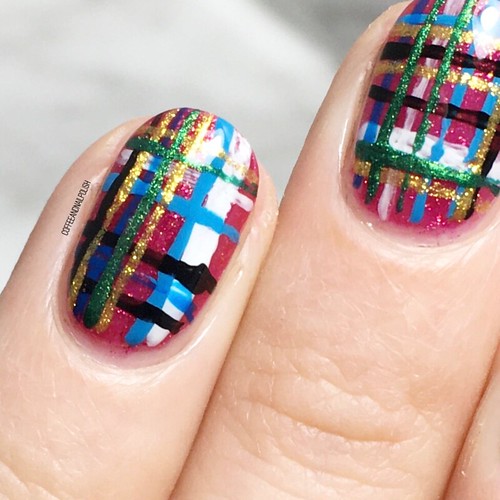
Oh my gosh you guys, this look is so fun & so easy! I started with a base of white, because it was easiest to make colours pop, & then created my blocks of colour. I did my green & orange first, & then filled in the middle with my purple. You don’t have to be too concerned with perfectly straight edges because you’ll be adding the black stitching, so I didn’t see the point in using tape. Then to finish my design, I took black acrylic paint & one of my NailStuff stripers, & added the black stitching along the edges. Finish off with top coat, & your nails are all ready for Halloween!

704962CA-71CA-465C-99C0-00A19C27B2FC

648C057D-0BA3-448F-9A0B-966E0F5FD209

This patchwork look is perfect for a variety of different Halloween costume ideas, & you can definitely change up your colours depending on needs–this would be perfect for a Bride of Frankenstein, Zombie, Scarecrow, etc. Lots of fun ideas, but super easy to do, even for a nail art beginner. & using acrylic paint for your lines vs nail polish also makes things a little easier, because if you mess up you can erase the lines without wrecking your whole nail.

840C102B-7CA0-490E-8302-3160049737D0

5DFB116B-E28A-4ED0-955F-ACC708F0A20F

What do you think about this nail art look, recreated from @thelittlecanvas? Did I live up to the original? & hop over to Alaina’s blog today to see her version of another one of my nail art looks!

Birthday Nails with Essie Birthday Girl 🎉

F516455D-4537-4A98-AB92-7F0C2C493092

Hello lovelies & Happy Tuesday! Hope everyone is having a beautiful start to their week. Today I’m breaking up my usual posting schedule because TODAY IS MY BIRTHDAY! That’s right, today marks 33 years around the sun. So obviously I needed to do something fun on my nails to mark the occasion.

In years past I’ve done some obvious birthday nails, but this year I decided to let the polish do the talking. When I saw that Essie had released a polish called Birthday Girl, I knew that I was going to need to own it & incorporate it into my birthday mani this year! I also wanted to do something fun, as I snapped a nail just in time for my birthday, so I am back to some serious shorties.

B6F4411E-B3BE-4022-A8E6-B491C3881773

D5BA04A3-77C1-4A8D-97B2-F6EDDF238362

For this manicure, the polishes I used were:

  • Base Coat: Duri Rejuvocate
  • Top Coat: YSL Beauty Quick Dry Top Coat
  • Essie The A-bliss {PR sample}
  • Essie Birthday Girl
  • Color Club Pucci-licious
  • Color Club Eternal Beauty
  • Essie Play Date
  • Sally Hansen Pat on the Black
  • Nailstuff.ca 11mm Liner Brush {PR sample}

.

6B65E022-F47A-402E-A001-10F99CDAA9E7

01B4F731-8F0D-445D-AAF9-C1103719365E

For my base, I applied two coats of Birthday Girl over one coat of The A-bliss. I then did a whole bunch of Pinterest stalking to see what kind of design I wanted to do overtop my base of Birthday Girl & in the end I decided a Waterfall look was the way to go! Do you remember when Waterfall designs were all the rage? I feel like this design needs to make a comeback!

3C197715-613B-4B6C-8739-90325123C31A

DF26AE0C-B843-43C7-B7C3-D9FD5043AFED

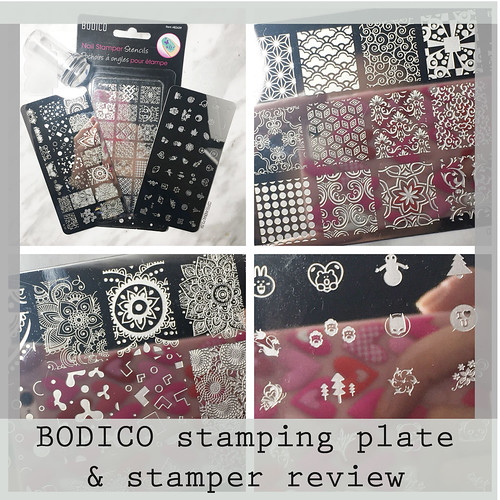
For this look I decided to pick a few purples that I thought would compliment my pink base. Then o used my liner brush from NailStuff to brush thin streaks of polish at my cuticle line, & bam! An low effort design that looks super fancy & fun. Kind of reminds me of sparkling fireworks at the base of my nails which is perfect for celebrating, even if my idea of celebrating is drinking my free birthday drink from Starbucks & playing with the new stamping plates my Mum bought me for my birthday! I can’t think of a more perfect day. ☕️💅🏻

06924BF0-00CA-4581-8459-66D69BCD6AE0

59F2C682-46CF-43FC-8C89-1023165DE1EC

Hope everyone has an amazing day! Let me know what you think about this look & what colour combination you’d love to see me do in a Waterfall look next! 💙

GlamnailschallengeOct—Ghosts 👻

6BFA27D0-E1DF-4432-81ED-1E3A98CA3982

Hello lovelies & happy Wednesday! The week is certainly speeding by! Today I have another fun look designed for #glamnailschallengeOct–ghost inspired nails! & be still my Halloween loving heart, because these turned out so much fun. I decided to try out a look I’ve always wanted to try, using watered down acrylic paint.

F093700A-35A3-47B1-8926-96BE2B0F972A

0B4941D6-F9CD-4DE9-9296-85626A02A3BA

For this manicure, the polishes I used were:

  • Base Coat: Quo by ORLY Bonder
  • Top Coat: Essie Speed Setter
  • Joe Fresh Gel Look Gothika Blue
  • China Glaze Fairy Dust
  • White acrylic paint
  • Black acrylic paint
  • Thick nail art brush (I used an old one from Bundle Monster)
  • Small dotting tool (Mine are from NailStuff.ca)

.

5EFA1380-E304-4564-800A-2D0DE88414D7

4698DFF5-B64A-4D54-9379-79B3E6716F50

First off, loving this base of Fairy Dust over Gothika Blue because it really does look like the night sky. Also why do I always forget how amazing China Dust Fairy Dust is over pretty much everything, but especially over dark polishes. I don’t wear it nearly as much as I should. Could you imagine it over a dark red to black gradient?! Okay I’m getting some nail art ideas for more Halloween designs! Definitely going to need to try that out in the next couple weeks before Halloween. It would look so good!

Okay back to this design, haha.

C8B82B1B-D030-4326-A2BD-0B1E019C51AC

2EB77859-9EF2-4119-9E96-100A6246F950

This design turned out pretty much how I imagined, although I kind of wish I had watered down my acrylic slightly more to give my ghosts a more ghostly appearance, but I think the trick is the try & only do one coat of white vs. a few coats. My thumb kind of turned out my favourite, because you can see the the base peeking through his ghostly body. & I love how it looks. Next time I try this technique, I’ll know what works a bit better & I’ll be able to get them all perfect.

2A2C77C4-09ED-4198-93BC-CA514813383F

8D1FAFC1-2537-4E43-AA9B-340CB3518E93

What do you think about today’s ghostly look? Have you started planning your Halloween looks yet? Let me know down in the comments below what you think about this design, & as always check out #glamnailschallengeOct on Instagram for everyone else’s amazing designs this month!

🎃