Purple Glitter Sparkle Gradient

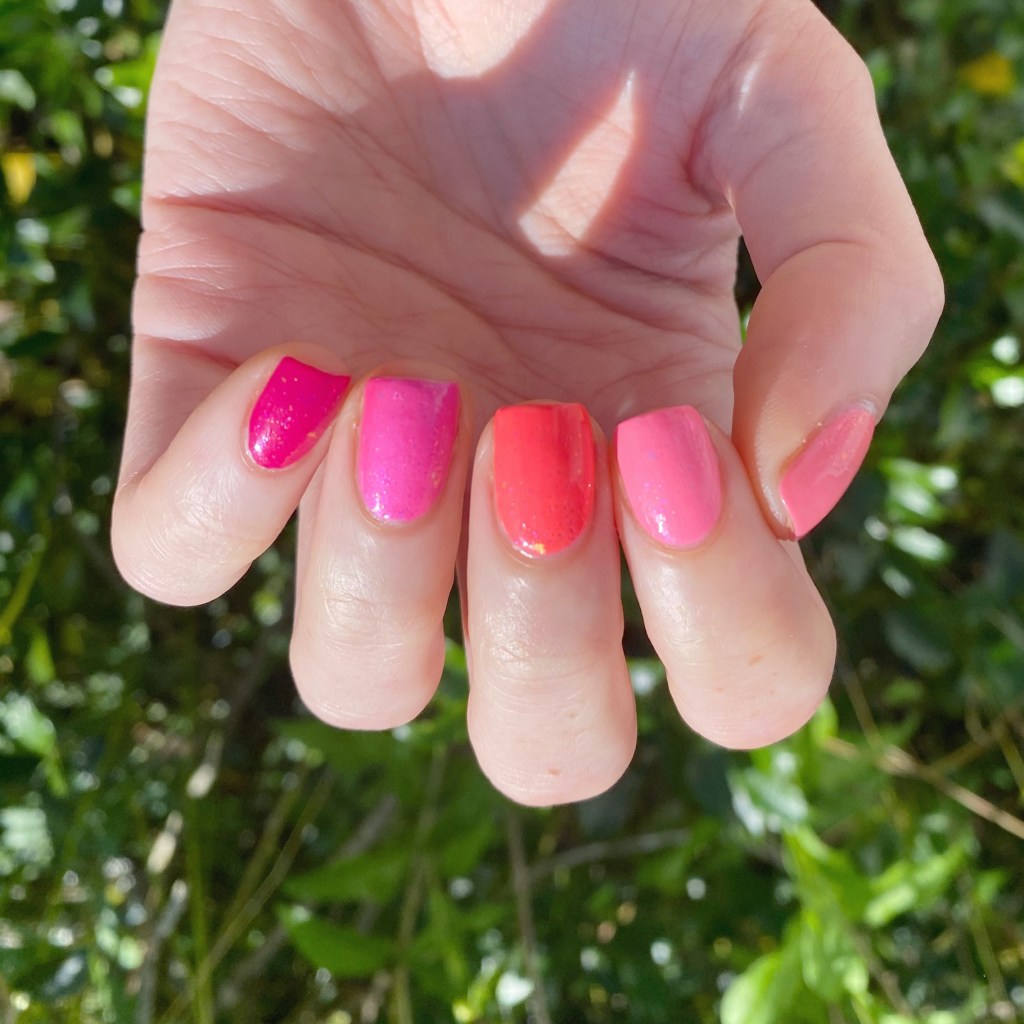
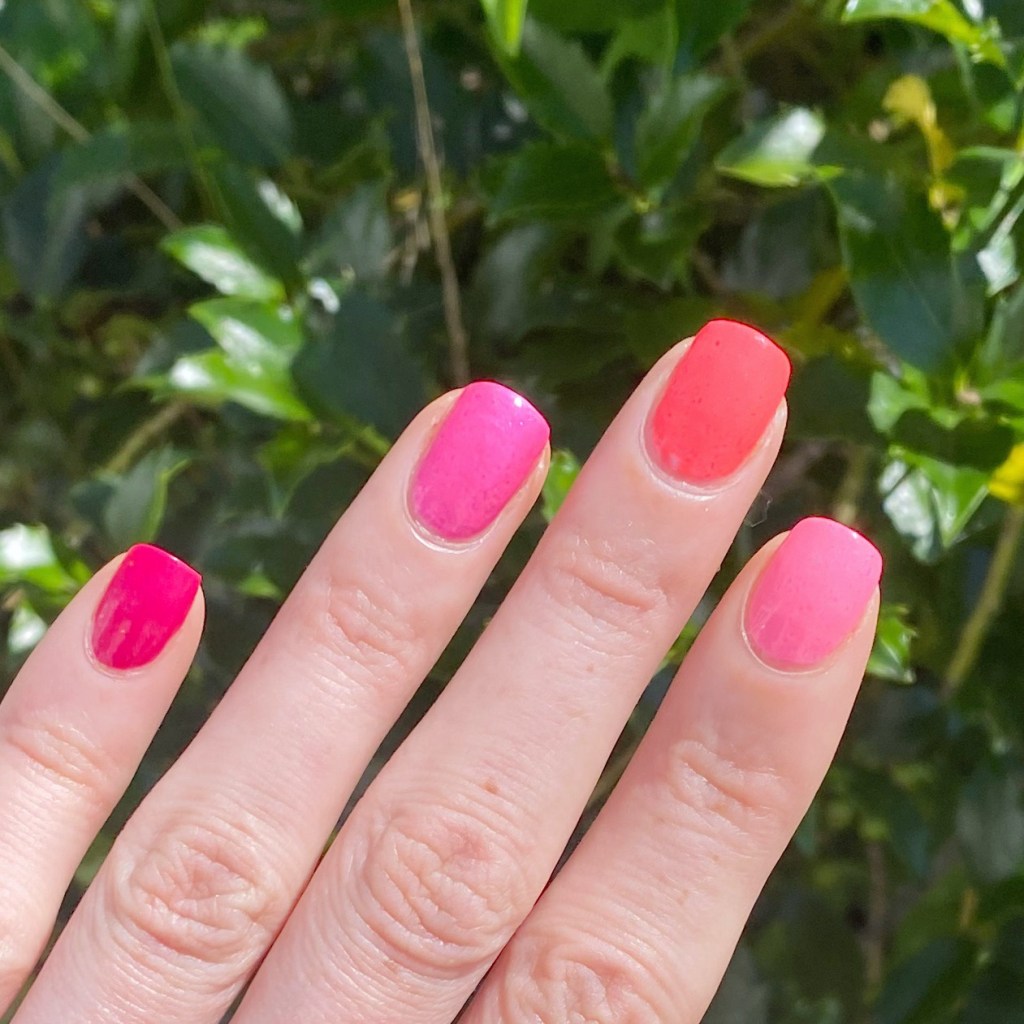
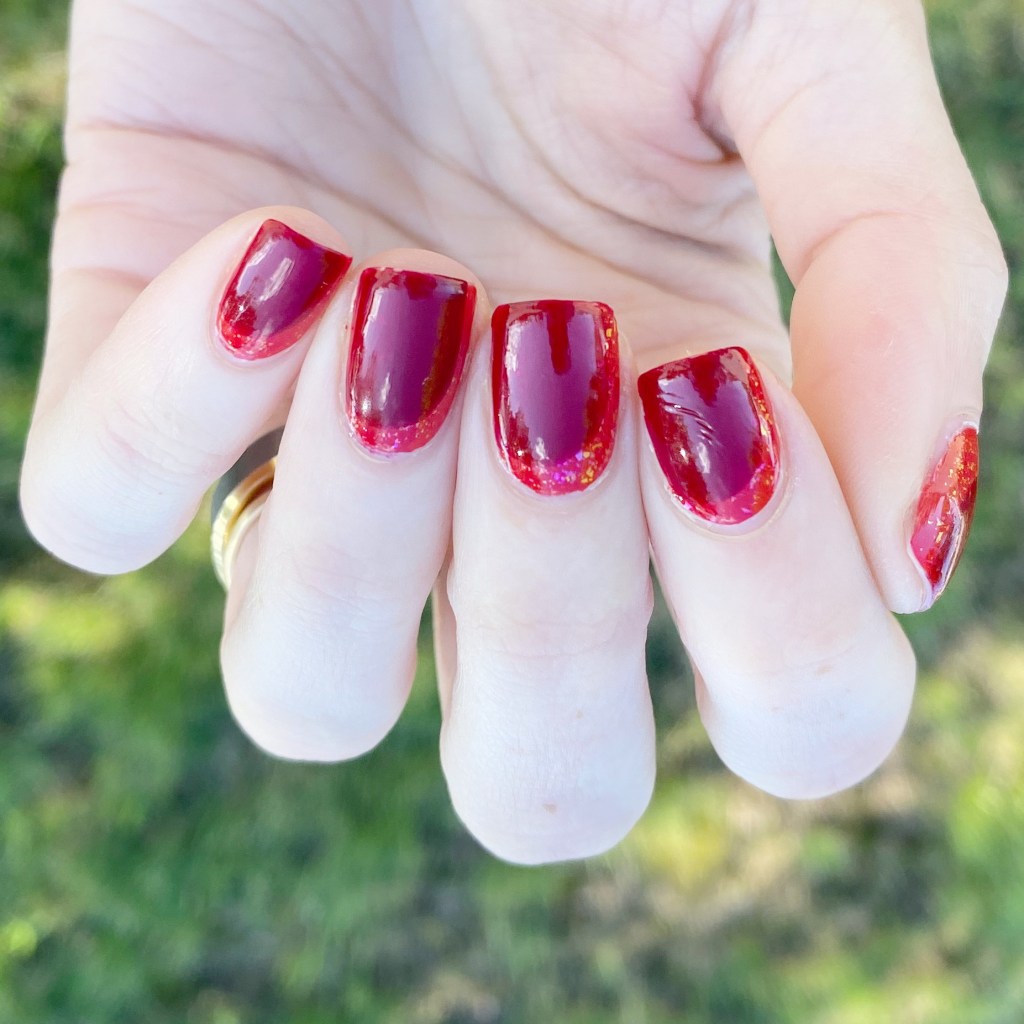
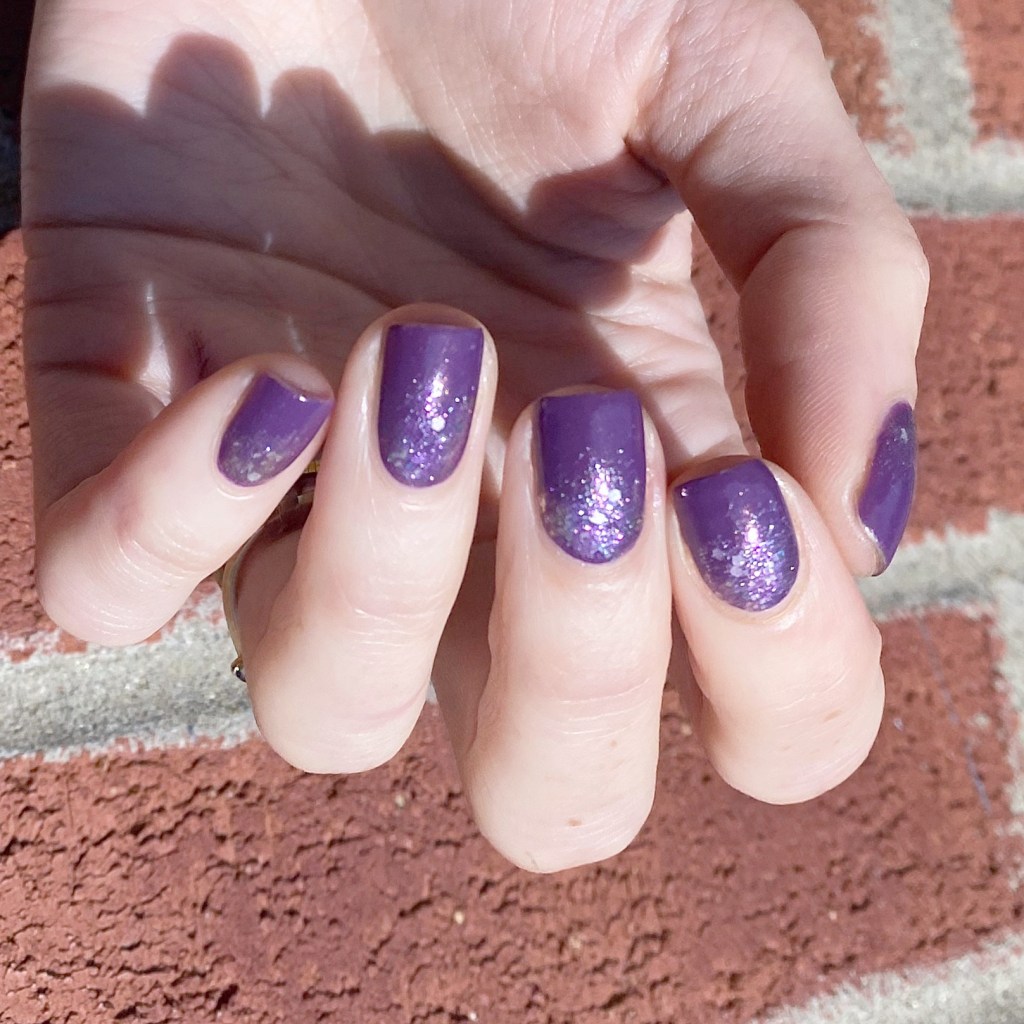
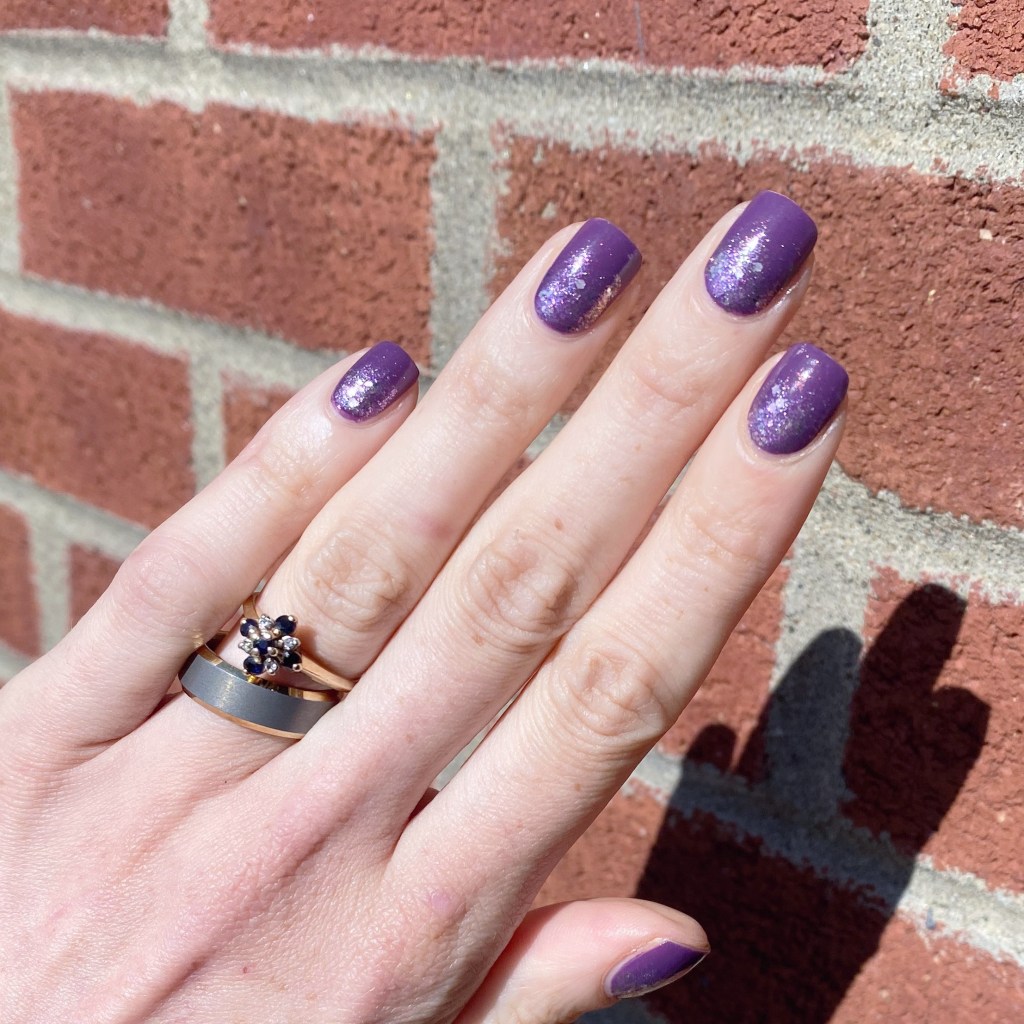
Hello lovelies & happy Monday! A brand new week to enjoy. Today, I’m sharing a little bit of sparkle with you to start off this week. I recently was feeling stuck for inspiration, so I decided to grab one of my favourite purple OPIs Dutch You Just Love OPI?, & a pretty glitter OPI, & create a quick, easy glitter gradient!

The polishes I used for this manicure are: 

  • Base Coat: Sally Hansen Miracle Gel Colour Grip Primer Base Coat 
  • Top Coat: Sally Hansen Miracle Gel Glossy Top Coat
  • OPI Dutch You Just Love OPI?
  • OPI Charmmy & Sugar
  • Latex free make up sponge (mine are from Dollarama)

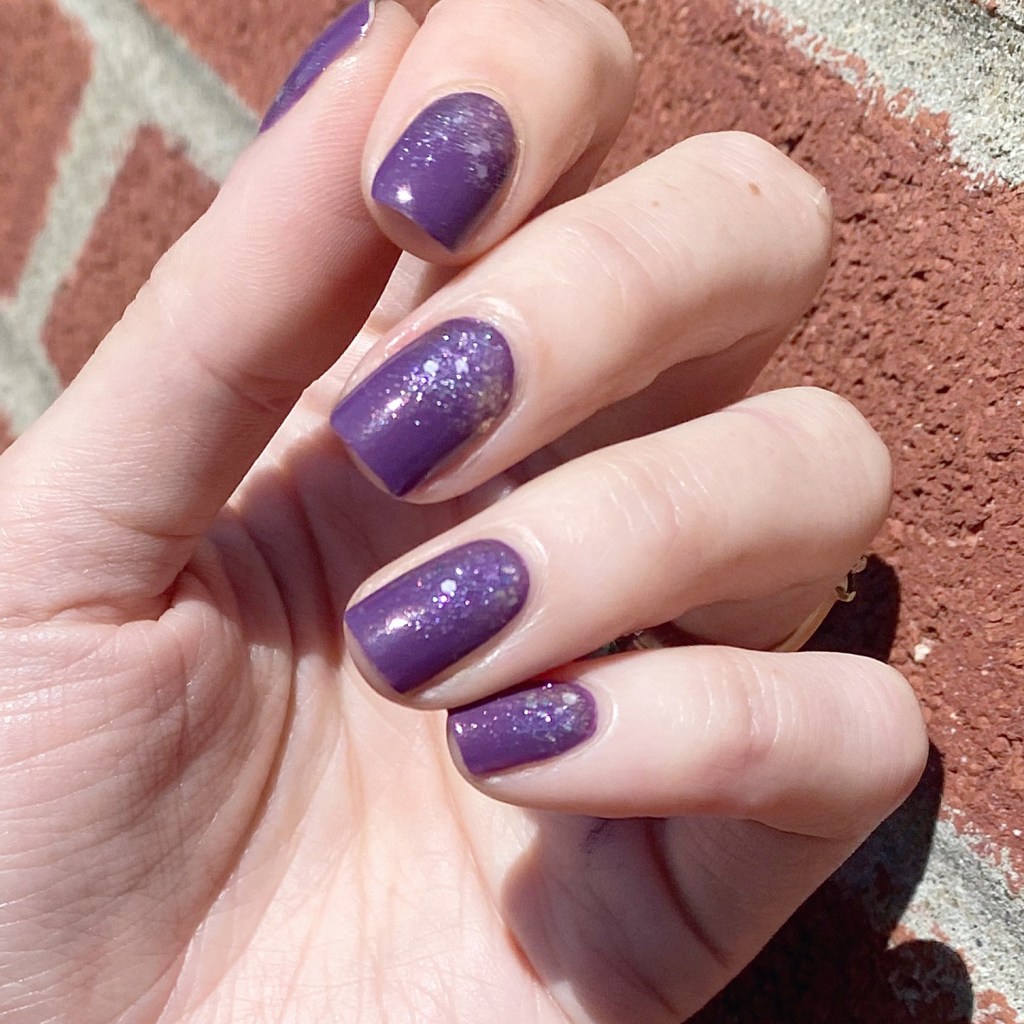
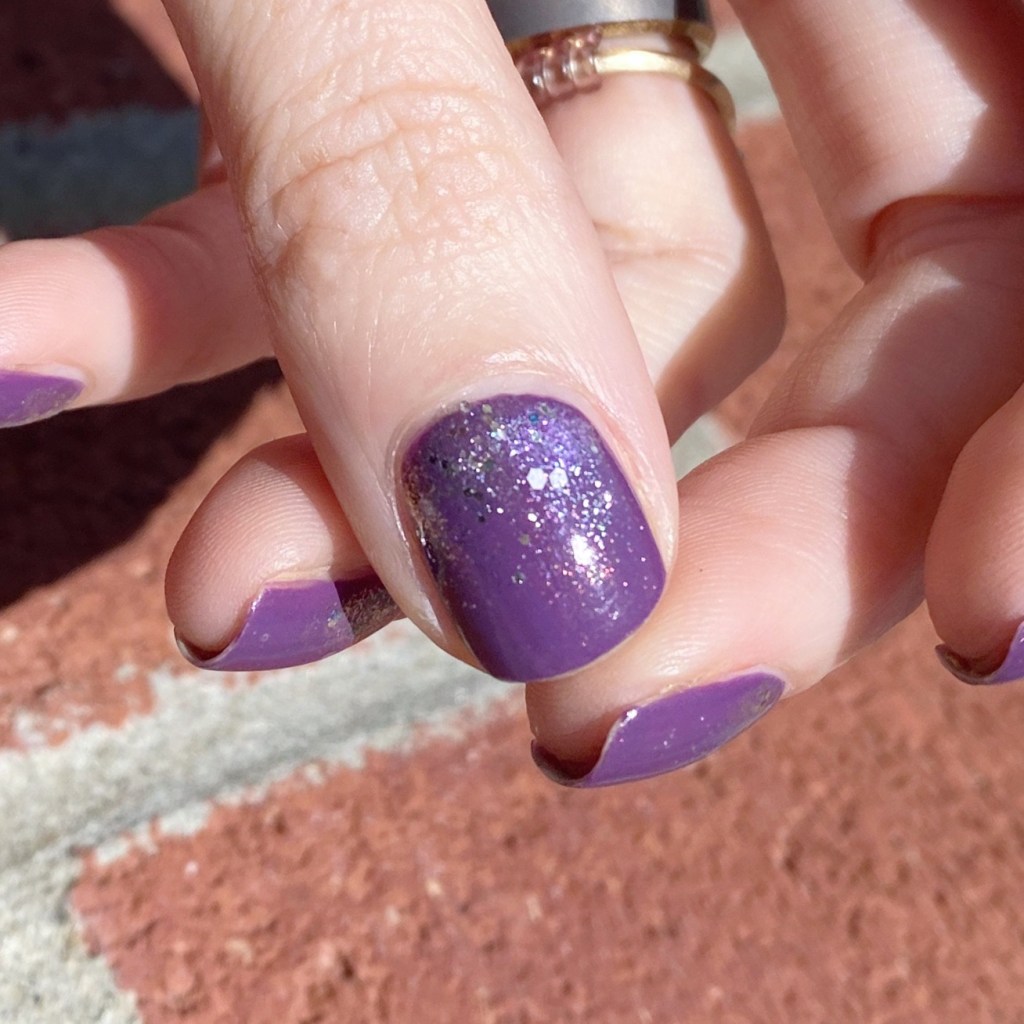
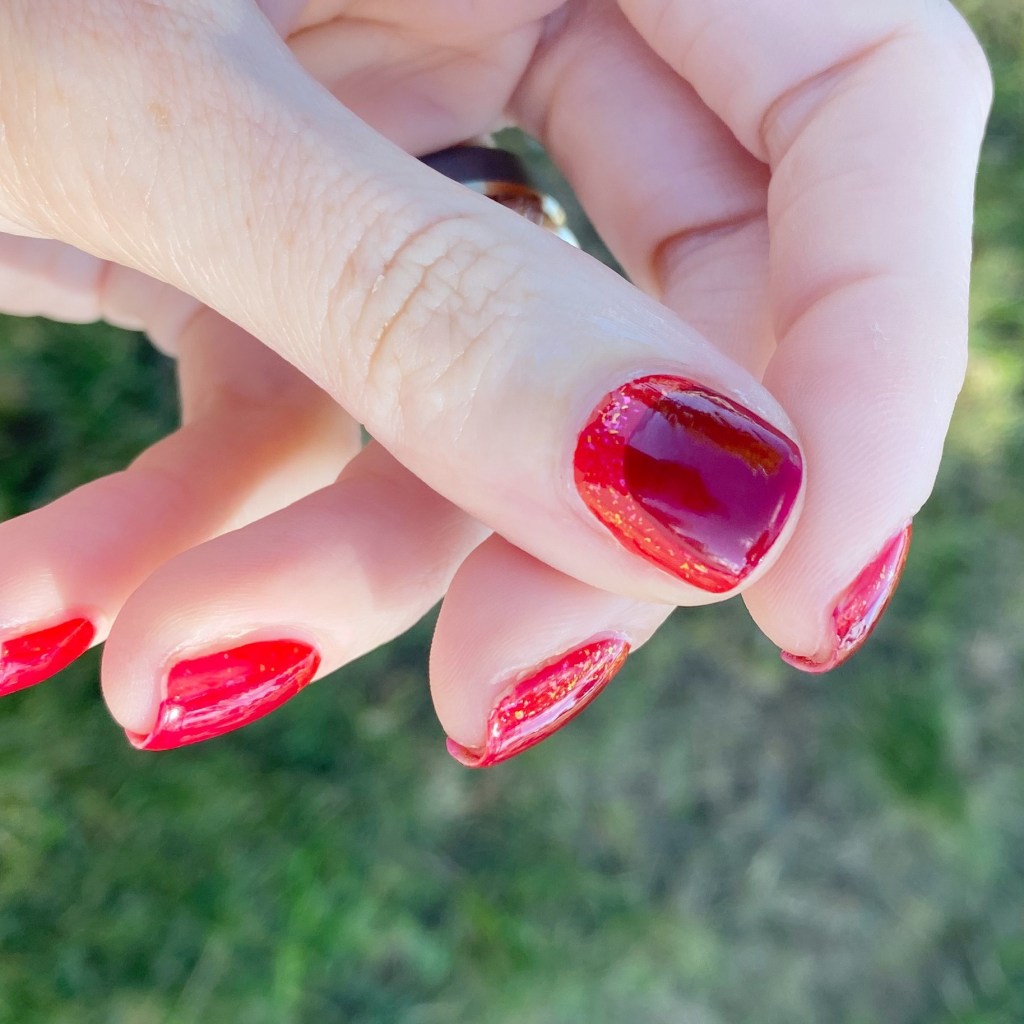
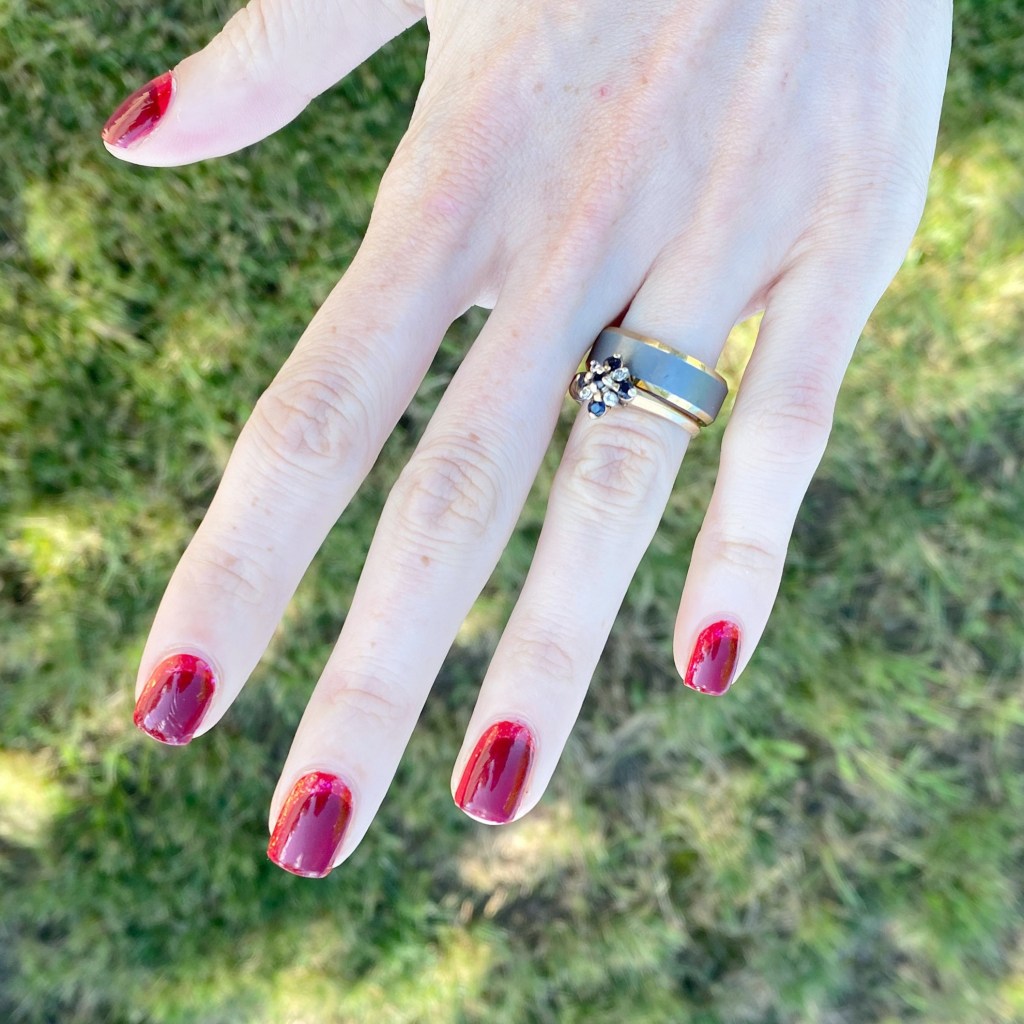
Check out that sparkle! I love it. I don’t know if I’ve ever worn this pretty sparkle before (it’s from the 2016 OPI x Hello Kitty collaboration) but I think it looks incredible over this purple. I love a good glitter gradient, & sometimes you find two polishes that just go together so perfectly. I love that moment.

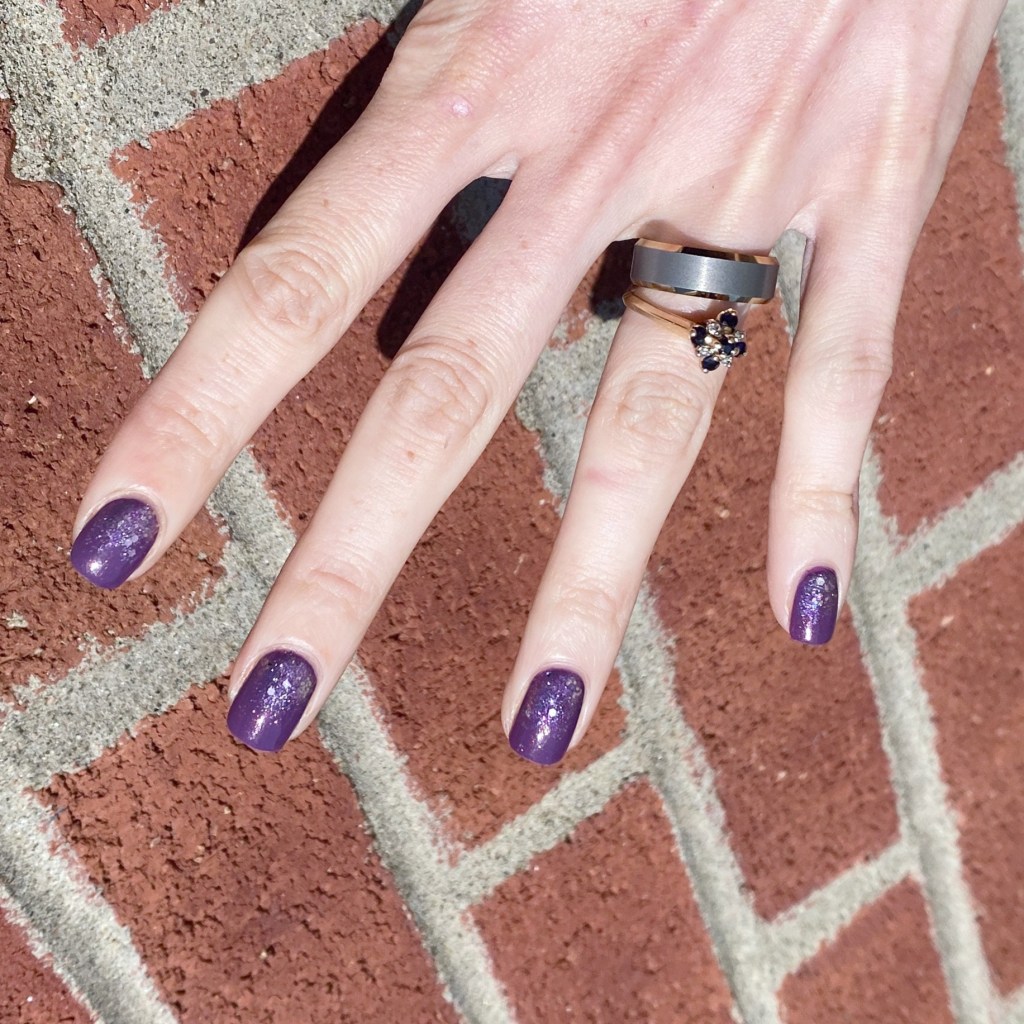
What do you think of this quick & simple nail art look to start off your Monday? I know it’s not the most exciting of manicures, but sometimes you just want a little bit of sparkle.

Let me know what you think down in the comments below.

Vacation Neon Ruffian Nails 💛💜

Hello lovelies & happy Wednesday! I’m back from vacation, & very refreshed from my weekend away. We had a great time, & enjoyed a ton of time visiting family. Now it’s back to the real world, & I’m excited to show off the nails I chose to wear for our vacation. I had done an Instagram questionnaire wondering what nails I should wear for my vacation, & the biggest winner was neon yellow.

So I thought I would do a fun neon yellow ruffian for my vacation nails, & I’m just obsessed with how they turned out.

The polishes I used for this manicure are: 

  • Base Coat: Sally Hansen Miracle Gel Colour Grip Primer Base Coat 
  • Top Coat: Sally Hansen Miracle Gel Glossy Top Coat
  • Sally Hansen Miracle Gel 90s Toadally Buggin’ •pr/gifted•
  • Color Club Art Club Striper Passion Flower

Please excuse my dry cuticles, haha, as I took these photos after reaching our destination & hadn’t had a chance to reach for my cuticle pen. Even still, I think this look is such cute for a vacation mani! The purple of Color Club Passion Flower kind of went a bit grey against Toadally Buggin’ but that’s okay. I really like my little ruffian outlines, & this was the perfect nail art look for vacation.

Bright & colourful, which is just what I wanted!

Are you enjoying your Summer so far? I can’t believe how quickly September is approaching, & back to school. Crazy. & I can’t lie — I have definitely felt myself grabbing a few darker polishes lately without really thinking. I think the Autumn vibes are starting to seep in!

But I promise… I won’t go full Pumpkin Spice quite yet. I’ll still slip in a few Summery shades & manicures before then!

Have a fantastic Wednesday!

Pink Barbie Skittle Nails 🩷

Good morning lovelies & happy Wednesday!

It’s a beautiful sunny day here on the East Coast, but I won’t lie… the last few days have felt surprisingly Autumn-like compared to the weather we’ve been having. Cooler mornings, & that little bit of breeze. But you know, I’m still feeling those Summer vibes, & I want to fully enjoy that a bit longer before I pull out my darker shades & my Fall plaids.

Today I’m feeling Summer Barbie vibes with this fun pink skittle look!

The polishes I used for this manicure are: 

  • Base Coat: Sally Hansen Miracle Gel Colour Grip Primer Base Coat 
  • Top Coat: Sally Hansen Miracle Gel Glossy Top Coat
  • China Glaze Float On
  • China Glaze Shocking Pink
  • China Glaze Thistle Do Nicely
  • China Glaze Hang Ten Toes
  • China Glaze Chit-Chat
  • Sally Hansen Miracle Gel Glaze Top Coat •pr•

I’m kind of sad how freaking hidden the Glazed top coat turned out to be on my nails, but I feel like the direct sunlight definitely contributed to that too. Either way, I think this pink skittle look is so much fun, & it was nice to pull out so many of my China Glaze pinks for this look! I’ll be honest, I haven’t grabbed from that drawer in a while, & I kind of forgot about what was in there.

What do you think of this pink Barbie-esque skittle look? Are you still feeling the Barbie vibes, or do you hear those Autumn nights calling? Let me know all your thoughts down in the comments below!

Red Sideways Swoop Nails

•contains pr/gifted product•

Hello lovelies & happy Monday! & happy last day of July!

How was everyone’s weekend? I actually had an amazing weekend, catching up with my teenage best friend — she’s visiting for a few weeks, & it was just what my heart needed.

Today’s look is feeling kind of Autumn-esque, but I swear that was not intentional! Usually by this time in the year, I start feeling the call of pumpkin spice, but I’m making a point not to jump too quickly into Fall vibes too soon. Spooky season is my favourite season, but I still want to enjoy August, & what’s left of Summer.

The polishes I used for this manicure are: 

  • Base Coat: Sally Hansen Miracle Gel Colour Grip Primer Base Coat 
  • Top Coat: Sally Hansen Miracle Gel Glossy Top Coat
  • Essie Spice It Up
  • Sally Hansen Miracle Gel Moonlit Top Coat
  • Sally Hansen Complete Salon Manicure Red It Online

I wasn’t sure exactly what to call these nails. I know people used to refer to these as sideway French nails, but I feel like sideways swoop nails feels like a better descriptor. Either way, I really like how these turned out — & I got a few compliments at work too!

I was originally just wearing the base of Essie Spice It Up & Sally Hansen Miracle Gel Moonlit Top Coat, but it was looking a little rough. However, I didn’t have quite enough time to completely redo my nails, so I decided a little last minute nail art over my base was the perfect solution. & there is nothing better than red nails, in my opinion. We all know red nails are my favourite, no matter what time of the year.

What do you think of this subtle nail art look with sparkle? Do you have do some second/third day nail art to extend the life of your manicure? Let me know all your thoughts down in the comments below.

Summer Dress Inspired Floral 🌸

Hello lovelies & happy Wednesday! I hope everyone is enjoying their week so far. What is the weather doing where you are? We’ve been hot & balmy on the East Coast, a big difference from the torrential rainstorm we had on the weekend. I’m definitely happy for brighter weather.

I’m also super excited to show off today’s nail art look. You know the saying “nail art inspiration can come from anywhere”? Well I definitely took that to heart with this nail art look. Recently, I took my daughter thrifting & found the sweetest Summer dress for her, & the second I saw it, I knew I was going to need to do some nail art inspired by it. I’m a sucker for anything floral, & the simple sweet pattern was too cute not to do on my nails!

The polishes I used for this manicure are: 

  • Base Coat: Sally Hansen Miracle Gel Colour Grip Primer Base Coat 
  • Top Coat: Sally Hansen Miracle Gel Glossy Top Coat
  • Essie White Page
  • Sally Hansen Instadri Ghouls Night Out
  • Essie Frilly Lillies
  • Essie Check Your Baggage
  • Essie Willow in the Wind
  • Sally Hansen Good Kind Pure Peony Origins
  • Sally Hansen GKP Love You Lotus
  • NailStuff.ca Mermaid Tail Brush Trio (11mm liner brush)
  • Dotting Tool (NailStuff.ca Dotting Tool Trio)

How cute is this look! I’ll be honest, this wasn’t a super complicated design to paint, but it was a little time consuming… especially trying to make sure my horizontal stripes were straight. &, as you can see from my pointer, I wasn’t completely successful in that regard. But I think this design turned out just like my inspiration, so that’s a win in my books! Such a sweet, pretty design to match my sweet little girl.

What do you think about this floral design? Do you like this line & floral design? Where do you find inspiration for your own nail art looks? Let me know down in the comments, & enjoy your Wednesday!