31 Day Nail Art Challenge — Day 17: Glitter

I went with a simple manicure for today’s prompt. I really, really wanted to try out China Glaze’s Sand Dollar Make You Holla which I picked up a couple weeks back, and haven’t yet had a chance to wear.

glitter

Sand Dollar Make You Holla(isn’t that just the most amazing name ever!) is an off white–almost pale pink–base with teeny tiny rainbow glitters through out. It’s a textured polish, which China Glaze released from their Sea Goddess collection. And it is beautiful. I’ve seen other nail bloggers compare its finish to icing, and I have to agree. Even though the application is quite sheer, it does build quite nicely. This was three  applications, and they went on super flawlessly.

I really love this color. It’s so different from any other texture polish I’ve picked up, and I’m glad I have it in my stash. I’m also thinking it would be perfect to use for a cupcake manicure, as it already looks like icing!

Also you’ll notice I’ve featured the Timmie’s a lot lately. They just came out with a cinnamon bun latte for a limited time, and they’re right up the street so the boyfriend always gets me one in the mornings. I seriously love anything cinnamon, and these latte’s are starting to become an addiction.

31 Day Nail Art Challenge — Day 14: Floral.

floralnailart

A few weeks ago, I picked up the new OPI sheer tints minis that have been floating around on nail art blogs. I was super excited when I found them, and so there was no question I needed them. The only thing I wasn’t sure was what I should use them for! After some serious consideration I realized they would be perfect for a water-color floral print for day 14 of the challenge.

floral

floral2

floral3

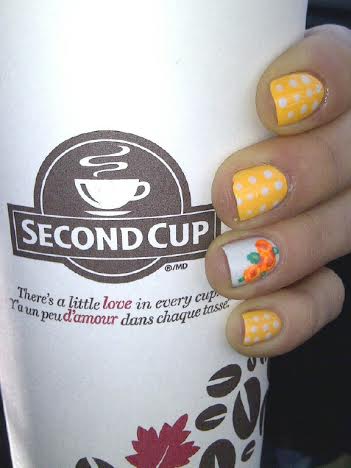
For this manicure, the polishes that I used were:

  • Revlon Nail Polish in Minted — the mint green polish on my thumb, pointed and middle finger.
  • China Glaze’s White on White — white base color on my ring and pinky finger, and dots on my mint base color on other fingers.
  • OPI Sheer Tints in Be Magentale With Me — pink-ish colored flowers.
  • OPI Sheer Tints in I Can Teal you Like Me — blue-ish colored flowers.
  • OPI Sheer Tints in Don’t Violet Me Down — Purple-ish colored flowers.
  • Sally Hansen Diamond Flash Top Coat.

These turned out so perfect. The OPI sheer tints are a little weird to work with, because they dry quickly on the nail art brush. I also found myself having to grab more polish more often than when drawing with regular polish. However the outcome is gorgeous. I’m such a fan of floral print in general, and this manicure just screams spring to me. It makes me want to wear pretty floral dresses, and flats, and not have to worry about freezing to death. Hopefully the weather starts to agree soon. Summer is my favorite season, and I’ve been longing to break out my maxi dresses again. Every time I walk past my closet I see them hanging there… and I just want to wear them SO bad.

So what’s your favorite go-to nail art for Spring?


Happy Easter!

Taking another pause to share some Easter nail art. I wore these the other night for an Easter shindig we had. I really wanted to do something festive with my nails as I had taken my speckled egg polish off. Looking at them now I kind of wish I had done each one a little bit different, just to switch them up slightly, but I do think they turned out well (especially for something I’ve never tried to do before!)

bunnynails

The polishes I used for the manicure were:

  • Sally Hansen Hard As Nails Xtreme wear in Twisted Pink — Pink base on thumb, and pinky. Inside of the bunny ears and nose.
  • Essence’s Dive with Me to the Island (from the Ticket to Paradise  collection) — Turquoise base on pointer, middle and ring fingers. It showed up more green on the finger, but it is more turquoise in the bottle.
  • Stripe Rite Striping Polish in White & China Glaze White on White — Bunnies.
  • Flaunt Beauty in Jet Black — The eye’s of the bunnies.

Hope your Easter is going well, and involves lots of chocolate (if you’re into that kind of thing) and time spent with your family. I’m looking forward to an Easter Egg hunt at my parent’s house, and competing with my nephew on who can get the most eggs!

31 Day Nail Art Challenge — Day 11: Polka Dots!

I love polka dots.

Maybe it’s the girlie girl in me, but I’m all about the polka dots.

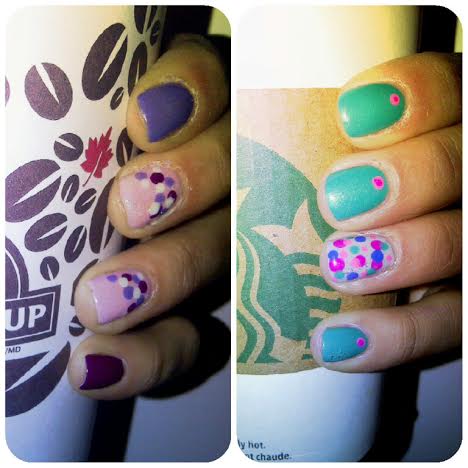
I actually ended up doing two polka dot manicures. I started one the day before, and my manicure idea ended up being cut short. Because I didn’t really feel like I gave Day 11 a fair shot, so I decided to the prompt over again. I figured I would feature both manicures, just because I do love the colors I used for attempt #1 (purple, yey!), and it wasn’t a BAD manicure, just a little simple.
allpolkadots

Dot nail art is a really easy way to spice up an otherwise bland manicure. I got my first dotting tool almost a year ago, and it was one of the best $3 purchases I ever made. Over the years, I’d tried doing polka dot manis with tooth picks, and bobby pins, but never found they would turn out how I wanted. However, buying a dotting tool changed all of that–I could finally attempt the manicures I never could before! Flowers! Roses! Leopard Print! And Polka dots.
purplepolkadots

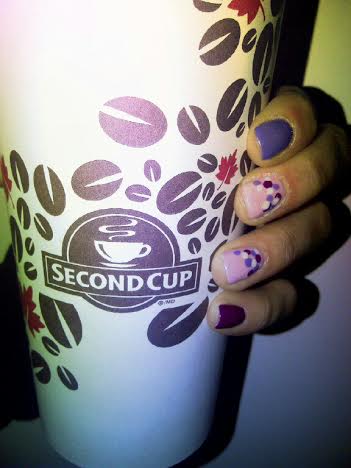
The polishes I used for polka dot manicure #1 were:

  • Essie’s We’re in this Together — the pink base on my accent nails.
  • China Glaze Flying Dragon — dark purple thumb and pinky finger, and some polka dots.
  • China Glaze What a Pansy — lighter purple on index finger, and some polka dots.
  • OPI My Boyfriend Scales Walls — white dots.
  • Sally Hansen Diamond Flash Top Coat.

I did like this manicure, even if it wasn’t what I had intended to do when I started. However, even though it was fairly simple, I can’t help but love purple nails. Flying Dragon has to be one of my all time favorite polishes–I just wish it wouldn’t chip so bad at work (even with base coat, and regardless how many coats of top coat I apply.)


polkadots

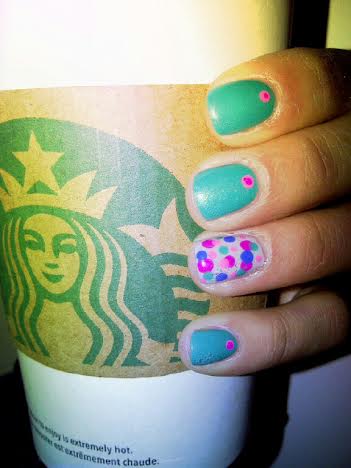
The polishes I used for polka dot manicure #2 were:

  • Mariposa nail polish mini — the teal (my base color), dark pink, and light pink polish (dots on accent finger.)
  • Maybelline Color Show Nail Lacquer in Audacious Asphalt — base color of my accent finger.
  • Sally Hansen Xtreme Wear in Pacific Blue — polka dots on accent finger.
  • Sally Hansen Diamond Flash Top Coat.

I tried to go somewhere different with this second manicure. I grabbed the most spring-like colors I could find and just started dotting. I also put some dots on the base of each of my non-accent fingers. I’ve been seeing that look around a bit from different nail bloggers, so I wanted to give it a try. I’m not sure if I like the color combinations I chose, but besides that I like the look of the single dot. It’s almost like a jewel resting on your nail.

Also how gorgeous is that teal color!? It’s from one of the mini sets my roommate gave me for Christmas. None of the polishes have names, but it has a really awesome formula that makes painting your nails so easy.

So which manicure do you like better–the more simple purple dotticure, or the bright and colorful and crazy dotticure?

31 Day Nail Art Challenge — Day 6: Violet Nails

I love purple.

You have no idea how much I was looking forward to the violet prompt for the 31 Day Nail Art Challenge. Purple has always been my favorite color–I even had purple hair years ago! So I was super excited when Day 6 rolled around. The only hard part was trying to decide which polishes to use, and what design I wanted to try. After obsessively browsing my favorite nail art blogs for a couple of hours, I finally decided to go with Chalkboard Nails Distressed nails. It’s been on my to-try list for a while, but I’d never given it a go. I’m glad I did though! These turned out better than I imagined, and I had so many random compliments on them!

Violetnails

The polishes I used for this manicure were:

  • China Glaze’s What a Pansy — Purple Base & some strokes.
  • OPI’s  My Boyfriend Scales Walls — White base & some strokes.
  • Sally Hansen Complete Salon manicure in I love you — light purple strokes.
  • ACO by Ardene Forever Young — medium purple strokes.
  • Essence “Beauty Beats” collection in Baby, Baby, Ooooh — Darkest purple strokes.
  • Sally Hansen Diamond Flash top coat.

It’s hard to distinguish between the different shades of purple with just a picture, but on the nail in person it was striking. I feel like the darker purple base turned out better than the white base. I will definitely have to try this look again, with different colors. I also feel, it’s a nice (less messy) alternative to the paint splatter manicure–which I also want to try, but will definitely need more than a couple extra hours just for clean up.