Comparison Post–holo glitter top coats.

IMG_2494


IMG_2495


Hello lovelies!

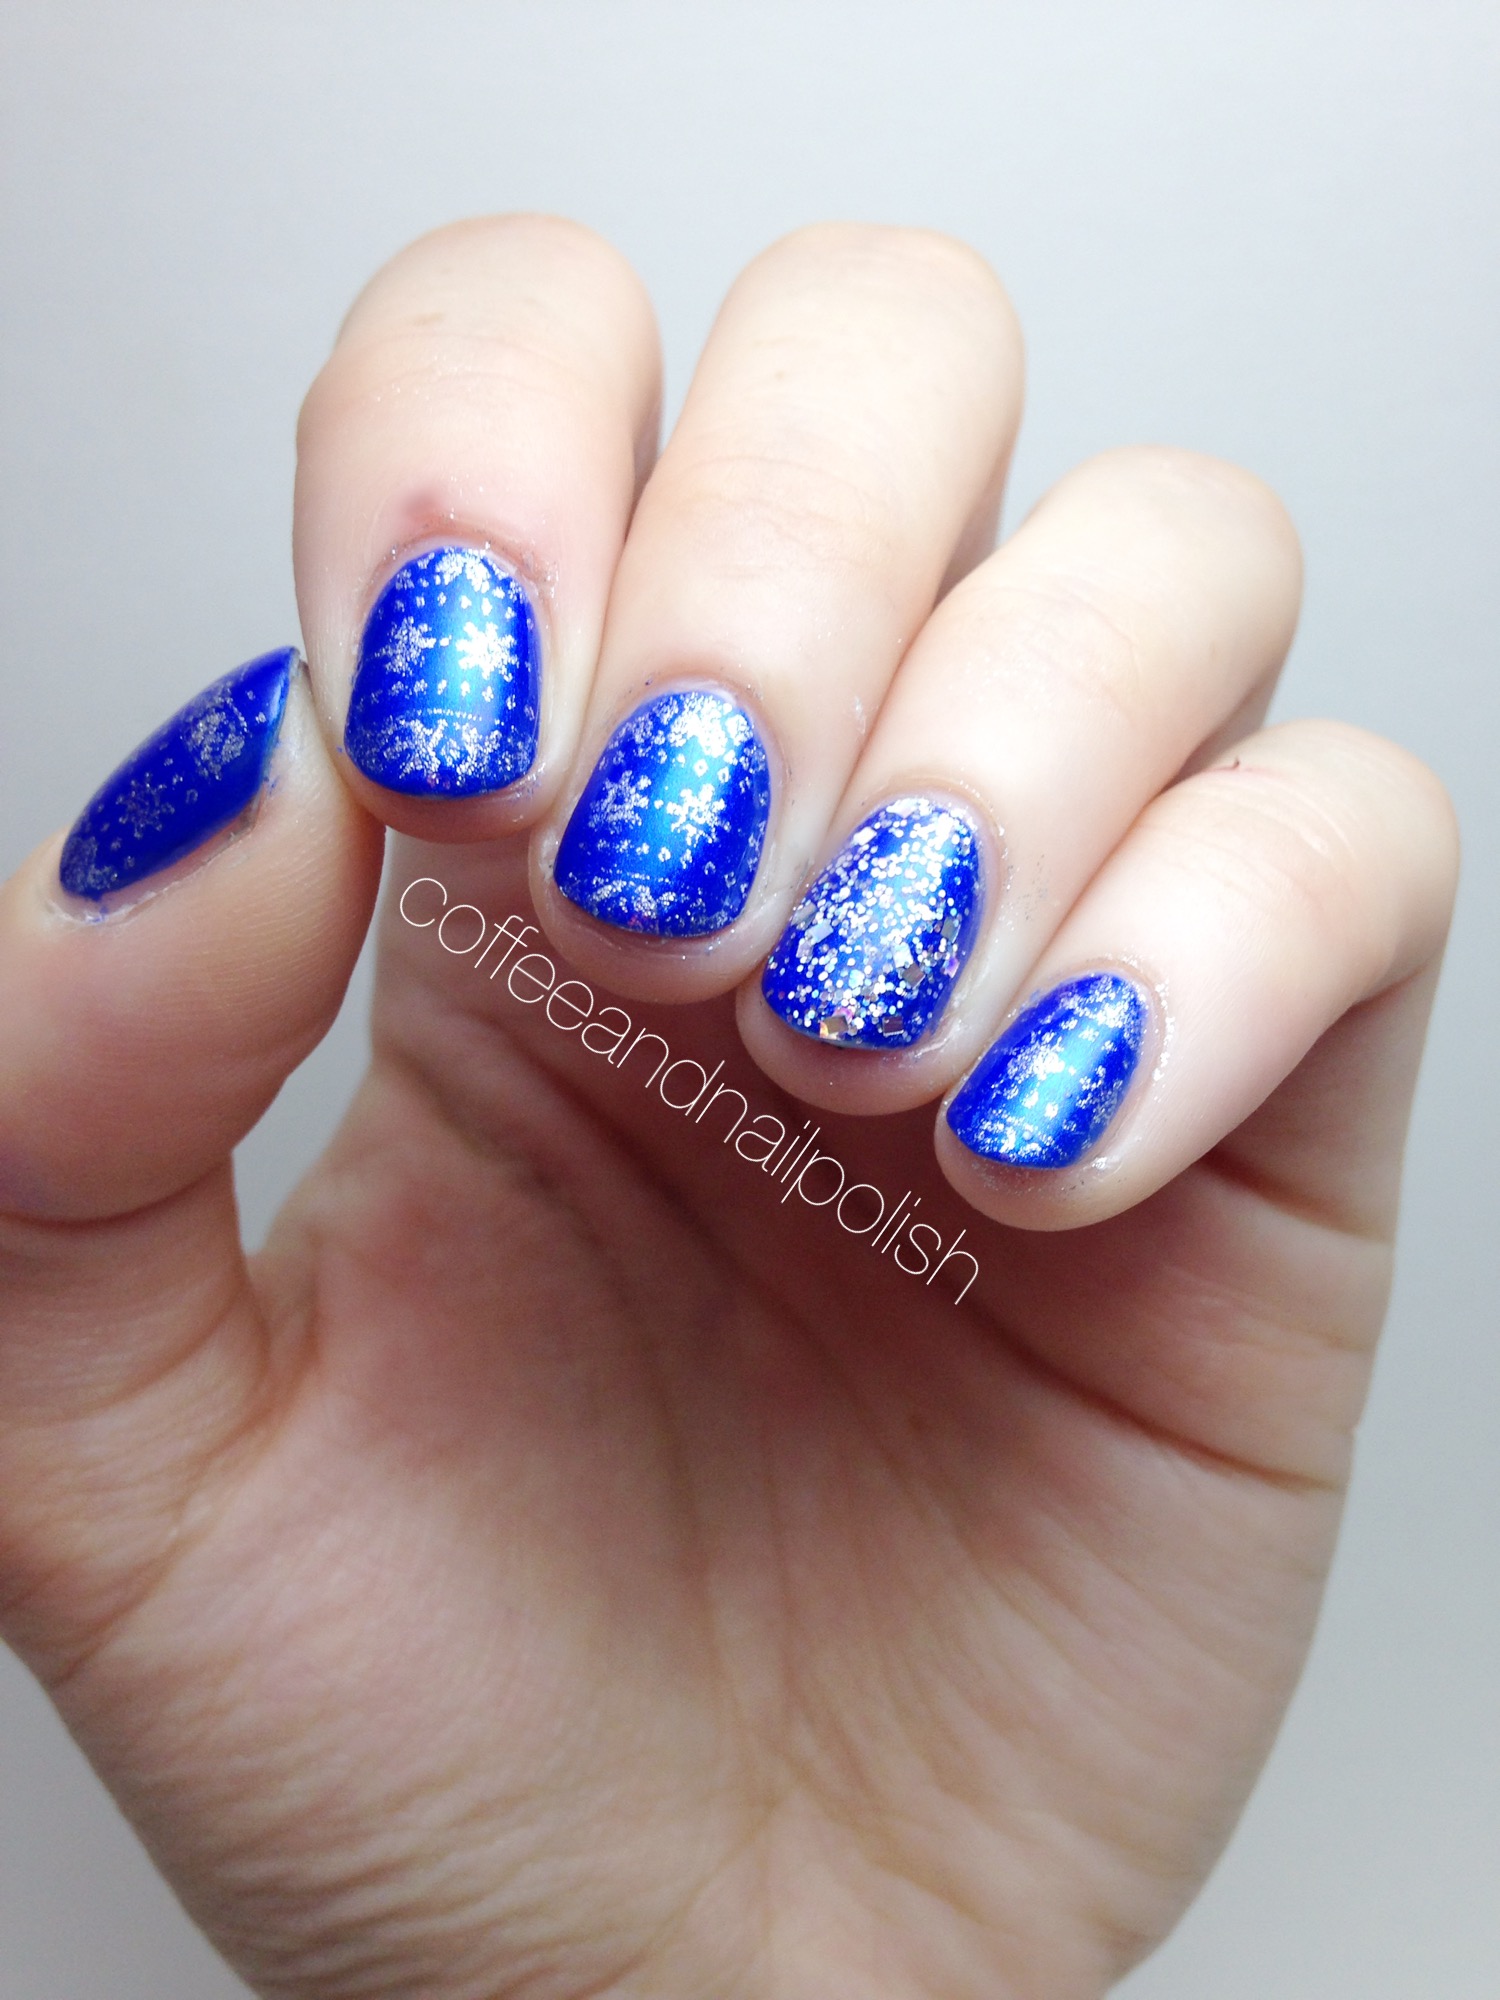
Today I have a fun swatch post to share with you. A couple weeks ago I was at Wal-mart and noticed that Revlon had released a line of specialty top coats. There was a whole bunch of fun ones, bu the one that caught my eye was the Holographic Pearls top coat, so I had to have it. I tested it out with a snowflake manicure I did, and couldn’t help but be reminded of China Glaze Fairy Dust so I knew I had to do a comparison! I hadn’t yet used OPI My Voice is a Little Norse, so I figured I’d throw it in just to see how close the three of them were.


IMG_2496

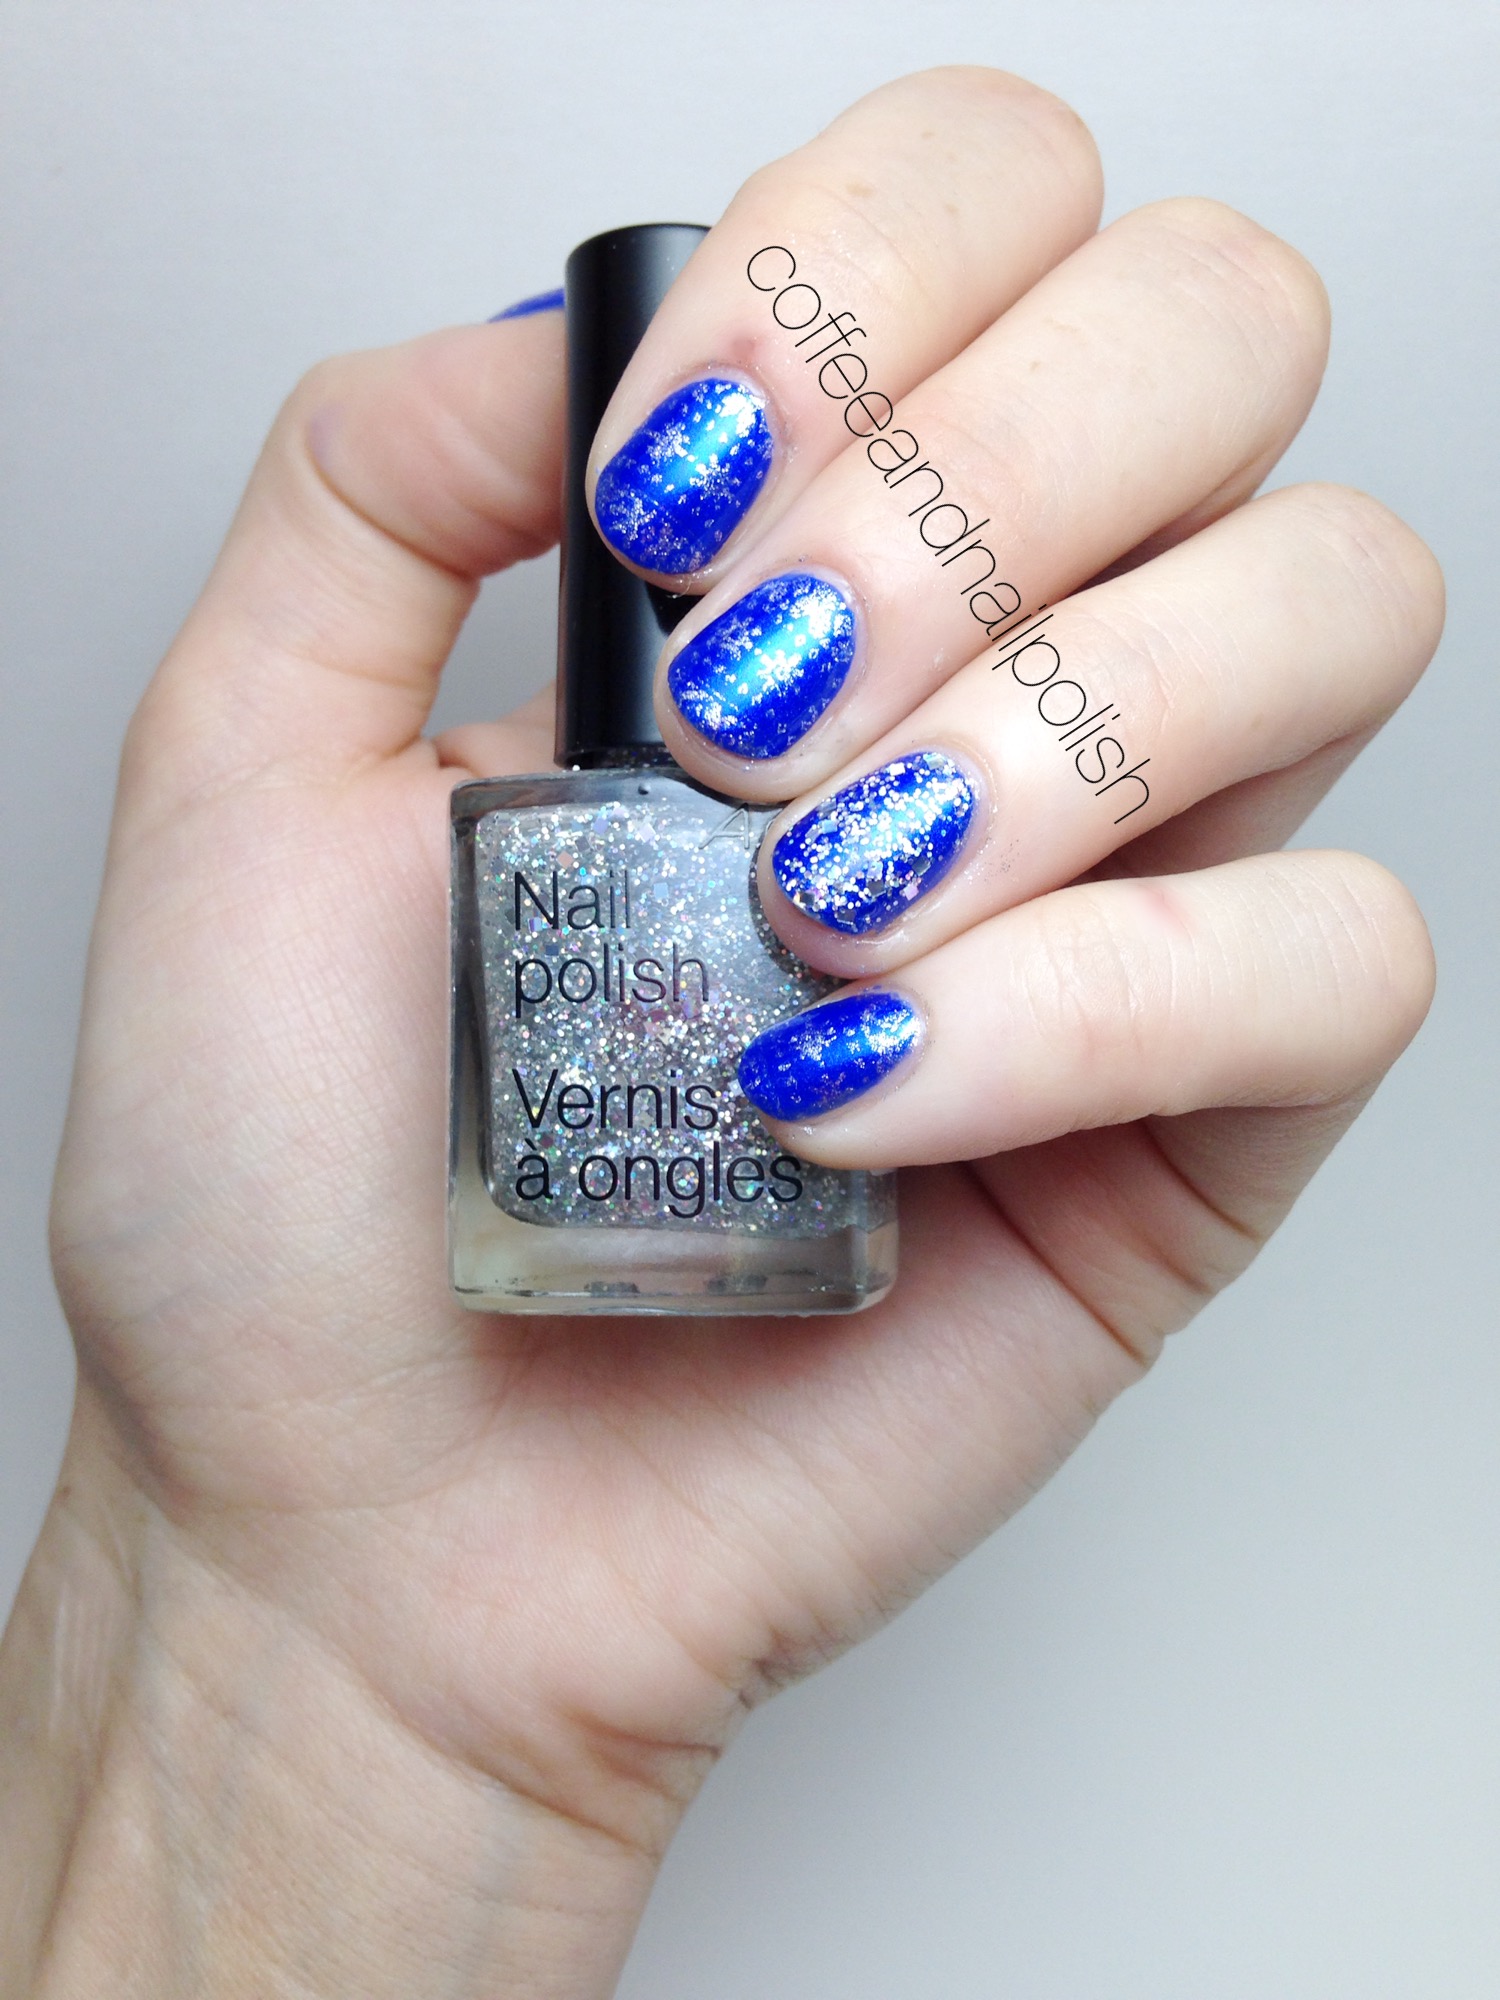
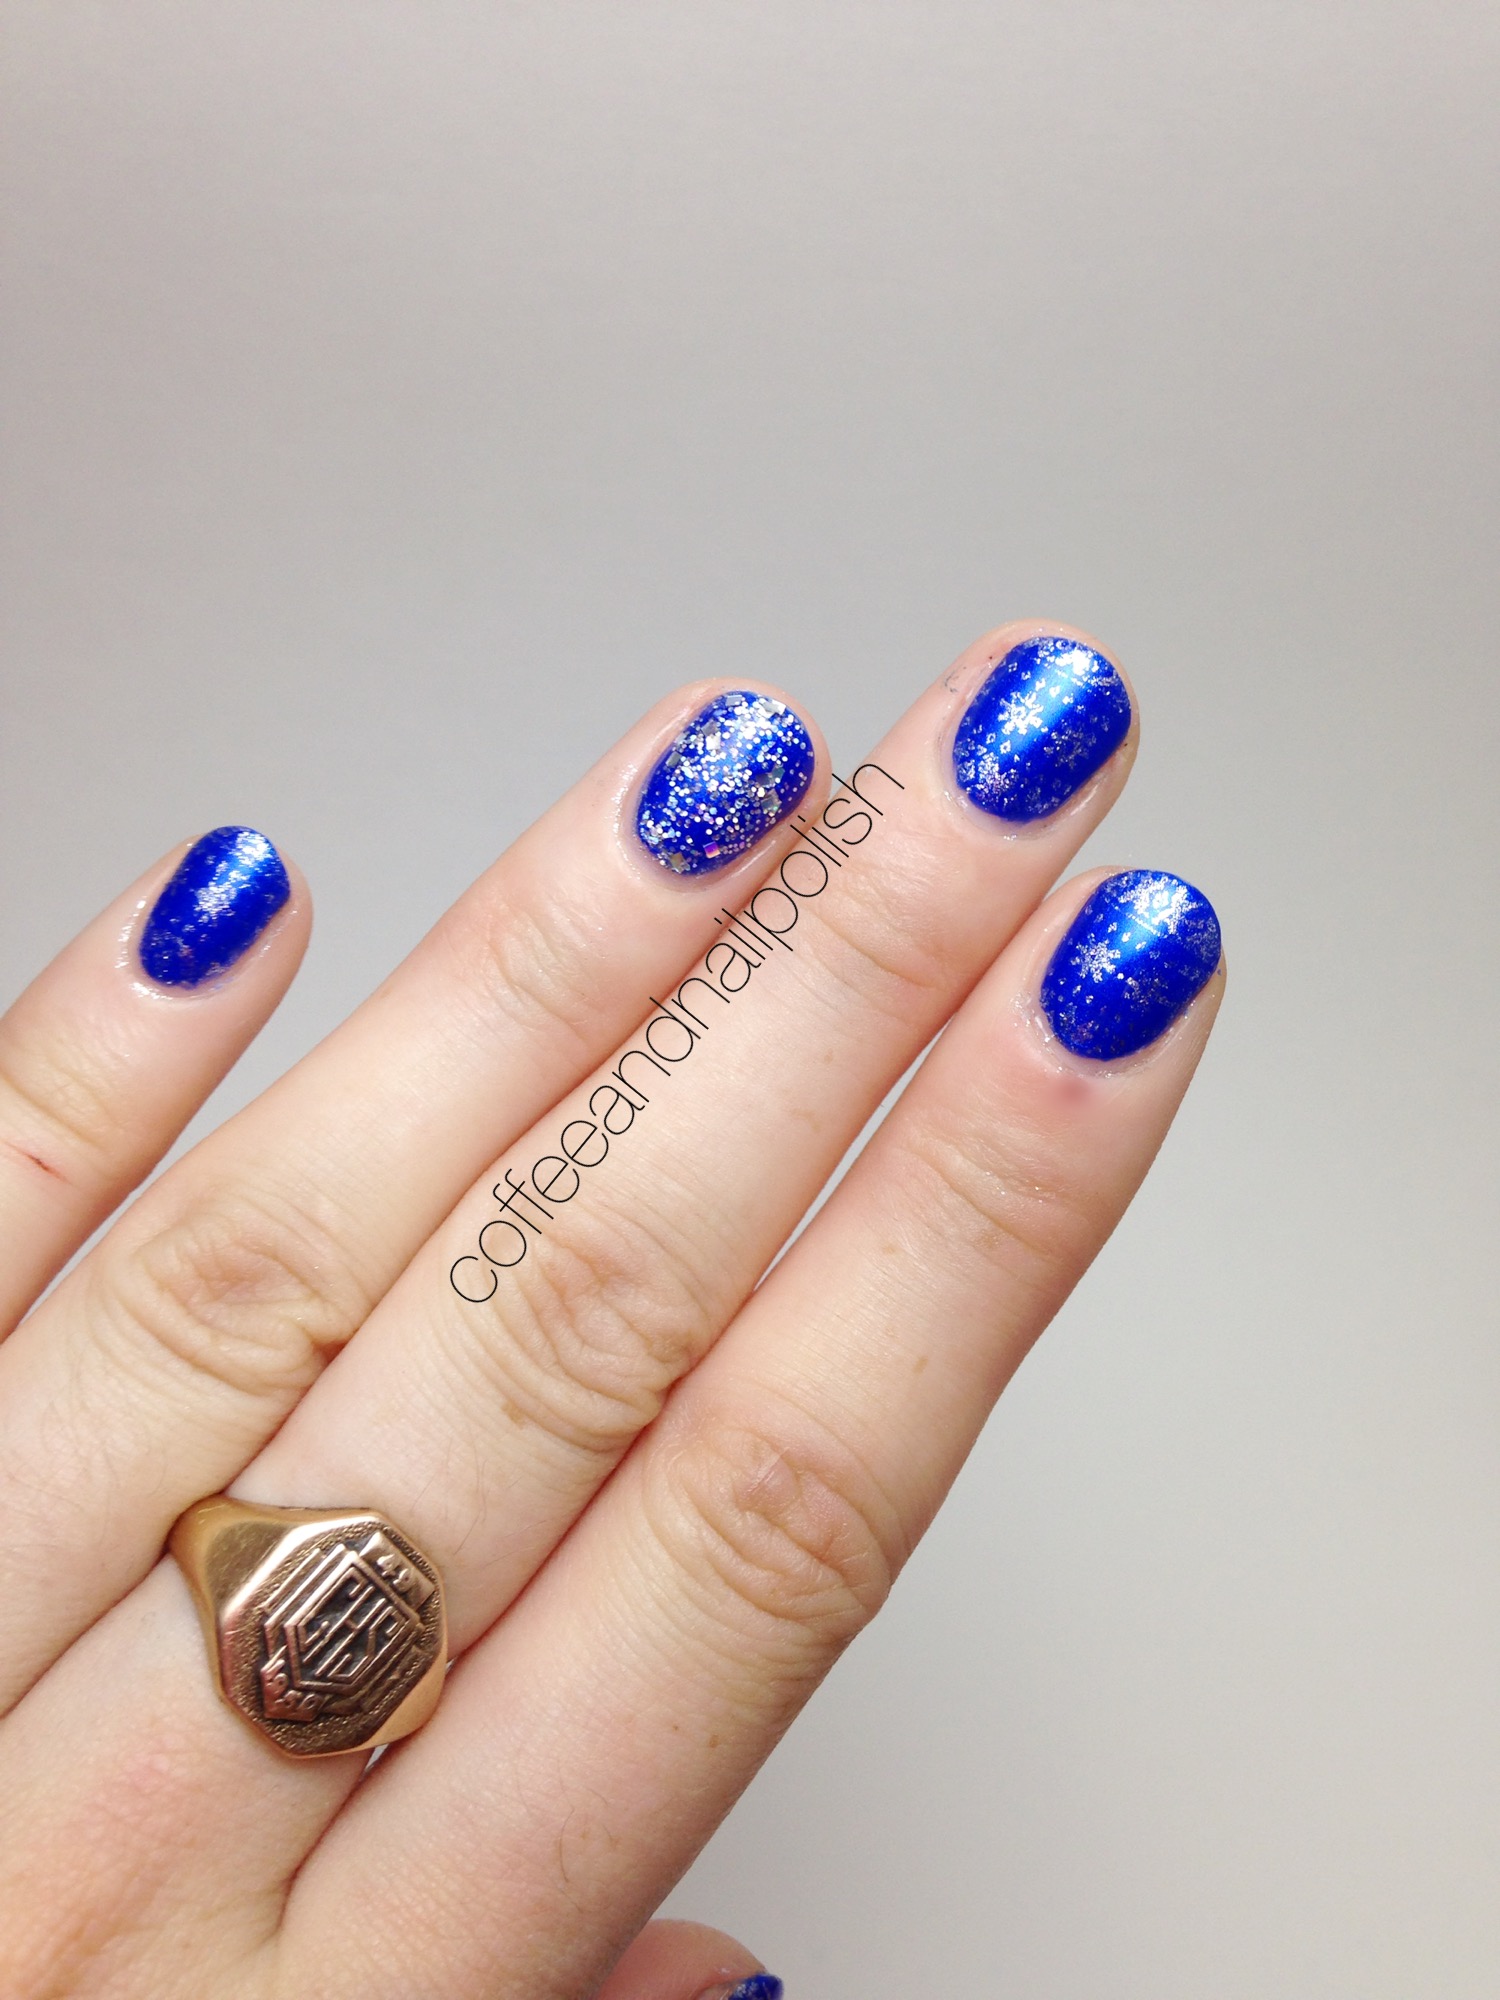
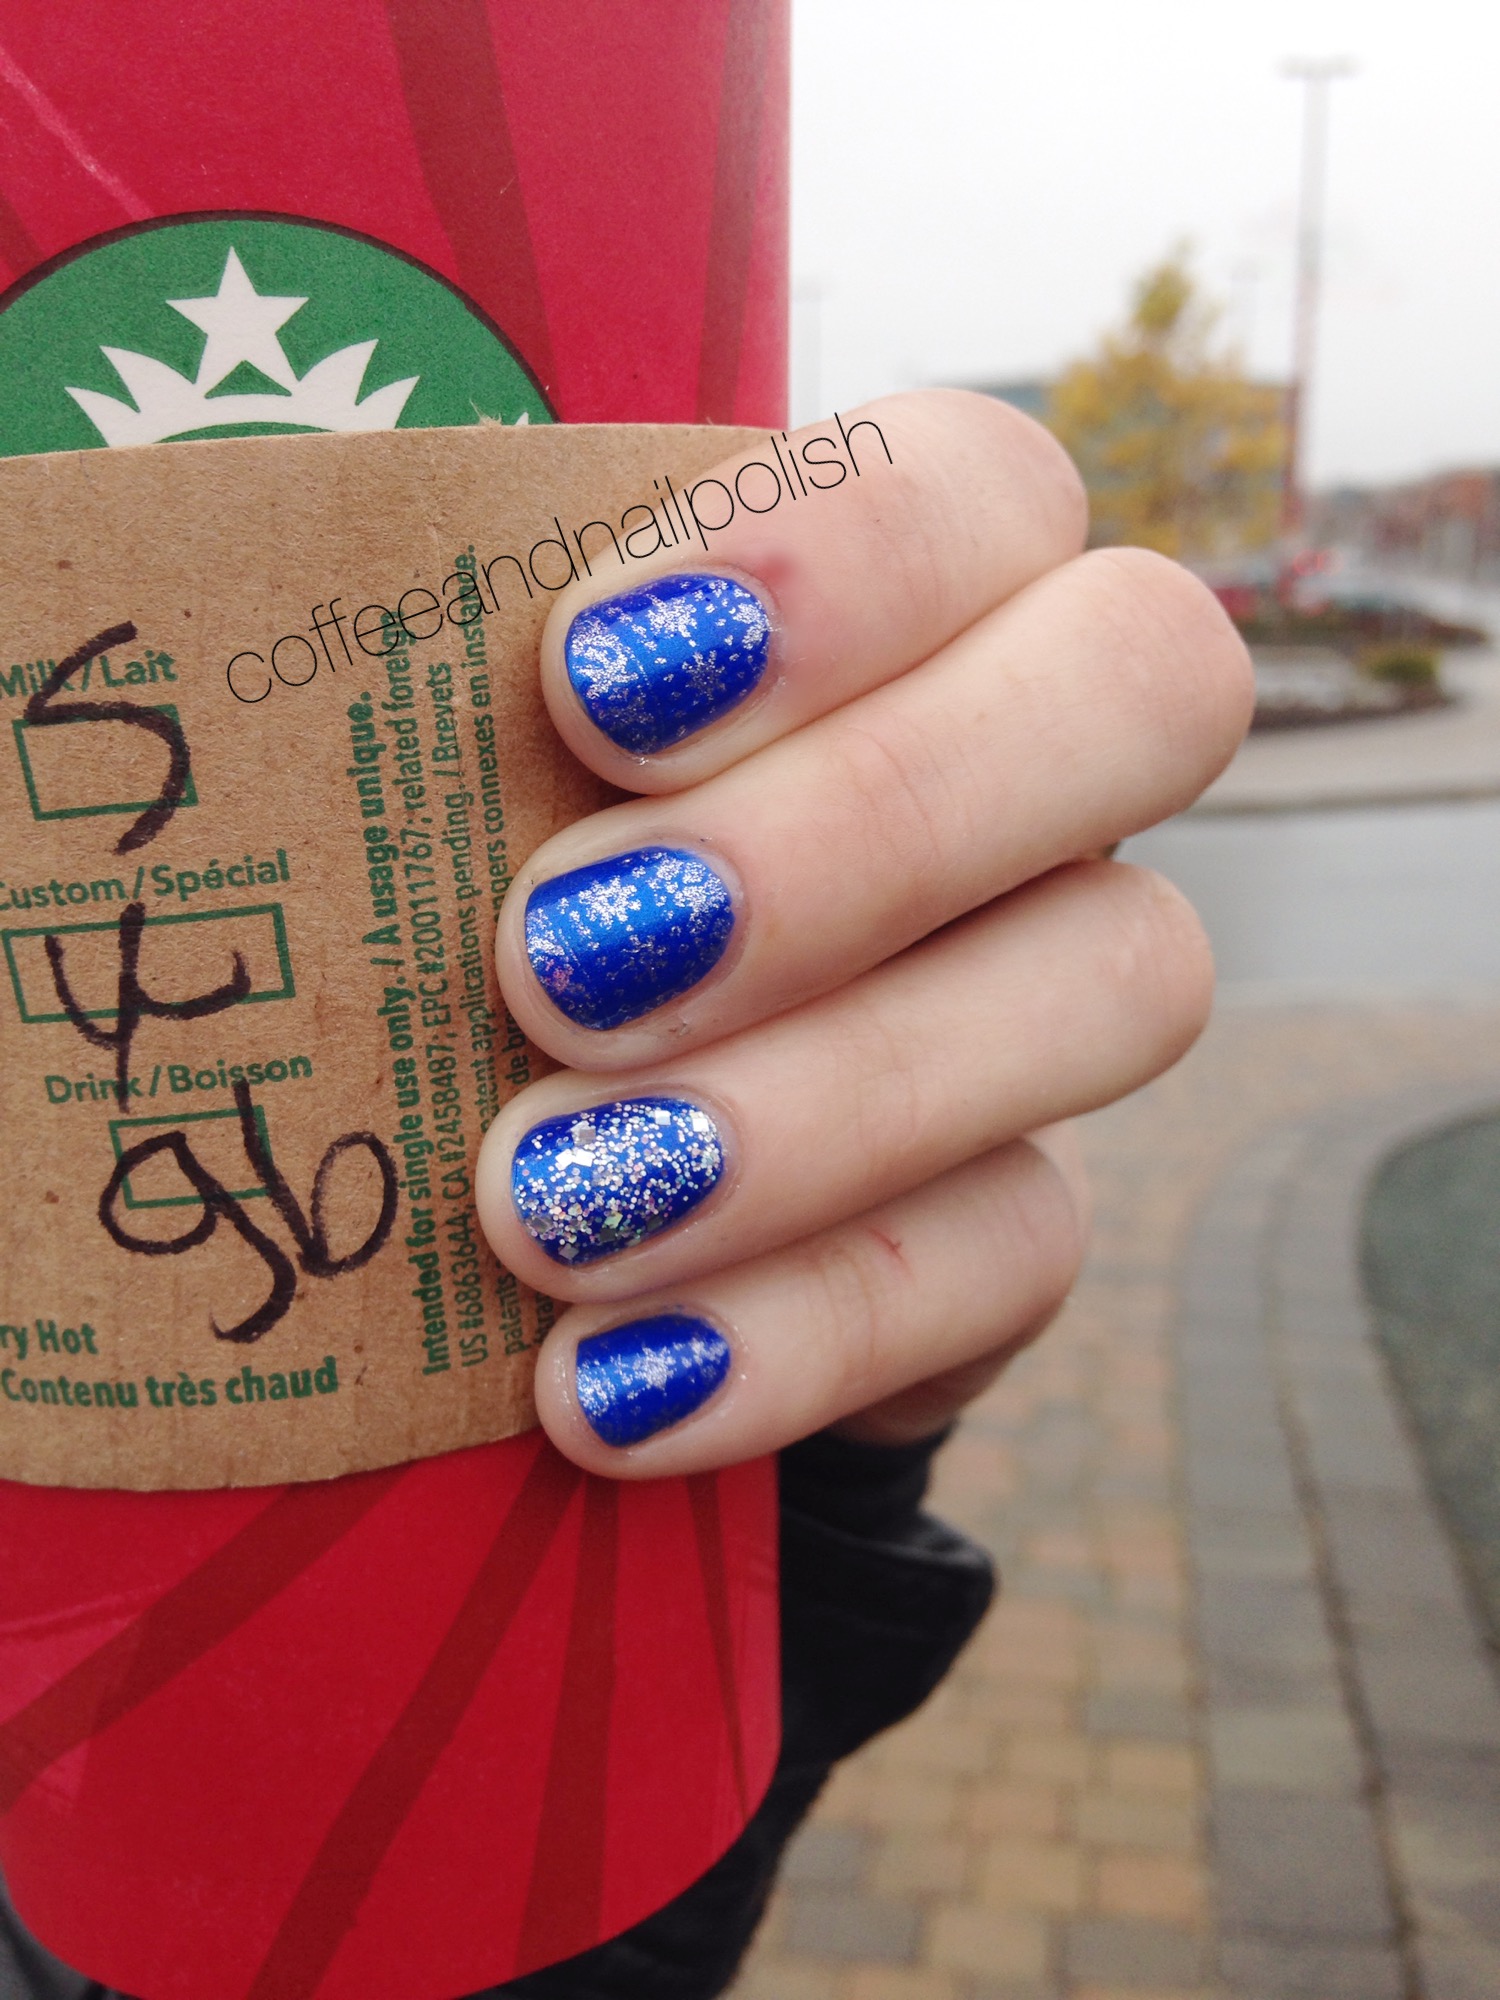
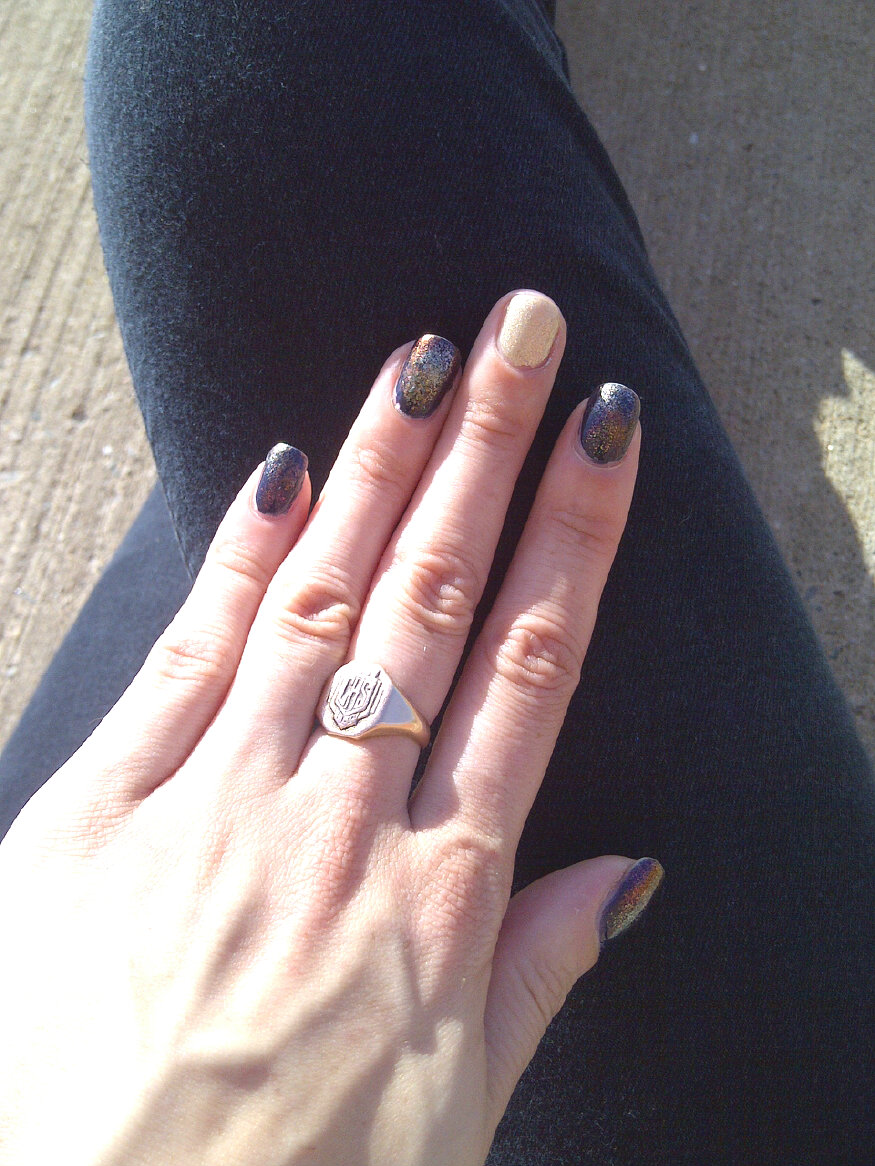
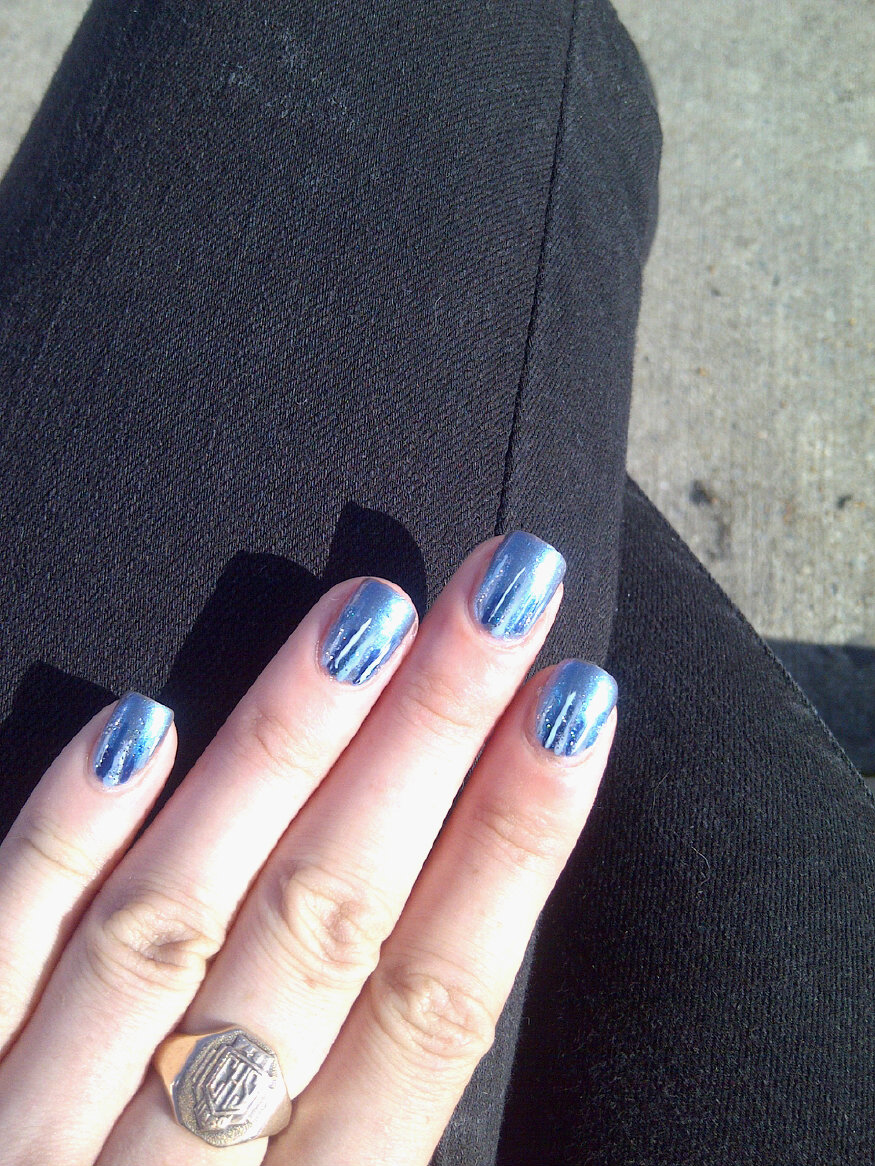
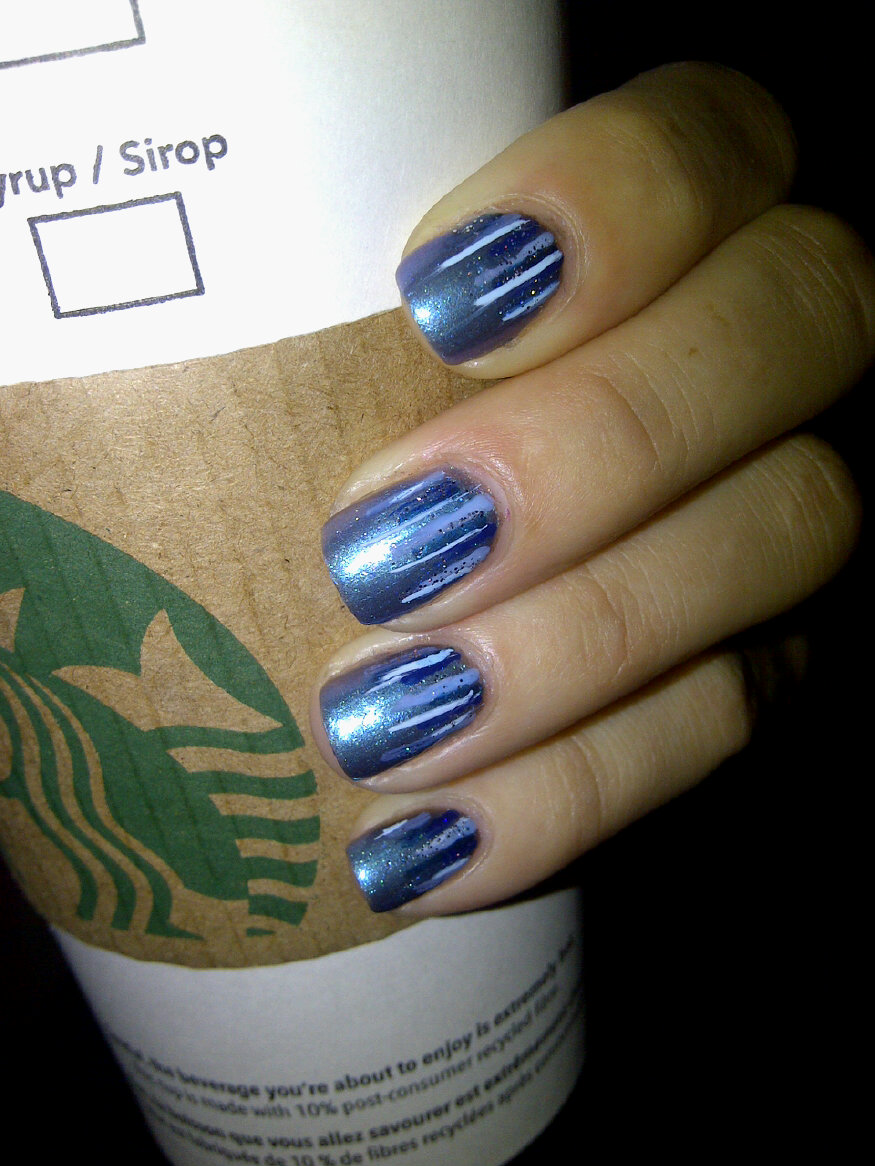
On my pointer and pinky, I have two coats of China Glaze Fairy Dust applied over Mary Kay Blue Knight. On my middle finger, I have just one coat of Revlon Holographic Pearls, and on my ring finger I also have one coat of OPI My Voice is a Little Norse. As you can see Holographic Pearls is a much denser glitter than the other two. My Voice is a Little Norse isn’t as dense as the Holographic Pearls, but the glitters are bigger than the other two. I definitely think I still prefer Fairy Dust over the other two, but I do love Revlon’s Holographic Pearl top coat and you cannot go wrong for the price (I paid $3.99 at my local Wal-mart for it). Seeing My Voice is a Little Norse in person now, I’m definitely going to be pulling it out again. I’m quite fond of how it looks, especially over a darker polish. Tis the season for glitter, and I’ve been glitter crazy.


IMG_2497

So what do you think about these holographic glitter top coats? Do you have your own favourite? Like I said, Fairy Dust is still my absolute favourite, but all three are just gorgeous on the nail.

Out of this world Galaxy Nails–with a bonus tutorial!

IMG_1891

After being inspired by two of my fellow nail art girlies on Instagram (mymintnails and banulovesnailpolish) the other day, I was in the mood for Galaxy nails. The last time I did them was in April during the early weeks of this blog, and I hadn’t tried them since so it felt like a good time.

IMG_1893


IMG_1892


The polishes I used for this manicure were:

  • OPI Who Are You Calling Bossy?!?
  • Unnamed Blue Joe Fresh Metallic Polish I got as part of their holiday collection this season.
  • LA Splash Heiress.
  • LA Splash Glitz & Berry.
  • LA Splash Maroon.
  • Quo by ORLY Trashy Glam.
  • ACO by Ardene Showtime.
  • China Glaze Fairy Dust.
  • Sally Hansen Diamond Flash Top Coat.

I’m seriously so happy with how my galaxies turned out. I’ve done galaxy nails a couple of times now, and always get frustrated by the fact I don’t find they look very Space-y. However thanks to using ACO by Ardene’s Showtime for glitter placement (the stars) and China Glaze’s Fairy Dust I managed to create my very own galaxies on my nails.

And I thought since I’m trying to create more tutorials I would share my steps for creating this manicure. I know everyone has their own way of creating galaxy nails, these are just the steps I took for the above manicure.


IMG_1895

  1. Paint all nails black (OPI Who Are You Calling Bossy?!?) and apply quick dry top coat.
  2. While that is drying, applying OPI Glitter Off Base Coat around cuticle area. I do this to keep the sponging I do when creating gradients and other like manicures off my fingers and minimize clean up.
  3. Sponge on first colour (the unnamed Blue Joe Fresh polish with shimmer.) Depending on how sheer the polish is, you may have to sponge a couple times to be able to see the polish.
  4. Continue sponging using a variety of other colours. I try to keep my sponging in a line so you get that galaxy look. I also will apply some polishes thicker than others, or just sponge small spots so that it’s not too heavy handed.
  5. Using a dotting tool, place stars in random places on nail. (ACO by Ardene Showtime.) I also used some of the bigger glitters in Showtime for along the sponging.
  6. Apply a coat (or two) of Fairy Dust over everything. Then, after a couple minutes apply your top coat to seal everything in. Once that’s dry, you’ll be able to peel off your protective layer around your cuticles, and clean up what you might have missed around your cuticles.

And tada! You now possess galaxies on your finger tips. Galaxies are one of the easiest nail art designs you can probably do because they can be done with pretty much any polish, at any level, in whatever style you want! And the plus side is–it’s almost impossible to screw them up.

IMG_1896


In case you’re interested, my ring is courtesy of Kristalized_Designs on Instagram (who also happens to be my sister!) She designed two gorgeous midi-rings for me, and is going to be designing a little something special for an upcoming giveaway I’m going to be holding. She’s in the process of getting her Etsy page up and going, but you should definitely check out her page for a sneak peak at her designs. Everything is hand made and one of a kind (there is even a picture of her making the above ring.)


So what do you think of these galaxy nails?

Silver Stamped Snowflakes.


IMG_1465

Last month, I made my first ever Born Pretty Store purchase, after dawdling about the idea for a while. I was in awe over all their options for stamping plates. I’m totally in awe of all the stamping I’ve seen around. I haven’t stamped in a while–almost a year! So I decided to order some fun plates with images I could never create freehand. One of my favorite plates I ordered was a collection of sweater-style winter prints. So when they arrived the other day, I knew I had to use them–immediately!

I stamped these nails at 7am, before having to get ready for work so they’re not perfect. But for my first time stamping in a long while, I’m really proud of how I did.

IMG_1466

The polishes I used for this manicure:

  • China Glaze Frostbite (applied over undies of China Glaze I Sea the Point)
  • Sally Hansen Xtreme Wear Celeb City — stamping.
  • ACO by Ardene Style Icon –gorgeous chunky silver and holo glitter.
  • Born Pretty Stamping Plate ID #6457 (Lace Snowflake Pattern).
  • Seche Vite Quick Dry Top Coat.

IMG_1463

IMG_1464

IMG_1477

This is about as close to a Christmas Manicure as I’ve gotten so far this year, but I really love this sweater print. I’m already collecting a whole bunch of designs in my head I want to do for Christmas this year, so I have a feeling once December hits, there will be a lot of Christmas/Holiday manicures to share. There are also a few I did last year that I’m really itching to recreate and see how things have improved.

What Christmas manicures are you itching to do?

Dark and Metallic Sponge Manicure.


IMG-20140910-02373_1410774249378_n

Oh man, I wish I had better pictures of this NOTD to share with you, but unfortunately I took these while at work in the late afternoon, so the beautifulness of this manicure was kind of lost. (Side note–I just got a brand new phone with an awesome camera so expect upcoming posts to have MUCH better picture quality.) However, regardless of the lack of pretty pictures, I still had to share this gorgeous manicure because I was super in love with the outcome.


The polishes I used for this manicure were:

  • Mary Kay Blue Knight (base color)
  • ACO by Ardene Golden Luxury (middle finger & sponging)
  • Layla Soft Touch Golden Touch (middle finger)
  • Essence Color and Go Mister Rusty (sponging)
  • Claire’s Poison Apple (sponging)
  • Claire’s Venomous (sponging)
  • Claire’s Evil Queen (sponging)
  • Nutra Nail Quick Dry Top Coat.


IMG-20140910-02367_1410774087978_n

IMG-20140910-02368_1410774148441_n

Oh man, this manicure just was perfect for fall. I wanted something reminiscent of the color changing of the leaves, and I think I succeed with this multicolored metallic sponge manicure. Even one of my co-workers noticed how cool my nails looked, and commented on how neat it looked, which always makes me feel good about my nails. =) Next time I wanted to try this with a super dark green Essence polish I picked up not too long ago–I think it will look even more perfect for the fall weather.


So what do you think of this manicure?

Chasing Waterfalls… again.

Today’s manicure is almost kind of aredo to one I did a few months back. I really love the look of waterfall manicures, and so the other night when I was struggling with nail art ideas I decided why not create another one. I had already painted my nails using Revlon’s I’m Electro, which is a beautiful blue duocrome from the Amazing Spiderman 2 collection, so I grab a bunch of my blue polishes and went to work.

IMG-20140825-02108_1408969217617_n

The polishes I used for this manicure were:

  • Revlon I’m Electro — base color.
  • Revlon Superpowered.
  • Icing Starlight.
  • Sinful Colors Hip to Be Square.
  • Art Club Nail Art Duo in Baby Blue
  • Quo by ORLY Falling Star.
  • Essie Good to Go Top Coat.

IMG-20140825-02107_1408969091083_n

Pretty, aren’t they. I wasn’t quite happy with my waterfall nails the last time I attempted them–and with a couple tweeks I think I’ve made a vast improvement. It doesn’t hurt my nails have quite a bit more length to them now, as opposed to last time. I think using a darker base color (but not too dark) also helped make them pop as well.  =)

IMG-20140825-02109_1408984143369_n


So is anyone else as excited as me about Starbucks releasing their Pumpkin Spice Latte’s today. You apparently need a special code to unlock the drink, so I’ve got mine already to go. I have a Halifax Adventure day planned with my best friend, which always means COFFEE! We’re going to soak in the last of Summer before he goes back to finish his degree and it gets too chilly for our adventuring.