Pink Drag Marble with Gold Glitter

Hello lovelies & Happy Tuesday! Hope everyone is recovering from the time change this past weekend. I’m currently trying to recover from another fantastic cold, but I did manage to get my nails done before it struck me down this weekend! & it was so exciting to play around on my nails.

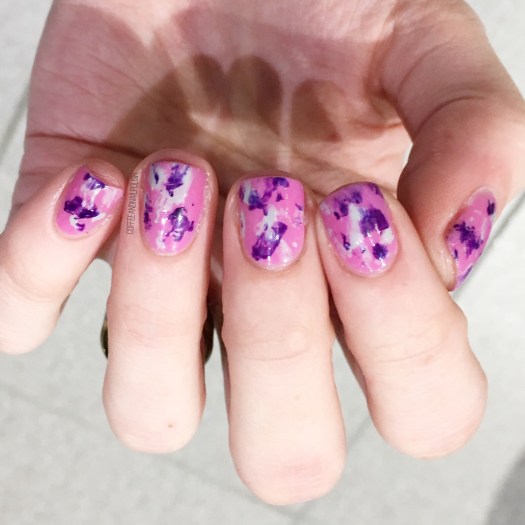
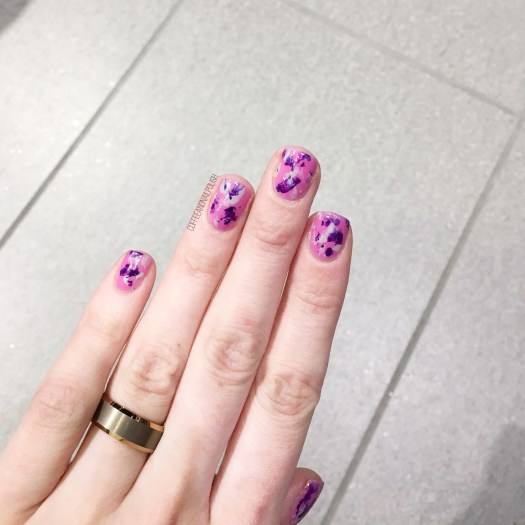
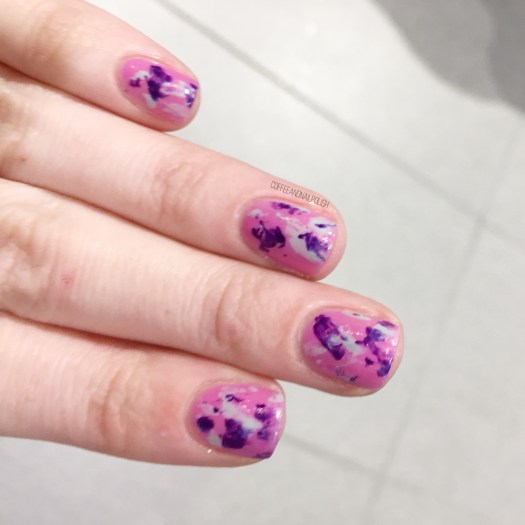
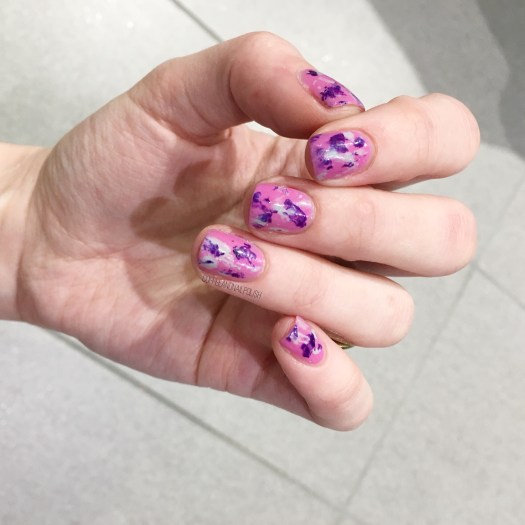
& what was I feeling? A drag marble. & oh boy was I rusty!

The polishes I used for this manicure:

  • Base Coat: OPI Nail Envy
  • Top Coat: Essie Speed Setter
  • Ardene ACO Dashing
  • Ardene ACO Road to Nowhere
  • Sally Hansen Hard as Nails Black Heart
  • Sinful Colors Twilight Twinkles
  • Nailstuff.ca dotting tool

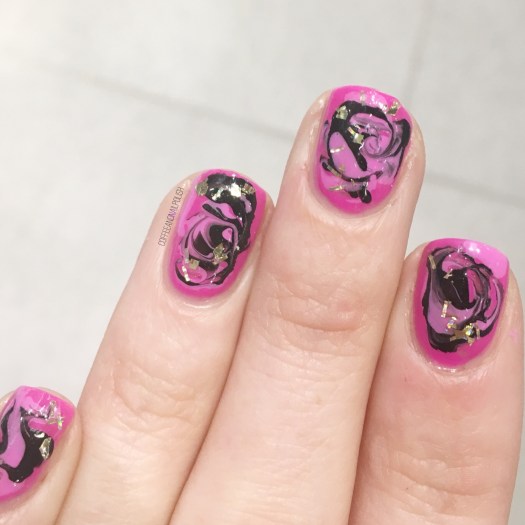
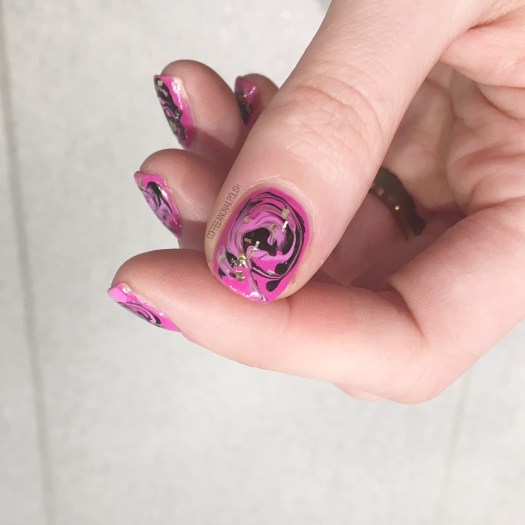
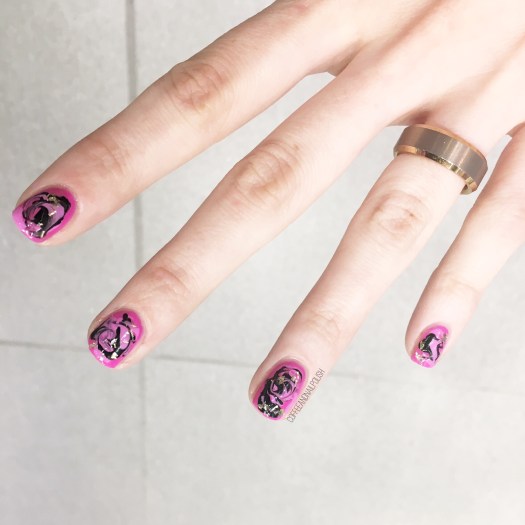
It’s been forever since I attempted any kind of drag marble design & my base shade (Ardene Dashing) was a little too quick drying which added some difficulty to my look. But the more I look at this design, the more it’s grown on me. I added a bit of gold glitter flakes which I’m not sure if it added to the design, but I was a little haphazard with my placement.

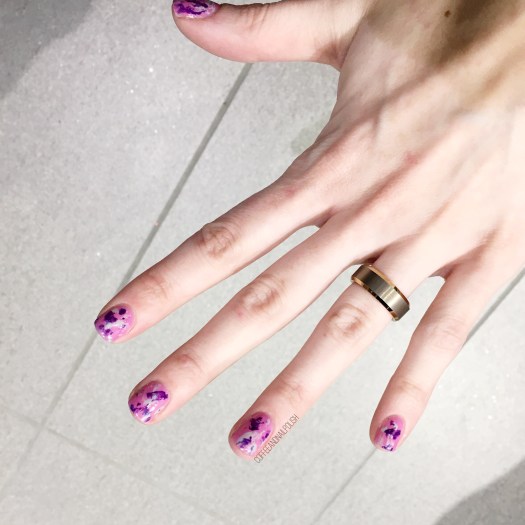
& my favourite nails? My thumb & my pinky. The design on both definitely turned out be best. As you can see, the swirl on my thumb looked just perfect. If only every nail had turned out this amazing.

What do you think of this look? Which nail do you think turned out best? Which colour combo do you think I should try next?

Share you thoughts down in the comments below!

SWATCH SUNDAY — China Glaze Turned Up Turquoise

Good morning lovelies & welcome to another rendition of Swatch Sunday. Today’s polish is brought to you by my 2 year old who decides what colour I needed to wear. & his pick? China Glaze Turned Up Turquoise!

Turned Up Turquoise is a neon shade that dries to a very matte finish. For my swatches, I applied 2 coats over my base. The coverage was perfect but like any matte shade, it gets a little goopy the older it gets because matte polishes do dry faster than regular (in my experience) & my bottle is going on 5 years old.

Usually I apply a glossy top coat to my matte shades & then finish with a coat of matte top coat, but I really wanted to show off the true finish of this shade. As you can see, it dries down pretty well on its own, although it doesn’t hide the rough state of my current nails. If I was wearing this for a while, I would definitely top coat it & then either add my matte top coat or leave it glossy.

& speaking of glossy, I had to add some top coat to show off how gorgeous Turned Up Turquoise looks with Essie Speed Setter added.

As you can see, glossy top coat really adds to the shine of this shade. It also shows off the shimmer that gets kind of hidden when it’s matte. But honestly–I love this polish either way! It’s so pretty while left matte & it’s gorgeous when glossy.

My only complaint about this shade? It’s just so hard to photograph the true colour! It’s slightly more green-ish than you see in my photos, but from browsing the Internet I don’t think anyone can capture the shade truly. I think that just comes with it being a neon, as neon polishes can be difficult to photograph.

So what do you think of this shade? Do you have it in your polish collection? Which do you prefer — glossy or left matte? Let me know your thoughts down in the comments below!

Purple Saran Wrap Splatter Nails

Good morning & happy Saturday! & happy March as well (how crazy is that?) Today I have another fun nail art look to share & it’s a super easy design that I just love: Saran Wrap splatter nails.

I think this is one of my favourite easy nail art looks, mostly because I literally takes no talent at all. Or tools for that matter! You just need polish, & some crinkled up Saran Wrap/plastic wrap, or even an old plastic shopping bag.

For this manicure, the polishes I used were:

  • Base Coat: OPI Nail Envy
  • Top Coat: Essie Speed Setter
  • Essie Splash of Grenadine
  • Color Club Disco Dress
  • Quo by ORLY Color Amp’d City of Angels
  • Crinkled up plastic bag

This technique honestly is one of my favourites & return to designs as it’s just so easy & relatively mess free. One of these days, maybe I’ll manage to do a video tutorial to show the just of it, but in the mean time you can check out my previous Saran Wrap designs for a run through of how to do them!

What do you think of this design? Have you tried the technique yet? Let me know what you think down in the comments below!

(Also guys… sorry about the picture quality… work lighting is not nail art friendly!)